Friday, May 26, 2023

Soft Focus Pictorialist Effects ~ part Ten

If I bend the self-imposed rule about being done, finished, over with talking about soft images just a little I can sneak in another little missive about soft focus pictorialist effects, this on that does not involve optics nor filters.

I know I've written about this before, but in light of what I've recently learned about soft focus lenses, soft filters, and image processing, it might be good to make a clear comparison between the various approaches.

What if there was a way to create a "convincing" soft image from a sharp one?  I could avoid having to carry a soft focus lens or a soft filter.  I might have very good image processing flexibility, right?  Color.  Black and white.  Sharp.  Soft.  All from a single RAW digital image.

Back in the film days someone popularized an image softening technique that is known as the "Orton Effect."  Micheal Orton is the photographer.  His film technique is easily adaptable to digital image processing.

Though the previous links talk about the effect as it applies to landscape photography.  I'll take a short look at how it might work in portraiture.

Setup ~ 

  • Camera - 
    • Sony A7 100ISO, 2sec timer, "A" mode
  • Lens - 
    • Nikon Nikkor-S 50mm f/1.4
  • Bogen tripod
  • Image Processing - 
    • RawTherapee - to generate a low contrast image that is fed into...
    • The Gimp
      • Gaussian Blur - 
        • Open image copy in a new layer
        • 2 pixel radius
        • Hard Light blend mode
        • Opacity set by taste by balancing the effect against...
      • Gaussian Blur - 
        • Open image 2 copies in 2 new layers
        • 10 pixel radius
        • Soft Light blend mode
        • Opacity set by taste
  • RawTherapee - to add final imaging tones

Note: The image processing choices I made here are to my taste and are based on trial and error.  It's easy to add or subtract "softness" by varying the Gaussian Blur settings.  It's a little more difficult to balance the contrast, but I found that varying the Opacity gives me flexibility in this regard.  There is no specific "magic" in the fact I used Hard Light and Soft Light blend modes, except they add contrast (sometimes very quickly) at the same time they soften the scene.  I could just as easily have added a Normal blend mode layer that was Gaussian Blur'd to help manage the contrast.

Image Comparison ~

As always, click on the image and enlarge to 100percent to see whatever there is to be seen.

Here is the original sharp image -


Orton Effect Comparison


Here is the Orton Effect processed image -

Orton Effect Comparison


For additional comparison purposes, here are two more images.  The first is soft filtered and the second is using the Pentax 85mm f/2.2 Soft lens.

Nikon Nikkor-S 50mm at f/1.4 + Nose Grease on UV filter + Local Contrast

Autoportrait ~ Pentax 85mm Soft f/2.2 at f/4.8


It should be pretty obvious that each softening technique has it's own "signature" and are each unique in their own way.  I'm not sure there's any one "good" nor "correct" nor "proper" way of doing this.  It's good to have choices and flexibility in image making, isn't it?

I've enjoyed exploring this topic again.  It's something that I've tried to come to grips with over the years and it feels like I'm getting close to being able to fully control an outcome based on a more complete understanding of the underlying materials, science, options, and effects.

I imagine a person could choose an approach and stick with it until they'd mastered their chosen path.

Sunday, May 21, 2023

Pentax 85mm f/2.2 Soft ~ Instruction Manual in English

Chetworth del Gato sent me a link to an instruction manual in English for the Pentax 85mm f/2.2 Soft.

This was the very thing I recently groused about not being able to find.  Indeed, it contains rather interesting guidance.  Concerning the use of the 85mm Soft -

"... The picture taken with the Rear Converter combined is more uniform, better in quality and has a greater soft focus degree than that taken with the soft-focus lens only.  Combining the Rear Converter varies the focal length and speed..."

The Rear Converters are the Pentax 1.4x and 2x tele-converters.  Four of them are listed in a table found just below the quoted guidance.

I'm not sure what "a greater soft focus degree" means.  After having dug into the topic and trying a 1.4x teleconverter with the Pentax Soft perhaps what they were trying to say is that the degree of softness across the field of view is more evenly distributed than when the lens is used without a teleconverter.  That, at least, is what I found.

Have a look at the following image.  The softness of the scene at f/4.8 is quite nicely distributed.  When used without a teleconverter, the scene shows a strong sharp to soft transition zone.  It's something that I called a "resolution hole" in the series of nine blog entries I posted on the topic of soft focus Pictorialism starting here.

Using the Pentax 85mm f/2.2 with a teleconverter seems to do the trick.  It behaves rather nicely and reminds me a lot of the results that can be achieved using a Wollensak Verito on large format film.


Pentax 85mm f2.2 Soft at f4.8 with Sigma 1.4x Extender ~ USM + Contrast Curves + Toned + 100 Micro Contrast + Red filter Channel Mix + Liight Noise Reduction -1

Pentax 85mm f2.2 Soft at f4.8
+ Sigma 1.4x Extender ~ USM
RawTherapee Image Processing:
Contrast Curves
+ Toned
+ 100 Micro Contrast
+ Red filter Channel Mix
+ Noise Reduction -1

Thursday, May 11, 2023

Soft Focus Pictorialist Effects ~ part Nine

Here is my last blog entry on this topic, I promise.  I know.  I know.  There are so many things to be looked at, but enough is enough.  For now, at least.

It seems strange to me how I vacillate between extremes.  I recently sold most of my Nikon manual focus lenses because I'm reaching that age where AF isn't just a luxury.  My Nikkors were getting to be too difficult to use in fast changing situations.  So I now have three wonderful fixed focal length lenses for the Sony A7, three for my APS-C Sonys, and two zooms for the APS-C for when I'm out photographing motorsports.  I'm keeping several old Nikkors "just in case" I might wake up one day and find I "need" them.

One of the lenses I've had forsale for several years is a Nikon F mount Pentax 85mm f/2.2 Soft.  Recently I got frustrated at the lack of interest in the optic and decided to try and sort out how to use it once and for all time before I let it go.  Hence the Prime Mover of this entire series of blog entries.

Pictorialist Photo-Sessionist style images are sometimes built on soft focus lenses and their "interesting" properties.  So I thought it might be interesting to take one more look at this Pentax Soft from the perspective of Pictorialism.  Of course the style is just as importantly built on lighting, composition, subject, image processing and printing techniques.  I had the lens and that seemed the most reasonable place to start.

I have said little to nothing about lighting, composition, and printing techniques in this series.  But I was able to explore a little of what might be possible using image modifiers (lenses and filters) and current digital image processing tools.  The three tools I used were to try and reveal underlying sharpness of a soft lens.  The tools are global contrast, local contrast, and micro-contrast.

With softening filters (Cinebloom, Nikkor Soft, nose grease, hairspray, etc.) as well as with Soft Focus lenses I believe an image can benefit from carefully controlling global and local contrast.

In these ways, I believe from a technical, commercially available camera equipment perspective that current practitioners of the craft can rather closely emulate the Pictorialist style. 

What I would like to do with this one final blog entry is to look at completely piercing the "resolution hole" that meniscus lenses are prone to.  To do this I will now try a smaller format Sony A6000 APS-C camera and combine it with the Pentax 85mm f/2.2 Soft and the Sigma APO 1.4x teleconverter.  This makes it a rather long focal length setup, but this seems on some levels to be in keeping with the use of long Soft Focus lenses in large format film work.

Was you may recall, my Full Frame digital camera still showed a bit of uncontrollable sharp/soft transition zone effects near the edges of the frame.  With luck the narrower APS-C field of view might fit _inside_ the "resolution hole" and render scenes at any distance more easily controllable.

Setup ~ 

  • Camera - 
    • Sony A6000 APS-C, 100ISO, 2sec timer, "A" mode
  • Lens - 
    • Pentax 85mm f/2.2 Soft
    • Sigma APO 1.4x teleconverter
  • Bogen tripod
  • RawTherapee - 
    • Global contrast increased by image to taste
    • Local Contrast increased by image to taste


Image Processing Comparison ~

As always, click on the image and enlarge to 100percent to see whatever there is to be seen.

I now present two scenes.  Each scene was shot at multiple apertures - f/2.2, f/2.8, f/4, f/4.8, and f/5.6.  We can see how the veiling softness changes with aperture settings.  I tried to keep the image processing results similar to better evaluate the aperture, "resolution hole", scene rendering effects.  For this reason I used slightly different processing (heavier local contrast and different brightness settings) at f/2.2 and f/2.8 than I did with the other images.  The aperture progression should be fairly obvious.

Without further ado, and starting with f/2.2 down to f/5.6 -


Sony A6000 + Pentax 85mm f/2.2 Soft at f/2.2 + Sigma 1.4x + Contrast 80 + Local Contrast 1

Sony A6000 + Pentax 85mm f/2.2 Soft at f/2.8 + Sigma 1.4x + Contrast 40 + Local Contrast 1

Sony A6000 + Pentax 85mm f/2.2 Soft at f/4 + Sigma 1.4x + Contrast 40

Sony A6000 + Pentax 85mm f/2.2 Soft at f/4.8 + Sigma 1.4x + Contrast 40

Sony A6000 + Pentax 85mm f/2.2 Soft at f/5.6 + Sigma 1.4x + Contrast 40

Scene One
Light Pears against
a Black Background

Sony A6000 + Pentax 85mm f/2.2 Soft at f/2.2 + Sigma 1.4x + Contrast 40
 Sony A6000 + Pentax 85mm f/2.2 Soft at f/2.8 + Sigma 1.4x + Contrast 40
Sony A6000 + Pentax 85mm f/2.2 Soft at f/4 + Sigma 1.4x + Contrast 40
Sony A6000 + Pentax 85mm f/2.2 Soft at f/4.8 + Sigma 1.4x + Contrast 40

Sony A6000 + Pentax 85mm f/2.2 Soft at f/5.6 + Sigma 1.4x + Contrast 40

Scene two
Light Kitchen Utensils backlit
against a Bright Background

What was important for me to verify is that the table front edge in both scenes remain "believable" toward the edges of the frame.  This it does.

After I'd run this series of images I realized I hadn't captured a landscape scene.  So I used the A6000's "magnifier" functions, put the focus point at the edge of the frame, and focused the Pentax/Sigma setup at infinity.  I was able to prove to myself that the edges of the frame remain optically correct and that the "resolution hole" has finally and completely been pierced.

To recap how I see best using a Pentax 85mm f/2.2 Soft and in believing the following also can apply to just about any meniscus-based soft focus lens of any focal length and any imaging format, here is what I found -

  • Control ~ subject matter distances
    • Close-up ~  
      • NOTE: put the subject dead center in the frame and crop accordingly in processing so as to avoid any "resolution hole" transition area effects as the aperture is stopped down
    • Portraiture ~  
      • NOTE: put the head of the subject dead center in the frame and crop accordingly in processing so as to avoid any "resolution hole" transition area effects as the aperture is stopped down
  • Control ~ aperture
    • Maximum under-corrected spherical aberration (veiling softness) is seen at f/2.2
    • Decreasing under-corrected spherical aberration in the center of the frame as the aperture is stopped down
    • Opening of a "resolution hole" in the center of the frame from f/4 thru f/5.6 - with attendant edge softness and harsh sharp/soft transition zone effects
  • Control ~ telextender/teleconverter
    • Enlarge the center of the field of view...
    • ... thus pushing the harsh sharp/soft transition zone to the edges of the frame
    • Useful for landscape work
    • Prediction has been proven to my satisfaction that a 2x telextender does indeed completely pierce the "resolution hole".  The behaviour is very similar to a designed for whole plate 11.5inch (292mm) Wollensak Verito f/4 shot on 4x5 inch film that completely avoids the "resolution hole" effect in that large format case.

  • Note: Nothing is being said about city scapes, street photography, large man-made objects, or technical applications were accuracy and clarity tend to be preferred.  I believe that people and nature may be the areas where soft focus lenses succeed most easily. YMWV.

I'm now satisfied that I'm able to control this previously nearly impossible to come to grips with Pentax 85mm f/2.2 Soft.  I'm happy to learn that controlling contrast can have a "improving" effect on soft focus images.  And I'm happy to have experienced a little more deeply the possibilities that lay in nose-greased/hairsprayed UV filters as image softeners.

My next project?  After a little "time out", I may try and buy a Pentax 85mm f/2.8 AF Soft to see how the extra lens elements modifies that soft focus lens' behavior.  Until then, have fun.  Go out and photograph.  Enjoy life.

Tuesday, May 09, 2023

Soft Focus Pictorialist Effects ~ part Eight

I'll admit it up front.  I lied.  I decided I needed to have two more blog entries.  Part Eight is not, repeat, not the last in the series.  There.  Truth in Advertising.  And all that.  Now that I've gotten that out of the way, onward.

Years ago I learned that soft focus photography tried to make images look more "artistic."  One of the challenges in the US back in the early days of photography was that "straight", "sharp" figure photography was unlawful.  In fact, in my lifetime a person could go to jail for making and having such works in their collection.

To get around this, late-1800's/early-1900's American photographers used soft focus lenses.  They were able to successfully claim that these kinds of images were "art."  I learned this interesting historical tidbit from reading "Clarence White and his world."

Sometime in the mid to late-1960's an English photographer built an enormous body of work and quite a career that was partly based on soft imaging effects.  In the case of David Hamilton he used light dustings of hairspray on otherwise clear lens filters (think UV filters). Certainly he didn't use these DIY filters on every image he ever made, but when he used them, something rather special was possible.  The approach predates by several decades the current Cinebloom/Tiffen Pro-Mist filter approach.

The soft filter images are different than those made using deliberately designed soft focus lenses.  In general, "soft" filters in front of a fully corrected optic can give a "glow" effect, while retaining the basic optical corrections of the lens.  Have a look at the lit signage in this Wes Anderson video short to see how this might be seen.  These kinds of "glowy" filters appear to be popular with film photographers these days as well.

I happen to have an old Nikon Nikkor Soft filter set. The Nikkor Soft filters come in #1 and #2 strength.  I find the #2 filter to be a bit to over the top strong for my tastes.  So I tend to stick with the still somewhat strong #1.

If you'll recall, I posted something on image processing and using global, local, and sometimes micro-contrast controls to try a reveal any sense of underlying sharpness.  That post talked only about pulling sharpness out of a Pentax 85mm f/2.2 Soft.  

For this blog entry I would like to try the same image processing approach on a Nikon Nikkor Soft #1 filter.  I put the filter in front of an early Nikon Nikkor-S 50mm f/1.4 pre-Ai that was shot wide open.  I thought it might be interesting to see what happened when I coupled the Nikkor Soft #1 with a narrow depth of field and to use the power of digital image processing.

Just for grins, I also made a nose-greased image.  I applied a little nose grease to a UV filter to see how that might compare to the Nikkor Soft #1.

Setup ~ 

  • Camera - 
    • Sony A7, 100ISO, 2sec timer, "A" mode
  • Lens - 
    • Nikon Nikkor-S 50mm f/1.4 at f/1.4
    • Nikon Nikkor Soft #1 filter
    • UV filter + nose grease (lightly applied)
  • Bogen tripod
  • RawTherapee - 
    • Global Contrast increased to taste
    • Local Contrast increased to taste
    • Micro Contrast set to maximum when used


Comparison

As always, click on the image and enlarge to 100percent to see whatever there is to be seen.


Nikon Nikkor-S 50mm at f/1.4

Base Image
No filter

From wide open I can see that the old Nikon Nikkor-S 50mm f/1.4 is a fine optic.  Image rendition is consistent across the field.  There are no obvious optical defects.


Nikon Nikkor-S 50mm at f/1.4 + Nose Grease on UV filter + Local Contrast

Base Image +
Nose Greased UV filter

It is clear that nose grease works to soften the contrast and make the highlights "glow."  The process of smearing nose grease on a UV filter is easily controllable.  This can be used to control the "strength" of the effect.

For image processing I increased the global contrast, and I set the local contrast sliders to something that I felt balanced the tones without making the processed image look too "artificial."


Nikon Nikkor-S 50mm at f/1.4 + Nikkor Soft Focus #1 + Local Contrast

Base Image +
Nikon Nikkor Soft #1 filter

It's interesting to compare the Nikkor Soft filtered image to the UV nose-greased photo.  I modified the global and local contrast to make what I felt looked like a decent image.  I'm sure I could increase the local contrast, particularly around the eyes, to make the image *pop* a bit more.  As a starting point to compare softening filters and unfiltered images, I think this is sufficient.

It's interesting to see how managing contrast effects softened images.  This is the control David Hamilton used, though he might not have fully appreciated it at the time.  It's been written that M.Hamilton had his slide film push processed.  This increased grain (which also enhances an "artistic" effect) and increased contrast (which I've tried to emulate here).

Nikon Nikkor-S filtered images lack the optical deformities of a true soft focus lens.  Of course the softening effect is controlled differently.  I can imagine that a photographer might choose one approach over another, filtered over optical soft focus, depending on subject, lighting, and composition.  

I have to admit, though, that in this series of blog entries I might be over-thinking the whole thing a little too much.  Most of us react emotionally to a scene, don't we?  Maybe it's a Gud Thing(tm) that I'm considering this from a rational perspective outside live photography situations.  Can I apply rational experience in an emotional setting?  Hmmm... now there's yet another dimension to all this softness to consider...

Friday, May 05, 2023

Soft Focus Pictorial Effects - part Seven

After confirming that Pentax's 85mm f/2.2 Soft instruction manual provided good guidance on how to use this lens, I thought I'd like to see how the lens plus the 1.4x teleconverter worked at portraiture distances.

The reason for this is that as the Pentax is stopped down to f/4 and beyond, a "resolution hole" starts to open and the edges of the frame a strangely rendered.  At portraiture distances the effect is fairly well hidden (which I will illustrate below), but if I stare at a photo long enough I find I might not be entirely happy with the result.

Hence this blog entry.

Before I get to the comparisons I'd like to say that this has been a very interesting exercise.  I have learned a tremendous amount by listening, reading, looking, and considering the many details.  This is such a complex area of photographic practice that I can see why some people might feel these lenses are simply too difficult to use.

Heretical Thought: The parameters for sorting out how best to use this Pentax 85mm f/2.2 Soft likely (or most certainly) apply to other meniscus design soft focus lenses, regardless of focal length or film emulsion dimensions or digital sensor size.

In typing the previous paragraph I realize I'm going against the grain of conventional wisdom.  I would really enjoy having a conversation about this to see if I can improve my understanding, particularly with people who might have a deeper understanding of optical physics and lens design than I.

To once again express my current understanding of the areas this Pentax Soft operates in and the effects lens controls have -

  • Control ~ subject matter distances
    • Close-up ~  
      • NOTE: put the subject dead center in the frame and crop accordingly in processing so as to avoid any "resolution hole" transition area effects as the aperture is stopped down
    • Portraiture ~  
      • NOTE: put head of the subject dead center in the frame and crop accordingly in processing so as to avoid any "resolution hole" transition area effects as the aperture is stopped down
  • Control ~ aperture
    • Maximum under-corrected spherical aberration (veiling softness) is seen at f/2.2
    • Decreasing under-corrected spherical aberration in the center of the frame as the aperture is stopped down
    • Opening of a "resolution hole" in the center of the frame from f/4 thru f/5.6 - with attendant edge softness and harsh sharp/soft transition zone effects
  • Control ~ telextender/teleconverter
    • Enlarge the center of the field of view...
    • ... thus pushing the harsh sharp/soft transition zone to the edges of the frame
    • Potentially useful for landscape work
    • Prediction that a 2x telextender might completely pierce the "resolution hole", much like a designed for whole plate 11.5inch (292mm) Wollensak Verito f/4 would completely avoid the "resolution hole" effect when shooting the lens on 4x5inch film
  • Note: Nothing is being said about city scapes, street photography, large man-made objects, or technical applications were accuracy and clarity tend to be preferred.  I believe that people and nature may be the areas where soft focus lenses succeed most easily. YMMWV.

Another Heretical Thought: If I pay attention to completely controlling the lens, if I pay attention to the colors of the scene to emulate early light sensitive emulsions, and if I pay attention to expressing the dynamic range to emulate early film and print characteristics, I'm now of the opinion that the earlier Pictorialist effects are achievable using current day digital equipment.

That's a lot to bite off, I know.  Please challenge me if you don't think I'm right.  Again, I would invite the conversation.  I love talking about this stuff, particularly over a proper pint of Belgium beer.

Continuing to abusing myself as a subject and so as to not scare the women and horses, viewer discretion is advised.

It's darned difficult to find or hire decent help these days.  The modeling industry has changed significantly since moving to Europe eleven years ago.  It wouldn't surprise me at all to learn that cell-phones, CGI, and now AI have taken their toll on the old practice of model photography.

Setup ~ 

  • Camera - 
    • Sony A7, 100ISO, 2sec timer, "A" mode, +1EV
  • Lens - 
    • Pentax 85mm f/2.2 Soft at f/4, f/4.8 (see comments under each photo)
  • Bogen tripod
  • RawTherapee - 
    • Global contrast increased by image to taste
    • Local Contrast increased by image to taste
    • In one image B&W Channel Mixer red filter


Image Processing Comparison ~

As always, click on the image and enlarge to 100percent to see whatever there is to be seen.


Pentax 85mm f4 ~ Blue-Green Channel Mix + Local Contras

Pentax 85mm f/2.2 Soft at f/4
B&W Channel Mixed Blue-Green Filter
Local Contrast enhanced

Using a prior image as an example of what happens in portraiture when the lens is stopped down to f/4 and below, have a close look at the image starting just under my arm and down to the very edges of the scene.  The belt area shows quite well the effect I'm thinking about here.
 
The soft effect of the lens is not consistant across the frame.  What I see is the image becoming much softer than the center of the frame.  The soft effect might not be "bad" and the subject might be rendered exactly as one would prefer.


Pentax 85mm f2.2 Soft at f4.8 with Sigma 1.4x Extender ~ USM + Contrast Curves + Toned + 100 Micro Contrast + Red filter Channel Mix + Liight Noise Reduction -1

Pentax 85mm f/2.2 Soft at f/4.8
+ Sigma 1.4x APO telextender/teleconverter
B&W Channel Mixed Red Filter
Local Contrast enhanced

Considering the effect of using the Pentax Soft with a telextender/teleconverter at portraiture distances, I see that the level of softness is quite even across the field.  When rendered in this manner, I feel digital sensor images look remarkably similar to early soft focus lens images when longer lenses are used.  This is where my prior comment about using an 11.5inch Verito whole plate lens on 4x5inch format is a good example.  In both cases the focal lengths are long enough to pierce the "resolution hole" in the center of the frame, thus giving a photographer greater control over the harsh sharp/soft transition zones that can form around the edges of the frame.
 
Considering image processing, I used a red filter found in the B&W Channel Mixer.  It's my "beauty filter."  The skin tones are raised and skin imperfections disappear in a seemingly magical way.  
 
Of course I have to keep in mind that old film never could see red in this way, so there's no way that this could be considered a good match to Pictorialist images.  If there is any merit in using the red filter, the image would have to stand on its own for other reasons.

Pentax 85mm f2.2 Soft at f4.8 with Sigma 1.4x Extender + USM + Contrast + Curves + Toned + Local Contrast

Pentax 85mm f/2.2 Soft at f/4.8
+ Sigma 1.4x APO telextender/teleconverter
B&W Channel Mixed Blue-Green Filter
Local Contrast enhanced

Reprocessing the prior image, this time using the Blue-Green Channel Mixer filter, reveals an image that more closely matches the Pictorialist era works.  Local Contrast is increased as well.  This has the effect of making the "sharp" areas of the scene appear sharper, which can be an interesting technique to help dig out the hidden behind veiling softness resolution.
 
Lastly, as with the prior image, the f/4.8 veiling softness is even across the field.  The telextender/teleconverter has indeed enlarged the subject to the point that the "resolution hole" sharp/soft transition zones are moved to or beyond the edges of the frame.
 
I realize this has been a lot of words to say something that might easily have been said in a couple of sentences.  What I've been trying to do is throughway understand what exact nature of this lens.  I feel I've confirmed what Pentax said (in Japanese, at least) that mating the Pentax 85mm f/2.2 Soft with a telextender is useful for more than just landscapes.  It seems to me that this setup can work quite well in making portraits as well.


Wednesday, May 03, 2023

Soft Focus Pictorialist Effects - part Six

In an earlier post I shared that two people have helped me immensely to increase my understanding of how soft focus lenses are best used.

For years the eminent Chetworth delGato has guided my thoughts.  His thesis is the only one I've encountered that takes a serious academic look at Pictorialist era photography and the soft focus lenses that were often used.  I am forever indebted to him for his wise insight and deep knowledge on the topic.

In a conversation about an image I'd made using a Mamiya 150mm f/4 SF, Bonzo Din provided a brief translation of a Pentax 85mm f/2.2 Soft instruction manual from the original Japanese.  From this I learned several things -

  • The Pentax 85mm f/2.2 Soft was designed for -
    • Closeup photography
    • Portrait photography
  • The lens is not recommended for landscape photography
    •  Except when used with a telextender/teleconverter

That last bit caught my attention.  Pentax knew that this lens had certain limitations and they tried to guide users to get the best possible results.  The only problem is, I've yet to see an instruction manual of any kind for this f/2.2 Soft.  As I've found out, the 85mm lens is really difficult to come to grips with and perhaps it is simply too complex a lens that many photographers have ended up shying away from it.  

I'm only guessing here, but if others have experienced what I have, I'm sure we'd all be tempted to convert this optic into a paper weight or something more useful.

One of the many problems I've encountered include figuring if it is possible to make a nice landscape image using this Pentax.  The problem is I see that as the lens is stopped down what I've been calling a "resolution hole" opens up in the center of the frame.  The center becomes sharper than the edges of the frame, where the effect is like looking through the bottom of a bottle.  Edges swirl and go soft, where the transition from sharp to soft is dramatic and obvious.

I've been thinking that this "resolution hole" effect was limited to this specific difficult to understand lens.  Then, just the other day when I was looking for Wollensak Verito inspiration I came across something interesting.  See that?  Right there.  That's what I found with the small Pentax, too.  A very similar phenomenon.  Here's another Verito example.  The effect appears to exist in others of the earliest soft focus lenses as well.  A quick Flickr search confirms this.

Armed with new insight I'm now thinking that meniscus lenses (new and old) have a region where sharpness over rides softness as the lens is stopped down.  This region, or "resolution hole", is a simple fact of optical physics life.

Interestingly, photographers who shoot meniscus optics wide open to get the maximum softness effect might never ever see a "resolution hole" in their work.  It certainly doesn't appear in the smaller lens until around f/4.

That's the other thing that makes these lenses complex to use, variable rendition based on aperture.  And this is why I'm sure that when people find something that "works", they stick with it.  Don't mess with success.  If it's working for you, don't "fix it" by changing things up.

One more thing comes to me.  In early large format Pictorialist photography, lenses could be matched to film size.  Longer focal length lenses relative to film size could be shot all the time in the middle of the "resolution hole."  With a longer focal lengths comes bigger the fields of coverage in terms of absolute dimension.  In this situation a practioner could shoot smack-dab in the middle of the field of coverage and avoid the sharp/soft transition zone entirely, regardless of aperture.

With this in mind I could begin to see that by using a telextender on the small format Pentax 85mm Soft that the telextender would enlarge the center of the field of view.  It might enlarge the image to just the center of the "resolution hole."  

Conversely, I could also use a smaller format camera, such as an APS-C Sony instead of a Sony full frame device.  That might crop the field of view to include just the "resolution hole."  Though I have to say that I've fallen under the spell of the Sony full frame A7 (early/original) for the way it renders down at the pixel level.  It feels rather "film like" to me.

So, I picked up as good a telextender/teleconverter as I could afford to see how it might change the Pentax 85mm f/2.2 Soft's landscape rendition.  A Sigma APO 1.4x off That Auction Site happened to meet the price/quality trade-off I was looking for.

This post has a very brief look at how a telextender mated to the Pentax Soft on full frame deals with the meniscus lens' "resolution hole."

Setup ~ 

  • Camera - 
    • Sony A7, 100ISO, handheld, "A" mode, +1EV
  • Lens - 
    • Pentax 85mm f/2.2 Soft at f/4, f/4.5, and f/5.6
  • RawTherapee - 
    • EV increased to increase the highlight tones
    • Global contrast increased by image to taste
    • Local Contrast increased by image to taste

Image Processing Comparison ~

As always, click on the image and enlarge to 100percent to see whatever there is to be seen.


Pentax 85mm f2.2 Soft at f5.6 with SIgma APO 1.4x teleconverter ~ NoBorder

Full Frame Uncropped
Pentax 85mm f/2.2 Soft at f/5.6
+ Sigma 1.4x telextender
Global and Local Contrast enhanced

Looking around the corners of the frame I see the transition zone that forms the edges of what I've been calling the "resolution hole."  Does it remind you of anything?  Like, say, a Wollensak Verito stopped down?  Hmmm...
 
Even though the transition zone has been moved toward the edges of the frame, I still don't like it.  Though I do like how the center of the frame renders.


Pentax 85mm f2.2 Soft at f4 with SIgma APO 1.4x teleconverter ~ Cropped

Pentax 85mm f/2.2 Soft at f/4
+ Sigma 1.4x telextender
Global and Local Contrast enhanced

Starting at f/4, I cropped to the center of the telextended Pentax and, well, for me it does the trick.  The "resolution hole" transition effect has been cropped away and I'm left with a more or less usable image.  The telextender does what Pentax' instruction manual hinted that it would do.  The Soft becomes usable for landscape work.


Pentax 85mm f2.2 Soft at f4.8 with SIgma APO 1.4x teleconverter ~ Cropped

Pentax 85mm f/2.2 Soft at f/4.8
+ Sigma 1.4x telextender
Global and Local Contrast enhanced

I have to say that having explored the limits of what this lens is capable of, I rather like this exact aperture for just about every subject I photograph at closeup, portrait, and now telextended landscape distances.  F/4.8 is a "sweet spot" for me.  It tickles my funny bone like no other aperture on this optic does.

Though, me being me, maybe next week I'll find another "magic" aperture that I prefer.  Anyways, the point being, shooting/practicing/processing/thinking-about/retrying seems to be the best way to come to grips with soft focus lenses.


Pentax 85mm f2.2 Soft at f5.6 with SIgma APO 1.4x teleconverter ~ Cropped

Pentax 85mm f/2.2 Soft at f/5.6
+ Sigma 1.4x telextender
Global and Local Contrast enhanced

Yes, I just said that my favorite aperture on this lens is f/4.8.  Um, but have a good look at this f/5.6 image.  It's not half bad, either, right?  
 
Gack.  So many possibilities.  So many complexities.  So many subtleties. So little time.


Monday, May 01, 2023

Soft Focus Pictorialist Effects - part Five

As I continue to consider soft focus Pictorialist effects including lenses, processes, and printing, I thought it might be worthwhile to explore for a moment how to emulate early film emulsions.

At the dawn of photography emulsions were sensitive to blue light only.  This is why skies in many images from the 1800's were white.  This is why skin imperfections could be rather prominent.

By the start of the 20th century film became available that could record a broader spectrum of light.  These were called "pan chromatic", as in sensitive to all colors.  What's interesting to me is that these early film types couldn't see all colors equally.  There were subtle differences in gray recording for different colors of exact same intensities.

Late in film history and before the time digital sensors, black and white film could "see" all colors fairly equally.  If you took a picture of red, green, and blue values of exactly the same intensity, film would record them at the exact same level of gray.

This background is important if one wishes to try and accurately reproduce Pictorialist images.

I know I've said it before, but it bears repeating as color sensitivity of the recording medium had a important influence on how early photographs were made.

Returning to the primary object of this series of posts, the Pentax 85mm f/2.2 Soft, here is what I have thus-far learned.

This is not a general purpose lens.  It appears this lens was designed for close-up and portraiture work.  Period.

While the aperture controls in a very broad sense the level of under-corrected spherical aberration (veiling softness), it's more complex than just that.

It's blastedly difficult to use this optic on subjects beyond a medium/portraiture distance due to the way a sharper central region appears in the middle of what can look like a coke bottle bottom of softness around the edges as the aperture is stopped down.  The effect becomes particularly apparent and troublesome as the focus approaches infinity.

Image processing can be used to help reveal the underlying "sharpness" of the lens by increasing overall and with digital image processing tools, local contrast.  In early photography history these things were very difficult to control.

In summary of my current understanding of how best to use the Pentax 85mm f/2.2 Soft, from image capture through to image processing, there appears to be no simple, single answer on how to achieve success.  It seems to me that a photographer would be best served to build a matrix of subject distance, aperture (including 1/2 stop settings), and image processing based on personal experience, study, tastes, and desired final image presentation.

As in the previous portraiture distance blog entry, I used myself as the subject.  It's darned difficult to find or hire decent help these days.  The modeling industry has changed significantly since we moved to Europe.  It wouldn't surprise me to learn that cell-phones, and now AI have taken their toll on the old practice of modeling.

So as to not scare the women and horses, viewer discretion is advised.

Setup ~ 

  • Camera - 
    • Sony A7, 100ISO, 2sec timer, "A" mode, +1EV
  • Lens - 
    • Pentax 85mm f/2.2 Soft at f/4
  • Bogen tripod
  • RawTherapee - 
    • Global contrast increased by image to taste
    • Local Contrast increased by image to taste
    • B&W Channel Mixer filters
      • Red
      • Blue
      • Blue-Green


Image Processing Comparison ~

As always, click on the image and enlarge to 100percent to see whatever there is to be seen.


Pentax 85mm f4 ~ Red Channel Mix + Local Contrast

Pentax 85mm f/2.2 Soft at f/4
B&W Channel Mixed Red Filter
Local Contrast enhanced

For me, this is my B&W "Beauty Filter."  It removes imperfections, and raises the skin tones nicely.  The stripes on the shirt are medium blue, and with the red filter these tones are deepened.


Pentax 85mm f4 ~ Blue Channel Mix + Local Contras

Pentax 85mm f/2.2 Soft at f/4
B&W Channel Mixed Blue Filter
Local Contrast enhanced

Here is a blue filter applied to the +1EV base image.  I did not adjust the skin tones to something that looks more like the red filter because I wanted to clearly illustrate the blue filter effect.  Skin imperfections are clearly visible and the blue stipes on the shirt are much lighter than in the previous example.

Of course, if I were to try and fully emulate wet-plate collodion or tin-type images I could raise the skin tones.  I would need to be sensitive to the colors in the other parts of the scene, too.  So it's worth studying carefully the tonal ranges of early Pictorialist images and to take these tones into account.


Pentax 85mm f4 ~ Blue-Green Channel Mix + Local Contras

Pentax 85mm f/2.2 Soft at f/4
B&W Channel Mixed Blue-Green Filter
Local Contrast enhanced

I chose to try a blue-green filter since it nearly perfectly emulates "Ortho Chromatic" film.  This film-type "sees" more green than earlier emulsions.  On this particular subject, setting, and day, this image isn't half bad at emulating old Pictorialist expressions.

Here is one last comment on the image processing choices that I made for these images.  I applied a 0.10 strength Local Contrast enhancer.  The reason I did this was to subtly reduce the overlying veil of softness and to reveal a bit more of the "sharpness" of the underlying image.  I did this so as to try and more closely emulate large format film lenses and I think it does the trick.  
 
These kinds of controls were never available to early practitioners, and certainly weren't yet available when the Pentax 85mm f/2.2 Soft first came to market.  With this kind of image processing flexibility I am seeing the potential for how I can finally bring this seemingly impossible to control lens to heel.


Friday, April 21, 2023

Soft Focus Pictorialist Effects ~ part Four

Continuing the Mad Quest to look more deeply at this Dastardly Difficult to Wrangle Under Control Pentax 85mm f/2.2 Soft, I'd like to now consider image processing and its influence on soft focus Pictorialist effects.

As I previously wrote, there was an underlying "sharpness" to the 85mm Soft that lay just below the under-corrected spherical aberration "glow."  I see this from wide open.

One thing we have today that we didn't back in the Old Film Days are a vast array of tools that can be used to modify various aspects of an image.  Certainly, there were processes we could use in those Old Dinosaur Days of Film, such as contrast controls and masking.

Contrast controls should be self-evident.

Masking in the Old Film Days could be used for at least two ends.  One was to control global contrast when using contrasty print media.  I'm thinking of Christopher Burkett's fabulous works printed to Cibachrome.  I've been fortunate to see his work in person.  He is clearly a Master Print Maker and his images absolutely "sing."  He masks everything he prints.

Another use for masking was to reveal the mid-tones of a scene.  We used to do this in a photo-print lab that I worked at.  It was a time consuming, exacting, difficult process.  It was rather expensive, too.  I'm not sure how many clients we actually had, if any, for the service.

A few Dinosaur Age Film Photographers created softened images that had a certain "spark" to them.  Considering the works of David Hamilton and his hairspray filters, it's interesting to note that he used Ektachrome 200 film that was pushed to 400ASA or 800ASA (and perhaps more?).  

This did two things.  First it increased the grain size, as would be expected.  I'm convinced the grain added a "artful" distance between the viewer and the subject.  I feel this is the case from looking at David Hamilton's last work.  It's too "clean" looking, even though the work had his signature soft rendering.

Second, the push development process increased contrast.  I'll bet dollars to doughnuts that normally processed 200ASA Ektachrome images would've been seen as too soft, in part due to the lower contrast. 

I'm imagining that David Hamilton stumbled upon a process that "worked" for him.  The way he lit, filtered (light hairspray on UV filter), composed and printed his images very likely depended on his choice of film and processing.  He might not have known "how" to get from here there, yet I'm continuing to imagine that he uncovered a useful process, perhaps by accident and/or by experimentation, liked the results, and made a career out of the whole thing.

That's one of the great things about photography.  There's so much room for experimentation and exploration.  If something doesn't "work", we can build on what we've learned and try something else.  Even if, back in the Good 'Ol Film Days expérimentation could be a lengthy, hit/miss process.

Sometime I might share a black and white film developing process that broke many of the "rules" of film development, yet was the foundation for a successful Lord and Taylor ad compagne that ran for years.  The photographer I learned the process from was rather successful and his works looked on some level more like "art" than photography.  How Robert Randall came upon the process I'll never know.  All I know is it "worked."

Coming to current time, digital image processing includes a number of functions that we would've given our eye teeth for back in the Old Film Days.  Luminosity masks being one example.  Clarity and Texture functions in Pay-dobe' parlance, or Local Contrast and Micro Contrast in RawTheraee terms being another example.  These and many many other tools are well integrated into digital image processing software.  One can view the impact/results of these functions instantaneously.  No need to wait a few days for results to come back from a laboratory.

In this spirit I experimented using RawTherapee hoping to find a way to unlock the veiled resolution hidden in the Pentax 85mm f/2.2 Soft lens.   This post is described what I found.

Setup ~ 

  • Camera - 
    • Sony A7, 100ISO, 2sec timer, "A" mode
  • Lens - 
    • Pentax 85mm f/2.2 Soft at f/2.2, f/2.8, and f/4
  • Bogen tripod
  • RawTherapee - 
    • Global contrast increased by image to taste
    • Local Contrast increased by image to taste


Image Processing Comparison ~

As always, click on the image and enlarge to 100percent to see whatever there is to be seen.


Pentax 85mm f/2.2 Soft at f/2.2

Pentax 85mm f/2.2 Soft at f/2.2
Base Image

This is the starting point for the image processing comparison. I see a strong veiling softness at f/2.2.  Just under that, the image looks sharp, particularly  around the numerals on the faces of the watches.  That is where I focused the lens, so this makes sense, right?


Processing Comparison ~ Pentax 85mm f/2.2 Soft at f/2.2 ~ Local/Global/Curves Contrast Comparison Base

Pentax 85mm f/2.2 Soft at f/2.2
+ image processing

By choosing a strong global contrast setting, and a strong Local Contrast setting I was able to "bring up" the details of the watch faces.  The veiling "glow" remains quite strong.  
 
To my admittedly aging eyes this doesn't look 1/2 bad.  I feel this begins to prove a point about the power of software image processing tools.  With a little work it appears I can offset the soft effects of the Pentax 85mm lens.


Pentax 85mm f/2.2 Soft at f/2.8

Pentax 85mm f/2.2 Soft at f/2.8
Base Image

Processing Comparison ~ Pentax 85mm f/2.2 Soft at f/2.8 ~ Local/Global/Curves Contrast

Pentax 85mm f/2.2 Soft at f/2.8
+ image processing

Stopping down one click changed dramatically the softness of the overall image.  For this reason I didn't need to push neither the global contrast nor Local Contrast controls as hard as I did in the f/2.2 version.
 
This is looking rather nice, actually.  The highlights glow, but not too much.  The mid-tones are revealed quite well.  Clearly the image was made using a soft focus lens.  There are the optical effects I expected to see, but they are now coming under control in relationship to the "glow" and the overall image.
 
I could stop here, but why?


Pentax 85mm f/2.2 Soft at f/4

Pentax 85mm f/2.2 Soft at f/4
Base Image

Procsssing Comparison ~ Pentax 85mm f/2.2 at f/4 ~ Local/Global/Curves Contrast

Pentax 85mm f/2.2 Soft at f/4
+ image processing

Stopping down two clicks changes even further the softness of the overall image.  I didn't need to push either the global contrast nor Local Contrast controls as hard as I did in the f/2.8 version.
 
I see the "resolution hole" beginning to open in the center of the frame.  The image is sharper in the center of the frame than it is around the edges.  The sense of "glow" and optical effects are still in effect.  And I see that I didn't make the darks as deep in the re-processed sample than I did in the original.  Hopefully the mid-tone differences are apparent.

Where is the balance with this subject and this lens using strong side-lighting?  It comes down to how sharp I want the center of the image and how much edge softness I could tolerate.  I think there might be a very nice balance at f/3.5.

Considering Local Contrast in RawTherapee, I believe there might be another way of revealing the underlying sharpness.  That tool is Micro-Contrast.  I'll have a look at it in a future post.

Sunday, April 16, 2023

Soft Focus Pictorialist Effects ~ part Three

It's been such a long process of thinking, considering and trying to use soft focus lenses that I've developed a sense that my story includes looking into the morning mirror to see Don Quixote reflected back.  There's just enough self recognition in this Madness for me to question why I even bother, but bother I persist.  I know the windmills aren't what I've taken them to be, if only I could work out how.

In deepening my understanding of how to use meniscus soft focus lenses I am beginning to build a matrix of relevant information that I feel/hope/believe I can use to determine when a soft focus optic is "right" for me to use.

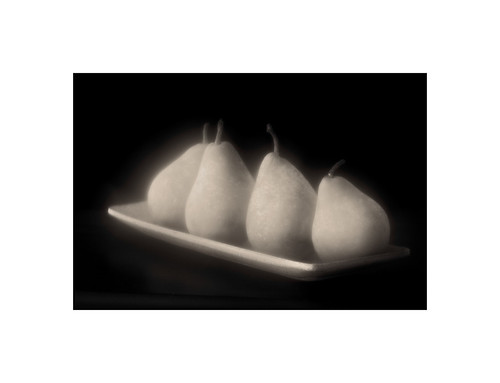
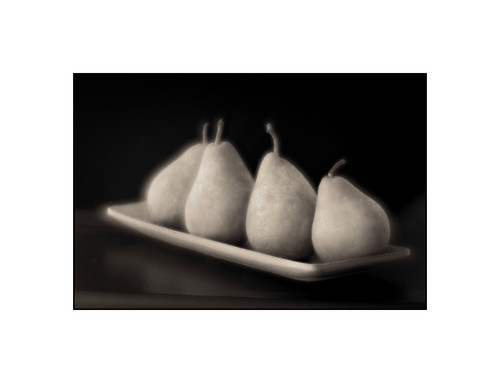
As a starting point, in the first two posts in this series I looked at how a Dastardly Difficult to Master 85mm lens behaves with close-up subjects.  In this post I would like to move the lens back a little from the subject and explore how the Pentax 85mm f/2.2 Soft renders at mid-distance

Before I get to the comparison images I'd like to share the nuggets of years of conversations with those who really know and to (*shock*, *horror* men don't usually do this king of thing) carefully read the lens' instruction manual.

While I knew this intuitively, I don't think I fully appreciated it until very recently.  A soft focus lens' aperture controls the level of softness the lens returns.

Duh.  Obviously.

Yet, if I look carefully at the effect of aperture on image softness, at some point the center of the image becomes clear to reveal an already existing at wider aperture underlying sharpness.  The transition areas from sharp to soft can be tricky.  In the case of this Pentax, the lens "resolution hole" that appears in closeup images around f/4 has a transition zone that swirls the edges of the scene.  

I don't find this pleasing.  It reminds me too much of the swirly out of focus rendition that Helios 40, Petzval, and many other early and now Hipster-Have-to-Have lenses deliver.  With one exception, I've never viewed a swirly background image that I could fully appreciate.  The swirly effect for me gets in the way.  Alex Timmerman's work being the exception.  OK.  Maybe two photographers.  Sally Mann makes incredible images from time to time in this style, too.

What this means to me is that while being strictly true that aperture controls the level of lens softness in meniscus photographic optics, the fuller answer is a bit more subtle.

As an aside, large format film soft focus lenses don't normally show much problem in the transition areas from sharp to veiling under-corrected aberration softness.  

Yes, if I look carefully at the edges of Chetworth delGato's work that I'm using as a reference, I can see a similar effect to what I've encountered with the smaller format Pentax, but the 9inch Pinkham & Smith Semi-Achromatic transition effect seems to be a bit more subtle.  I'll bet dollars to doughnuts that part of the reason is the way the transition zone is hidden by the way the subject is lit.  I'll keep this point in mind as I go along.

I am now of the thought that large format film lenses have been designed with a larger field of view than the small format Pentax, and that the gaping "resolution hole" that can form as a lens is stopped down is often _outside_ the field of view when using big sheets of film and longer soft focus lenses.  How do I feel this is true?  Look at instances where a lens' field of view is smaller than the film format.  I'll explore this, too, in the near future.

While mulling all of these things over in my wee-little brain, Bonzo Din suggested that the instruction manual for the Pentax 85mm f/2.2 Soft might provide important clues on how to use the lens.  Translating from Japanese, he found the lens was made for close-up and portrait work.  It is strongly hinted that landscape work with this Soft lens is best used in conjunction with a tele-converter.

There it is.  Truth.  Which underscores that fact that, if it's available (and in this case it often isn't), it pays to read the bl**dy manual.

The Pentax 85mm f/2.2 Soft is a close-up lens or a portrait optic.  Period.  It is not, repeat not, a general purpose lens in the sense that it might behave consistently across a wide range of subject to lens distances.  It doesn't.  Rendition consistency is lost on this lens.  It wasn't designed for that.  It's a two trick pony. If landscape photography is a goal, then a tele-extender is recommended.

In this post I will consider how the Pentax 85mm f/2.2 Soft behaves as a portrait lens.   I will use myself as the subject.  Viewer discretion is advised.

Setup ~ 

  • Composition -
    • Considering the "resolution hole" that opens in the middle of the frame starting around f/4, the subject's head (mine) was placed dead center in the field, right in the middle of the "resolution hole," so as to try and achieve the best possible sense of sharpness
    • If the head was placed nearer to the edge of the frame I know it would be distorted and covered with too much veiling under-corrected spherical aberration softness coming from what I'm calling the "resolution hole"
       
  • Camera - 
    • Sony A7, 100ISO, 2sec timer, "A" mode
    • Sony Remote Trigger so the subject could remain seated
  • Lens - 
    • Pentax 85mm f/2.2 Soft at f/4, f/4.8, f/5.6
  • Bogen tripod 
  • RawTherapee - 
    • Similar image processing settings applied to all images so as to observe optical differences
    • Vanity Alert - I used a red filter in BW conversion to suppress the skin imperfections and to raise the skin tones to something I found pleasing


Comparison ~

As always, click on the image and enlarge to 100percent to see whatever there is to be seen.

To facilitate the following comparisons, open Chetworth's image in a window, and then open my images in an adjacent window.


Autoportrait ~ Pentax 85mm f/2.2 Soft at f/4

Pentax 85mm f/2.2 at f/4

The underlying sharpness of the face and shirt collar regions are visible, but to my eyes, the overall image appearance is just slightly too soft, particularly when compared with the 9 inch Pinkham & Smith.


Autoportrait ~ Pentax 85mm Soft f/2.2 at f/4.8

Pentax 85mm f/2.2 at f/4.8

Of the three comparison images here, I feel this is the best balance between center sharpness and edge softness drop-off.  The face and collar regions are reasonably sharp.  The sleeve at the bottom of the image is not offensive to me.  The "resolution hole" isn't quite as obvious as in the following example.

Comparing this image to Chetworth's, it's not half bad at these viewing sizes to my admittedly aging eyes.  My image isn't as sharply lit as Chetworth's.  His model is far more interesting than mine.  And  I would expect the 5x7inch film image to be sharper in reality around the face and shoulders than in the above photo.  

But I have to say I'm pleased with the above result.


Autoportrait ~ Pentax 85mm Soft f/2.2 at f/5.6

Pentax 85mm f/2.2 at f/5.6

Compared with the prior two images, I feel the face and shirt collar areas in this f/5.6 image are the sharpest.  The transition "resolution hole" from sharp to soft is the most promenant, too.  If I'd lit this a little differently I might've had more success in hiding the effect.

What I've confirmed for myself is that aperture controls can be a little tricky on a lens like this.  It takes a delicate touch to extract the most out of the optic.  I can't just put the lens at a certain aperture by looking through the viewfinder and seeing something that looks good in-camera.  No.  It's more subtle than that.