In May 2018 I wrote about black and white conversions in digital. It was a very early effort and I see I rather missed the mark.
Desaturating a color image to make a black and white photograph in digital photography creates a dead, lifeless image. Just look at the results of Step Two. Ghastly, I say.
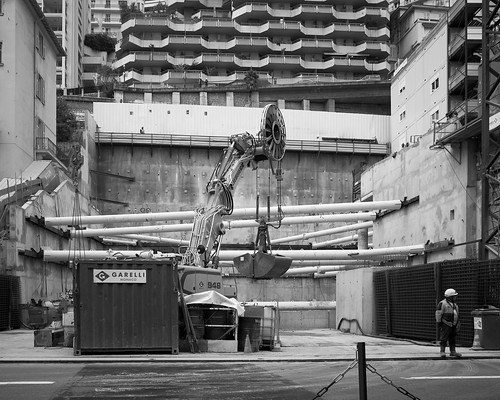
Now take a look at the results of Step Three (first image). The image is starting to "sing." The effect is now beginning to mirror film photography.
Important Observation: Scanning a black and white film negative will give the same results as in Step Two above with the very same ghastly results. The "magic" is how the tones are raised when a print is made. Silver halide papers effectively raised the mid-tones.
For myself I feel I have made a lot of progress using the simple three step technique illustrated above and tend not to mess around with contrast while in some cases gently moving the brightness slider.
It is going on a year, now, and I am very much enjoying the process. I find I have a renewed enthusiasm for black and white photography. And I find that converting digital files is, in general, nowhere near as complicated as I first wrote.
So here is a vastly simplified process, complete with examples of the image and the curves function that I use to make digital black and white images "glow" like old silver halide prints.
Step One -
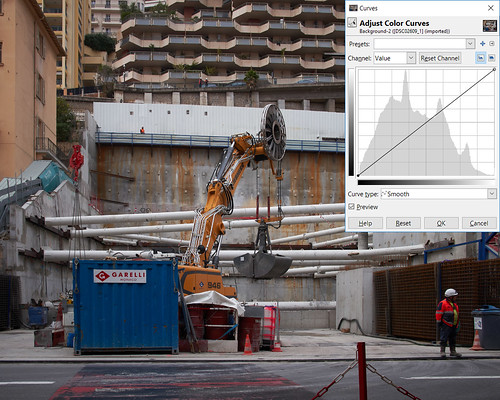
Start with a color image where the highlights and shadows are not clipped.
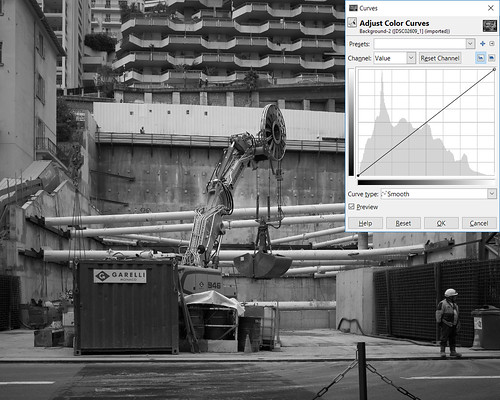
Step Two -
Convert the color image to black and white. In this example I simply desaturated the image.
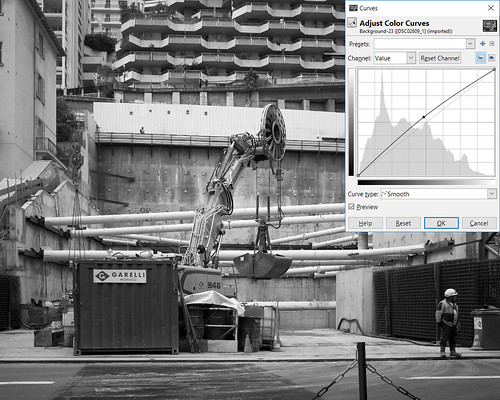
Step Three -
Open the curves function, grab the middle of the curve, and raise it.
If the image you are working on looks like it might benefit from being lighter or brighter, simply raise the center of the curves more. I deliberately "overcooked" the effect to illustrate the effect.
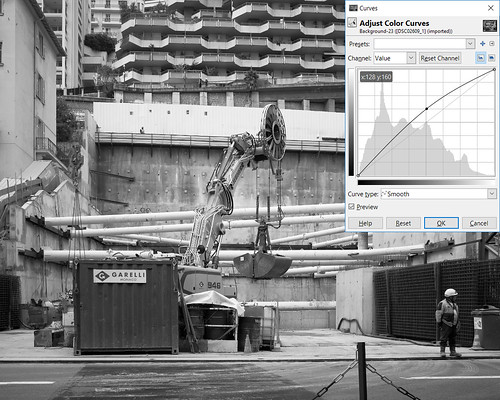
Example Image -
Here is an example of something that I feel fully expresses the gray tones and looks a lot like something I would have printed back in the day of film.
Comments -
Desaturating a color image to make a black and white photograph in digital photography creates a dead, lifeless image. Just look at the results of Step Two. Ghastly, I say.
Now take a look at the results of Step Three (first image). The image is starting to "sing." The effect is now beginning to mirror film photography.
Important Observation: Scanning a black and white film negative will give the same results as in Step Two above with the very same ghastly results. The "magic" is how the tones are raised when a print is made. Silver halide papers effectively raised the mid-tones.
Borrowing further from film photography, keep in mind that the viewer's eye will seek lighter portions of an image. This is why the classic technique is to vignette the edges of the frame. I find that around a 1/2 stop works well for the kinds of subjects I photograph.
Once you have these basic steps sorted out you can now move the brightness slider to lighten or darken the overall image. You can also move the contrast slider to increase or decrease contrast. Using the two sliders a person can quickly find the balance between tones and contrast that appeals to them.
The topic of filtering an image can quickly become complex, so I make the following over-simplification to start from. If a starting image was made out of doors under bright sunlight I find that using a yellow, orange, or red digital filter to convert the file can have some benefit in darkening the sky, just like in film photography.
No comments:
Post a Comment