Thursday, July 28, 2022

Cheap Chinese Flash Units ~ Marketing vs Reality

In the process of preparing for a project I discovered something about the three Yongnuo YN560 flash units I own.  

The published Guide Number (GN58 at 105mm) does not match my experience.  This makes it difficult to accurately expose a scene using the manufacturer supplied information.

As you already know, this model of flash is completely manual.  There is no TTL capability, nor is there any built-in RF triggering (at least in the series one and two versions I own).

Someone measured the output of a more recent model Yongnuo flash and shared their results.  They concluded that their measurements proved the factory Guide Numbers were accurate.  

Who am I to doubt? So I followed carefully what was measured, set the camera and flash to the appropriate settings, and the image was... *sad clown sounds*...  two stops under-exposed.  

Huh.  What had I done wrong?

If you've followed me over the years, you already know the importance I place on sorting things out "in the real world."  Forget the marketing lies.  Forget what someone claims to have measured, particularly if things aren't adding up correctly.  Somethings they can be wrong.  Or I should say, in the earlier days of Chinese manufacturing and sales, mostly wrong.  And sometimes there are significant differences in systems of measurement and/or understanding.

So what would the real Guide Number of my flash units be?

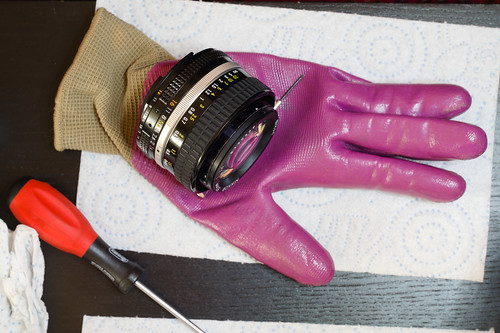
To sort it all out I took a Sony A7 and A6000, mounted up a couple old manual focus Nikkor lenses, grabbed a tape measure and set out to find the answer.

Here is the simple formula for determining Guide Numbers -

    Guide Number = Distance (meters or feet) X Aperture

Test Setup -

  •  Sony A7 (following values set to M1 on the mode dial for future use in the field)
    • ISO 100
    • 1/125th sec shutter speed
    • Daylight white balance
  • Nikon Nikkor 24mm f/2.8
  • Nikon Micro-Nikkor 55mm f/3.5
  • Subject exactly 1 meter from the sensor plane

As you will see I made things as easy as possible to calculate GN's at various flash power settings by setting the distance to 1 meter. 1 times anything is still just anything. In this case the Guide Number is simply the Aperture (anything).

    Guide Number = 1 meter Distance X Aperture

At each aperture setting (f/2 through f/22) I carefully noted the flash power output that gave the best range of tones from highlight down through and into deep shadows by looking at the image histogram.

Using 1/125th of a second and 100ISO, mapping flash power (FP) settings to Guide Number to distance, here is the matrix I came up with.  As you can see, at 1 meter, the Guide Number in my case is the same as the aperture.

In my system of Sony cameras, camera settings, Nikon manual focus lenses, and Yongnuo flash I found that the Full Power Guide Number is 22 at all flash zoom settings except 100mm where the Guide Number is a whopping 24.  I found these  GN's are valid for all three of my Yongnuo YN560 units.  There is no variation between them.

  • Distance = 1 meter
    • GN2, f/2, FP 1/128
    • GN3, f/2.8, FP 1/64
    • GN4, f/4, FP 1/32
    • GN6, f/5.6, FP 1/16
    • GN8, f/8, FP 1/8
    • GN11, f/11, FP 1/4
    • GN16, f/16, FP 1/2
    • GN22, f22, FP 1 (full pop)
  • Distance = 2 meters
    • GN4, f/2, FP 1/32
    • GN6, f/2.8, FP 1/16
    • GN8, f/4, FP 1/8
    • GN11, f/5.6, FP 1/4
    • GN16, f/8, FP 1/2
    • GN22, f/11, FP 1 (full pop)
  • Distance = 3 meters 
    • GN6, f/2, FP 1/16
    • GN8, f/2.8, FP 1/8
    • GN11, f/4, FP 1/4
    • GN16, f/5.6, FP 1/2
    • GN22, f/8, FP 1 (full pop)

To see how this works, let's say I have a subject 3 meters away and I would like to hit it with the correct amount of flash power with a lens aperture of f/4.  Looking at the matrix I see I need to set the flash (FP) to 1/4.  This is exactly how it reads on the back of the flash, so I don't have to think any further about it.  Hit the shutter release et voila, a perfect exposure.

Now let's say I have a subject that is 2 meters away and I am using a polarizing filter (to knock reflections off certain subject surfaces).  Let's say I would like to use an aperture of f/2.  Looking at the table I see the flash power setting would be 1/32.  Then taking into consideration that polarizing filters grab approximately two stops of light I see that I need to go from the GN of 4 to a GN of 8, where the flash is now set to 1/8 power.  Hit the shutter release et voila, a perfect exposure.

Let's do one more calculation, shall we.  Let's say we have a subject three meters away, want to use f/5.6 _and_ we have a polarizing filter.  We start with a GN of 16.  Then we need to account for the polarizing filter which is another two stops.  A GN of 22 won't cut it as it's only good for one more stop.  So, we need two flash units at 3 meters set to a GN of 22 (full pop) to give the subject enough light.  Hit the shutter release et voila, a perfect exposure.

You might question why go through all the trouble?  After-all, for a mere 500Euro/USD you can get a camera manufacturers own fully integrated flash system.  Valid question, right? 

A valid response is I'm a Cheap Old Slob.  Being retired and living on a fixed income can do that to a guy.  Further, I come from a time where these kinds of mental gymnastics were required and not optional.  Balancing ISO (ASA back in the day) against shutter speed, flash output, and lens aperture was simply part of the act of making a photograph.

Here's what I paid (approximately) -

  • 50Euro each for two new Yongnuo YN560II flash units 
  • 40Euro used for a third series 1 flash
  • 30Euro on a pair of cheap flash stands
  • 15Euro for a pair of shoot-thru umbrellas
  • 8Euro for a silver bounce umbrella
  • 15Euro for a three flash cold bracket
  • 20Euro for an RF (FM band) trigger with two remote receivers.

For less than 230Euro/USD I now have a fairly flexible fully GN verified three light system.  This, where just one Sony/Nikon/Canon flash would cost over twice that much.

I hope to be able to share results from an upcoming project.  It would be fun show what's possible while on a fixed Cheap Old Slob income.

Saturday, July 23, 2022

Photo Ops ~ July 2022

2022 isle de France Photo-opportunities - So, this is it for the updates on the Paris region photo-ops for awhile.  I have a lot to do over the summer and we'll be very busy through the Fall and Winter.  Bretagne and Italy will be in the cards.  These two places are always outstanding photo-ops.

[I've redone this sequence and put the completed events in reverse order putting the most recently finished events at the top.]


le Mans Classic - 30 June - 3 July DONE Photos Here


Aston Martin DB3S - 1955 ~ le Mans Classic 2022


Cafe Racer Montlhery - 18-19 June *NOPE* We were in the midst of a heatwave

Paris - Rambouillet avec les Teuf-Teuf - 28 rassemblement a Paris 7eme, 29 May a Rambouillet *NOPE* I went to the WRONG location!!!  Oh, man.  This isn't good.  I feel like such an idiot.

Rallye des Princesses - 14-19 May *DONE* Photos Here!

Rallye des Princesses ~ Paris 2022 

Vintage Revival Montlhery - 7-8 May - the Beast will be there (the only surviving Fiat S76) *DONE* Photos Here!


Vintage Revival Montlhery ~ 2022


Tour Auto - 25-30 April *Did not attend*

la traversee de Paris - 27 March *CANCELLED at the last moment! Argghhhh*  but it was rescheduled - yea!!! la traversee de Paris - 17 April *DONE* Photos Here!

la traversee de Paris ~ 2022


Foire Photo - Chelles - 20 March *Did not attend* 


Retromobile - 16-20 March *DONE*  Photos here!


Retromobile, Paris ~ 2022


Salon International de l'Agriculture *DONE*  Photos here!

Salon International de l'Agriculture, Paris ~ 2022


That's all for now.


Bugatti Brescia Type 13 1923 ~ Vintage Revival Montlhery ~ 2022


Sunday, June 12, 2022

Specialty Lenses ~ a more personal history

Specialty "soft focus" lenses can be a real kick in the pants, but most of the time they are difficult to control.

I've owned many "soft focus" lenses.

It all started with a 12inch Portland lens that I dearly wish I'd kept.  I didn't use it much and I now very much regret selling that lens.  I paid next to nothing for it and got next to nothing selling it on.

I also owned a Wollensak Verito, but it never was mounted nor used.  Stupid, stupid, silly me.  What I'd give to have that lens back.  Like the Portland soft focus lens, I paid next to nothing for the Verito and got very little when I sold it.

There were three other large format soft focus lenses that passed through my toy box.  Two came from Fuji and were the 180mm and 250mm SF lenses.  Like the Verito and Portland optics I never came to grip with the Fujinon SF, even though I tried them many times.  Something simply did not "click" (ahem) for me.  Same for a gorgeous Rodenstock 300mm Imagon lens that came with a complete set of sieves.

The "soft focus" lens I had the most luck with was a Mamiya 150mm SF for RB67 that came with the sieve set.  I picked it up for cheap from KEH and used it on a workman-like Mamiya RZ.  I photographed some of my wife's roses and peonies with it.  I still have several palladium contact prints that I made from digital inter-negatives that I scanned from the original 120 6x7cm.  The prints "sing" to me.  The flowers "glow" so magnificently.   These prints remain something quite special.

I have a Pentax 85mm f/2.2 Soft that was originally in Pentax K mount, but came to me in Nikon F mount.  Talk about under-corrected spherical aberration behind the point of focus!  Eowza!! that thing is over the top.  

Even stopping the Pentax down it fails to sharpen up in any meaningful way.  It's simply too much for me and I'd prefer a bit more softness control.  It's probably too much for other people, too.  I've had this lens forsale on a local website for months and no one appears the least bit interested.  Can't say I blame them.

After trading emails with a scientist photographer who received his PhD in the topic of "pictorialist" lenses I learned something interesting.  Of course, now I'd like to find the lens he says modern day "pictorialists" swear by.  It's the Minolta Varisoft 85mm lens and hey cost the moon.  I doubt I'll ever find one for a reasonable living on a fixed income price.  Though I do keep my eyes open.

A couple years ago I picked up a box of lenses for 7Euro each.  One of them was a Nikon Nikkor 50mm f/2 Ai.  It was disassembled, cleaned up, and as it was being put back together, a thought occurred to me that maybe using the rear element set all by itself could be "interesting."  I found I needed to put a couple extension tubes in line to get the setup to focus from infinity down to something pretty close.  It did the trick.  Some of the photos I made with it weren't half bad.

Paris ~ Fall 2020

Paris ~ Fall 2020

Since hunting and gathering is a full time obsession for me, the 50mm f/2 Nikkor was sold.  In the process of moving to Nikkor 50mm f/1.4 manual focus lenses, I stumbled across a 20Euro beater Nikkor-S.C.  I got the parts off it I needed for another Nikkor-S.C. project and quickly realized I had a similar setup to my old Soft Focus Special.

Using an 11mm extension tube I found the Nikkor-S.C. 50mm f/1.4 rear element set Soft Focus Special could focus from infinity to about a foot.  This was a much shorter lens adaptation than the f/2 was.


Nikon Nikkor-S.C. 50mm f/1.4 without front element set

Nikon Nikkor-S.C. 50mm f/1.4 without front element set


Looking at how it renders I feel that it behaves rather similarly to the old Wollensak Varito.  There's swirl around the edges of the frame.  There's loads of barrel distortion (which I didn't find in this quantity in the converated 50mm H f2).  The under-corrected spherical aberration is controllable using the aperture.  To help protect the lens internals I mounted up an old UV filter.  In short, not a bad "find" out of a cheap ready for the recycler lens.


Nikon Nikkor-S.C. 50mm f1.4 without front element set

Nikon Nikkor-S.C. 50mm f1.4 without front element set

Nikon Nikkor-S.C. 50mm f1.4 without front element set

Nikon Nikkor-S.C. 50mm f1.4 without front element set


Nikon Nikkor-S.C. 50mm f/1.4 without front element set

Nikon Nikkor-S.C. 50mm f/1.4 without front element set


How does the rear element set of a classic old manual focus double Gauss design give a soft focus rendition?  Nikon's "Thousand and One Nights" history series may have the answer.  When designing wide aperture SLR lenses they would "fight fire with fire" by letting under-corrected spherical aberration dominate both element sets of deeply ground element curves.  The trick appears to be to balance that under-correction.  The first element set gives under-correction and the second element set inverts the effect and re-corrects it back out.

With this in mind, you can use either the front or aft element set from a double Gauss lens to achieve a similar effect.  In the case of my thrashed 50mm S.C. the fore element group has deep scratchs and boatloads of fungus, but the rear element set remains clear.  This, it turns out, matches the configuration of the old Portland soft focus lens that I dearly miss.  The aperture is in from the element(s) and controls the level of softness.

One thing I notice is the out of focus transition behind the point of focus is very very smooth from the "get-go."  Where most old under-corrected 50mm lenses transition through the out of focus disk having a bright center _and_ a somewhat bright outter ring, this Nikkor SF Special transitions straight to beautiful under-corrected spherical aberration behind the point of focus.  No outter ring around the out of focus disk.  It's glorious.

I don't like this kind of rendering for automobiles (though things look slightly better in Black and White than they do in color) or many of the man-made subjects around town. The effect, however, looks pretty good on vegetation and in portraiture.  It's a matter of finding a subject that, to one's eyes, is enhanced by the softness.

Friday, June 10, 2022

Lens Out of Focus Rendition ~ a more personal history

Out of focus rendition behind the point of focus is where the "character" of a lens is.

For years I thought optical resolution was where "magic" could be found in a lens.  It took me a couple decades to learn otherwise.  Sharp lenses aren't hard to make.  Everyone is capable of manufacturing lenses that are "sharp."

I've learned that, for me, it's other optical properties that make a lens interesting and adds "character" to an image.  This is what I'm talking about when I write about the out of focus rendition behind the point of focus.  There are three kinds of out of focus rendition and they are as follows.

  • Under-Corrected Spherical Aberration - the out of focus disk of highlights are lighter (show more energy) in the center of the disk than at the edge
  • Neutrally-Corrected Spherical Aberration - the out of focus disk of highlights are smooth and evenly illuminated across the disk
  • Over-Corrected Spherical Aberration - the out of focus disk of highlights show bright edges and are "hollow" in the center of the disk

NOTE: These effects are most often and most easily seen when a lens is shot wide open.

Nikon knows that under-corrected spherical aberration behind the point of focus can produce a "subtle", "delicate", and "beautiful" effect.  From what I see they've been designing lenses to build this into their lenses since at least the end of WWII. For their old manual focus lenses Nikon has a clear understanding of the effect.

Zeiss lenses tend to be designed for neutral spherical aberration corrections.  I have a gorgeous Sony Zeiss 16-70mm f/4 ZA OSS that appears to be been designed this way.  And I have a couple Nikon zoom lenses that behave this way, too.  One is the cheap and under-appreciated E-series 75-150mm f/3.5.  The other is the 100-300mm f/5.6 AiS which is also cheap and under-appreciated.  I find out of focus rendering to be wonderfully smooth.

Old manual focus over-corrected lenses tend to appear "sharper" at the point of focus than under-corrected lenses (where spherical aberration tends to veil an image).  I'm convinced this is why certain manufacturers chose this approach.  I'm thinking of the Zeiss 50mm f/3.5 and f/2.8 Tessar lenses and many of the Canon FL, FD, and FDn designs.  This effect is what people tend to call "soap bubble bokeh."  I don't like it, but I know of photographers who do.

Back when I shot large format film (4x5inch up through 12x20inches) I felt with no real evidence other than "Tribal Widsom" that German made lenses were the "best."  I owned a nice collection of Schneider, Voightlander, and Zeiss lenses.

It was only recently that I read about Nikon's lens design philosophy and how they applied their under-corrected spherical aberration approach to their medium and large format lenses, as well.

I saw "something" in the way a pretty little Nikkor-M 200m f/8 performed, but at the time I couldn't "put my finger" on what it was.  Well, looking at a few of my old negatives I now see it was this out of focus rendition that makes Nikkor optics so special.  It was a real missed opportunity for me to explore what the Nikkor-W series of lenses were capable of. 

How to know how a lens was designed for behind the point of focus rendition?

This is easy.  Very easy, in fact.  Using a digital camera with focus magnification -

  1) Mount a lens on a camera

  2) Find and focus on bright highlights

  3) Magnify a highlight to 15x

  4) Start to slowly turn the focus ring from farther away to closer

  5) Watch the highlights as they go out of focus, note the highlights in one of three following ways:

        a) Bright point in the center of the expanding luminous out of focus disk - this indicates under-corrected spherical aberration behind the point of focus.  Often with old lenses you will see what appears to be a brighter ring around the edges of the out of focus disks.  This is normal.  What's important is to see is that the center is brighter than the surrounding disk area (with the possible exception of the very edges of the disk).

        b) Luminous out of focus disk remains smooth across the field - this indicates a neutrally corrected optic (these tended, until recently, to be rather rare in my experience)

        c) Bright disk edges with hollow center - the out of focus disk looks like a doughnut - this indicates an over-correction leading to "soap bubble bokeh"

I do this when considering a lens I'm not already familiar with and this simple technique works a charm.

Modern mirrorless AF lenses from Sony, Nikon, and Olympus are designed to eliminate as many optical defects as possible.  With the aid of computer ray tracing software and improved manufacturing techniques many new lenses are darned near "perfect."  You can use the technique of verifying the out of focus rendition on current optics, too.

Wednesday, June 08, 2022

Lens "Sharpness" ~ a more personal history

In looking at lenses and cameras, in doing these tests and comparisons I've always taken the simplest, most direct approach possible.  No fancy, often very expensive, test and measurement gear.  Just a standard USAF military test chart, newspaper, or "interesting" subject, cameras, lenses, film, and, more recently, digital sensors, a lot of research, more than a few conversations with scientists, and a bit of experience.  

Anyone can duplicate what I've done.  Which is partly the point.  If there are any questions about what I've written, people can have a look for themselves to see what's true, correct, or not.

I thought perhaps was now the time to share and sum up a few things that I've learned over the past quarter century of poking and prodding.

Lenses, unless otherwise designed and with very few exceptions, are sharp. Period.

Fixed focal length lenses are sharp, at least.  Zoom lenses?  It's a bit more complicated.

I've been fortunate enough to have been able to enjoy a vast variety of lenses over the years.  How many hundreds and hundreds of lenses have I owned, tried, tested, compared, considered, shot with, and written about?  Everything from very large format film down through APS-C digital have spent time in my Closet of Goodies. 

In my youth I shot primarily 35mm.  A Pentax H1A was my very first "serious" camera.  Then came a Canon FTb QL, Pentax MX and MV, a Nikon FM, a Canon F1 (first of the series),  several Canon AE-1/AV-1/AE-1 Program, and two Leica M3.

I had access to a Mamiya C220 for some years as well.  It was a wonderful camera.

One year I had a tax rebate large enough to allow me to buy a new Sinar F with extension rail, and what turned out to be a very nice, borderline fabulous 210mm f/5.6 Schneider Symmar-S MC.  I owned that setup for many many years and have more than a few wonderful negatives from that setup.

In my early 35mm and 120 format days I didn't have many thoughts about optics.  I didn't know enough then to form an opinion and I wasn't curious enough to have a look.  All I wanted to do was "find some magic", shoot a few good photos, become famous, and lead the Life of Riley.  

After realizing the world wasn't exactly coming to my doorstep and that I needed to put my head down, apply some effort, and simply get to work, I became curious all kinds of thing, including looking at what was really going on with cameras and lenses and such.   The Sinar F 4x5, Schneider Symmar-S MC 210mm kit was the first to fed that curiosity.

It started with the aid of a USAF Resolution Test Chart back in 1998.  I shared some of my first test results with folks on-line in the then still the academic implementation of what would soon become the "internet".  Those were the days of UUnet, modems, newsgroups, and the East/West communications link that stretched between MIT and Tektronix.

Kerry Thalmann (an engineer from Intel) contacted me (I was working at Tektronix at the time) and suggested we look at a bunch of his lenses too.  The mossy rock was soon scooting unflappably down the hill.  Here I am 24 years later, still looking at photography things, asking questions, and generally poking around to see whatever there is to see.  

I quickly learned that old lenses could be as good as new while looking at a pair of turn of the century Protar lenses and compared them against something quite modern.  Yes, the modern lens looked very so slightly "sharper", but there was certainly nothing wrong with the Protar images.  It took extreme magnification to see any difference between lenses from the early and late 20th century.  This was an important learning for me because this was the first time I experienced something that would frequently ran counter to whatever marketing literature came my way.

Of course I found I preferred some lenses more than others.  Often it more than anything else came down to whichever lenses had the most reliable shutters.  Here is a list of Large Format Favorites.

  • Schneider Super Symmar XL 110mm f/5.6 on 4x5inch
  • Schneider Symmar-S MC 210mm f/5.6 on 4x5inch and 5x7inch
  • Kodak Commercial Ektar 300mm f/6.3 on 8x10inch
  • Kodak Wide Field Ektar 250mm f/6.7 on 7x17inch
  • Fuji Fujinon C 450mm f/12.5 on 12x20inch
     

I also found joy in shooting Schneider's "Angulon" series of optics, too.  They are small, light, and covered large pieces of film quite well.  Other small, light optics that were wonderful to use were the rare and difficult to find Zeiss Jena Germinar lenses.

My favorite medium format lenses were Schneider Xenotar on Rolleiflex TLRs.  They were slightly less sharp than the glorious Mamiya 7 optics, but they had contrast, those Schneiders did.  Why on Gawds Green Earth I ever sold those Rollei's?  Well, I couldn't bring them with me when we moved to Europe.  It was a simple as that.  So I sold them.

For a short time I owned a cosmetically pristine Hasselblad 500CM.  It was one of those classic "dream cameras" that seemed too often just out of reach financially.  I had a couple film backs, a 45 degree finder, 50mm, 80mm, 120mm, and 150mm Zeiss lenses.  I wanted to love the setup.  I really did.  But it spent as much time in the shop getting repaired as it did on a tripod getting used.

It was always the little niggling things.  In-body light-trap barn door springs were prone to bending.  The light-trap materials used on film backs were prone to leaking light after just a couple months of use.  The whole plot felt weak and under-engineered.  I'd learned how to replace the film-back light trap materials.  But after the camera body went to the shop for it's third light-trap spring replacement I was done.  No more.  It was more of a pain in the arse than it was worth.

Looking for a replacement to the recalcitrant Hasselblad led me to discover a wonderful Mamiya 7.  The 50mm, 80mm, and 150mm lenses were all demonstrably sharper than anything I'd ever "tested" at 120 line-pair per mm, baby! (which, BTW, was the absolute resolution limit of TMax 100 in D76).  The camera was light, handy, and gave a nice, large, useable 6x7cm negative.  Along with the Rolleis, I think that if I ever get back into film (which I never will) I'd sure like to have another Mamiya 7.

My arrival to the New Age of digital photography was at first a horror show.  

Canon EOS APS-C format lenses and 40D and 50D in-camera jpg processing were absolute cr*p.  Images are visibly soft.  Even now I can't believe just how bad some of that work was. I had to keep the final image sizes small to give the illusion of them being acceptable.  This is why at first I still hung on to my medium format cameras.

Convinced "better" lenses would do the trick, I sold the first couple of Canon optics and went with hugely expensive L-glass.

After seeing that even the L-glass looked "soft" under a wide variety of circumstances on a brand new Canon 5D MkII, I dug around the 'net and found an answer.  The in-camera jpg processor was junk.  Hence the switch to RAW, which helped, but wasn't the complete answer.

I learned that Canon sensors are "soft" due to the heavy AA filter they use over the sensor.  I could lean heavily on USM to get something semi-decent out of the 7D and 5D MkII RAW images.  I didn't know just how strong that AA filter is until, one day, I shot a 100-400mm f/4.5-5.6 Canon L adapted to Sony APS-C A6000.  It was like the clouds had parted and everything was now clear.  The difference was dramatic.

In the end, my Canon Drama of visibly soft image came down to three things.  Lenses were, in fact, just barely "good enough", but they weren't the primary source of my problems.  The in-camera jpg processor cranked out soft images... and... Canon's use of heavy AA filtering softened all output, RAW and JPG.

Recently I read Thom Hogan's comments on early zoom lenses being designed for adequacy, not optical perfection.  Here's what he said.

"...As film SLRs developed and gained in popularity, a number of things started to happen with optics. In particular, autofocus and zoom focal ranges added convenience that drove much of the designs in the 70's, 80's, and 90's. The original Tamron 28-200mm lens in the early 90's also started a trend that was much imitated: "good enough" across a wide range of things..."

Looking at this with nearly perfect 20/20 hindsight I have the strongest impression that Canon was doing everything just "good enough" but no better.  While I have no direct knowledge of this, M.Hogan indicates Canon's old design approach may still be in play here in the Mirrorless Age.

"...  It took Sony awhile to get on board, but Olympus and Nikon have done this from the beginning of their mirrorless endeavors: simply design better lenses. Far better lenses. Lenses with a near complete lack of negative attributes. Canon, unfortunately, seems to be going to take a while to get fully up to speed with this..." [the bold is my emphasis]

It bears repeating that Canon lenses for me looked substantially better when used on Sony cameras.  The jpg-processor and the strong AA filters of Canon cameras often masked optical performance.

Having moved on from Canon is probably the best thing I've done since switching to digital.  Really good Canon EOS to Sony E AF adapter performance was not at first to be found.  In frustration I sold all my L-glass.

As a consequence, I'm most familiar with Sigma and Sony lenses on crisp, clean, clear Sony sensor'd bodies.  In general I love them.  They are spectacular.  And, yes, I'm still very much in love with my old "filled with character when shot wide open" manual focus Nikon Nikkors.  There is lots for me to appreciate and enjoy on both old and new optics.

Lenses are seldom the determining factor in whether an image is "sharp" or not.   It turns out, film and sensors limit resolution.  Lenses most of the time just come along for the ride.

Monday, June 06, 2022

Current lens design technolgies paying off...

Thom Hogan has been around the block more than a few times and _really_ knows what he's talking about.

So when he writes about the current state of lens design technologies, it can pay to listen to him.

While I may in the end choose to stay with my old "charactered" SLR lenses on Full Frame Sony A7, I can fully appreciated what Thom writes about how good new lenses can be.  And for this I'm sorely tempted to sell off all the old stuff and go with the new.


Vintage Revival Montlhery ~ 2022

Tuesday, May 24, 2022

Alternative Legacy 3 Lens Kit ~ "extended" version

A couple of days ago I wrote about the "Ultimate 3 Lens Kit."  It was based on some old thinking and the examples of certain famous photographers who started the Magnum news imaging service.  That lens kit consisted of a 35mm, 50mm, and 85mm lens.

Some might wonder why I don't just use, oh, let's say, a Sony 16-70mm ZA f/4 OSS on one of the beautifully small and very capable APS-C EVF mirrorless bodies?  Why not, indeed.  In fact, when traveling and attempting to keep the overall weight of my camera gear to an absolute minimum and to maintain domestic harmony I'll take this lens and put it on a Sony A6000 or NEX7 EVF APS-C and call it "done."

If there ever was one zoom lens to rule them all, it would be this Sony Zeiss.  The out of focus rendition is very similar to Nikkor lenses (ie: gloriously smooth behind the point of focus).  The Sony Zeiss is very sharp.  And there is nearly nothing of that common zoom lens design field curvature that makes the edges go soft when shooting flat 2D subjects.  The rendition of this 16-70mm ZA zoom is something to proclaim far and wide.  Except...

I love the way fixed focal length lenses render.  It's subtle.  It's not obvious (I know, I repeat myself, repeatedly).  Perhaps it's only me who can claim to pixel-peep "see" any differences, but in general, I love Nikkor optics for the way they capture a scene.  They "feel" to me to be a little step above even the Sony Zeiss.

In current times and with the advent of cellphone cameras people have migrated toward using wider angle lenses.  I see this even in photographers who shoot their more "serious" works using larger sensored cameras.  Wider seems to be "better."

So, in the spirit of keeping up with the times, here is a proposal for a slightly different 3 lens kit.  This answers a question of what would happen if we extended the "ends" of the kit just a little bit. What might that look like, while remaining very usable for a wide range(r) of subjects?

On the long end, I propose a slightly longer than 85mm Nikon Nikkor-P 105mm (Xenotar-type) f/2.5 pre-Ai lens.  The wide open "character" of the 105mm f/2.5 Nikkors is nothing short of sublime. I'm sure everyone remembers Steve McCurry's famous images made using this focal length lens from Nikon.  It seems to have cemented not just his celebrity but the celebrity of the optic, too.  Not a bad place to start building this extended range 3 lens kit, then.

In the middle, I put an early Nikon Nikkor-S Auto 50mm f/1.4 lens.  This is filled with "character" when shot wide open.  Stopped down a stop or two and lens performance looks remarkably similar to current optics.  From this standpoint the 50mm Auto might be seen as an interesting "all around" selection.  You can have your "character" and modern rendition out of the same focal length lens.

Moving to the wide end of things, 28mm lenses fall nicely between all too often distorting 24mm optics (similar focal length to cellphone "selfie" lenses) and the "Ultimate 3 Lens Kit" 35mm selection.  On one hand, 28mm's is definitely wider than 35mm.  On the other, 28mm's take a bit more work than 24mm's to make it distort a scene.  As a bonus, the 28mm lens I chose has a bit of the wide open aperture "character" that I've come to appreciate from early Nikkor manual focus lenses.

Here it is, a proposal.  This lens selection is wider on one end and longer on the other than the "Ultimate 3 Lens Kit" and contains three lenses that I find are filled with "character."

  • Nikon Nikkor-N 28mm f/2 pre-Ai (updated with factory Ai aperture ring)
  • Nikon Nikkor-S 50mm f/1.4 pre-Ai
  • Nikon Nikkor-P 105mm f/2.5 pre-Ai


 Three Lens Kit ~ 28mm, 50mm, 105mm


Sunday, May 22, 2022

Legacy 3 Lens Kit ~ "classic" version

When I was young and dinosaurs still roamed the earth my photographer friends and I would talk a lot about the "Ultimate Camera/Lens Kit."

Following closely from well known practitioners, comme Henri Cartier Bresson, we settled on 35mm, 50mm , 85mm as the perfect kit to carry wherever we went and to any photoshoot we made.  We used 50mm most of the time and reached for the 35mm or 85mm lenses when a situation warranted it.

It was simple.

For many years I carried either a Canon F1, a Pentax MX, a Nikon FM, or a Leica M3 with a 50mm in the appropriate lens mount.

The Canon F1 was the original first model series version.  It was built like a tank.  The camera survived a drop at one of the first Long Beach Grand Prix, it was that strong.  Additional lenses for it were a 35mm f/3.5 FD, a 50mm f/1.8 FDn, a 135mm f/2.5 FL, and a 200mm f/3.5 FL.  Yet, the vast majority of the photographs I made with it were using the 50mm lens.

The Pentax MX was a beautifully small camera and the 50mm f/1.7 lens I used was perfectly balanced for the way the camera handled.  I had a couple other lenses for it, but the 50mm was my "go to" optic.  I made some nice images with that camera.  That was one of the more "perfect" kits I owned.

The Nikon FM was slightly larger than the Pentax.  I had a 50mm f/1.4 Auto Ai that I used.  The camera body had a winder, too.  It was a fun kit, but I was too young and inexperienced to realize what I had.  The Nikkor lenses were considered the class of the world for very good reason and I was completely clueless.

The Leica with an interesting 50mm f/1.5 Leitz came to me after a Samy's Print Lab big "important client" print session that netted enough money to get to decide between the German camera, a Swedish Hasselblad 500C/M, and an Ansel Adams 16x20inch "Moonrise" print.  Yes.  I'm stupid.  I should've purchased the Adams.  In fact, I can still see that gorgeous print in my mind's eye hanging in the Best Gallery in Yosemite Valley.  Ugh.  Oh well.  Missed opportunities, and all that.

Fast forward from the Dinosaur Era to the present and I find myself with a nice collection of Nikon Nikkor glass and a Sony A7 full frame mirrorless camera.  The Sony camera is actually smaller and lighter than a Canon AE-1 film body.  Though, it must be noted that with age the Sony, Nikkor kit is beginning to feel a little heavy.

Anyway, here is what my friends and I used to call the "Ultimate Kit."  It's been repurposed for use in the Digital Age and consists of a Nikon Nikkor-O 35mm f/2, a Nikkor 50mm f/1.4 AiS, and a Nikkor 85mm f/1.8 K.


Three Lens Kit ~ 35mm, 50mm, 85mm

Saturday, May 21, 2022

On converting digital Color into Black and White ~ One Last Time

Before I pause this blog, I thought I'd reiterate something that I learned about converting digital color to black and white.  

When I used to make prints for other photographers for a living, I always strove to tone richness, creamy whites, and deep/beautiful blacks.  If you look at so much of the modern digital black and white work it can be a muddy mess of yuck.  Sure, current practitioners might not see things that way.  They likely believe their B&W work is just wonderful.    Yet to me I have to ask why is so much work missing that tonal richness we used to have back in the day?

It turns out there's a very simple way of getting back to that classic old print richness and I wanted to write about it again, but Mike Johnson beat me to it.  And he says what needs to be said more clearly and succinctly that I ever could.

Here is a link to his Online Photographer blog article.


Musee des Arts et Metier ~ Paris 2021


I now know that processing digital files can be more flexible and more accurate in black and white imaging than film ever was.  And, with a bit of knowledge, we can achieve that old silver print "richness" that so much of the current digital B&W is lacking.  

It comes down to this two things.  First, humans see color tones in black and white in a specific way and, second, the material properties of silver halide papers and their effects on printed from negative images are rather different than people might think.

First, the way humans see color converted to black and white is very interesting.  Tim Soret does an excellent job of explaining what we "see." What human perception modeling allows is tonal separation.  Let me say this again, with emphasis: What human perception modeling allows is tonal separation.

This used to be the Holy Grail of black and white film photography.  In digital work to touch that Holy Grail of tonal separation is as simple as understanding which tool to use and why.


Musee des Arts et Metier ~ Paris 2021


As a side note, I was happy to see that Sony's in-camera black and white conversion fits M.Soret's description of human perception.  When I set a Sony mirrorless camera up for black and white, I can see the effect in the EVF and on the LCD.  Sony has done an outstanding job of eliminating much of the guesswork.  A photographer can really "see" in black and white.  It's so easy it sometimes feels like cheating.

My second learning about converting digital color to black and white is related to what I used to experience when I was a black and white print technician working on Sunset Blvd in Hollyweird, CA back when dinosaurs roamed the earth.  Exhibition quality prints we used to make for at the time famous photographers were nearly always creamy smooth/rounded in the high-tones and raised elevated in the mid-tones of a negative.

It's most definitely not sufficient to take a black and white negative, scan it and invert it to generate a positive image and call it done.  

The negative was always only part of the process, the starting point.  Further, if we stop at the black and white film negative, we're once again stuck in a sea of muddled yucky grays.  It's no better than performing a simple de-saturation of a digital file.  So how do we get around this and come closer to creating the tonal richness of old film-era prints? 


Musee des Arts et Metier ~ Paris 2021


Following Mike Johnson's guide, open the "curves" function in your photo editor, grab the middle of the curve, and lift/raise it.  Watch what happens to your image and stop lifting/raising the curve when the effect is correct.  Here is what M.Johnson says about using this approach.

"...[It]increases shadow contrast, raises the often radically lowered middle values, and softens the contrast of highlights, all at once. This is just B&W Tonality 101..."

To cement this learning we can look at old prints and study their tonal ranges.  We can "calibrate" our eye to the "richness" of tones and expressions that can be achieved.  M.Johnson suggests browsing a site called "Shorpy."  Indeed, studying photos there can be educational and inspirational.

Once you "see" the difference between a muddle mess of grays image and beautiful tonal expressions you'll know what to do.  Just follow these two steps: 

1) Use luminance/human perception modeling to perform the initial conversion from color into black and white

2) Raise the mid-tones using the "curves" tool


Musee des Arts et Metier ~ Paris 2021

Thursday, May 19, 2022

Roasted, Toasted, Gunky, Gummy Hell ~ Nikon Nikkor 50mm f/1.4 AiS cleanup

The Nikon Nikkor 50mm f/1.4 AiS I recently picked up quickly developed a problem.  I suddenly had a set of oily aperture blades.

Quick as a bunny I went over to Richard Haw's website to read-up on how to disassemble the oil-stricken lens.  The process didn't look too bad, but decided to take it a step at a time.  I didn't want to make a mess of it by stripping screw-heads like I accidentally had on an otherwise nice Auto S.C.

By the way the rear mount came off the AiS I knew someone had been into this lens before.  The screws weren't as tight as they are coming from the factory.

Step one, remove the rear mount and assess the situation to see if something had caught in the spring mechanism.  After looking around I reassembled it and realized I hadn't solved the problem.

Step two, re-remove the rear mount and drop the element carrier out the front barrel to get at the aperture mechanism.  As M.Haw suggests, the 50mm AiS aperture mechanism is just like the Nikon Nikkor 85mm f/2 Ai/AiS.  Easy peasy, right?

Looking into the lens from the front I realized there was a larger problem.  The person who'd gotten into the lens had used WAY too much grease.  Perhaps the focusing mechanism had been stiff?  Who knows?  All I knew is there was grease in places there it had no business being.  It was everywhere!

I had an oil spill to clean up.  Call in the Hazmat Crew!! and gallons of ETOH, denatured, of course.  The natured stuff is best left for the photographer (me). Yes.  I'm being somewhat dramatic.  LOL!

After reassembly and working with the lens for awhile it appears I may have solved the problem.  Keeping fingers crossed on that, but if I didn't get it all, I know I can easily get back into the optic.

Here's the tale of the oil cleanup and aperture blade de-greasing in photos.


Nikon Nikkor 50mm f/1.4 AiS ~ partial teardown

Nikon Nikkor 50mm f/1.4 AiS ~ partial teardown

Nikon Nikkor 50mm f/1.4 AiS ~ partial teardown

Nikon Nikkor 50mm f/1.4 AiS ~ partial teardown

Nikon Nikkor 50mm f/1.4 AiS ~ partial teardown

Nikon Nikkor 50mm f/1.4 AiS ~ partial teardown

Nikon Nikkor 50mm f/1.4 AiS ~ partial teardown

Nikon Nikkor 50mm f/1.4 AiS ~ partial teardown

Nikon Nikkor 50mm f/1.4 AiS ~ partial teardown

Nikon Nikkor 50mm f/1.4 AiS ~ partial teardown

Nikon Nikkor 50mm f/1.4 AiS ~ partial teardown

Nikon Nikkor 50mm f/1.4 AiS ~ partial teardown

Nikon Nikkor 50mm f/1.4 AiS ~ partial teardown

Nikon Nikkor 50mm f/1.4 AiS ~ partial teardown

Nikon Nikkor 50mm f/1.4 AiS ~ partial teardown

Nikon Nikkor 50mm f/1.4 AiS ~ partial teardown

Nikon Nikkor 50mm f/1.4 AiS ~ partial teardown

Nikon Nikkor 50mm f/1.4 AiS ~ partial teardown

Nikon Nikkor 50mm f/1.4 AiS ~ partial teardown

Nikon Nikkor 50mm f/1.4 AiS ~ partial teardown

Nikon Nikkor 50mm f/1.4 AiS ~ partial teardown

Nikon Nikkor 50mm f/1.4 AiS ~ partial teardown


The End

Tuesday, May 17, 2022

Nikon Nikkor-N 28mm f/2 pre-Ai ~ field flatness and "sharpness"

Ok.  Once more.  With feeling.  

Nikon Nikkor-N 28mm f/2 pre-Ai

... and continuing with the series of posts on field flatness and "sharpness" I'd like to take a look, this time, at a Nikon Nikkor-N 28mm f/2 pre-Ai lens.

Here is what Richard Haw has to say about the lens.   

Here is what the guys over at MIR have to say about the 28mm optic.

I picked this lens up off That Auction Site for a bit less money than they typically trade for.  Fearing the description might've left something out, I was pleasantly surprised to find the lens to be in very good condition.  Optically it appears mint.  So, in short, a win for the Home Team.  Or something like that.


Setup

  • Sony A7 - ISO50, 2 second timer, in-camera levels used to square the whole plot up
  • Manfrotto tripod - it's capable of securing an 8x10inch view camera, so it's sturdy enough for this
  • Lens - Nikon Nikkor-N 28mm f/2 pre-Ai (updated with factory Ai aperture ring)
  • Rawtherapee RAW to jpg conversion - Auto-Match function, but nothing further (ie: NO Capture Sharpening) to minimize processing effects

Comparison

Here is the scene setup.  You can see we have new curtains.  Life is good, isn't it?


Nikon Nikkor-N 28mm f/2 ~ Field Flatness Check


[As always, click on the image and look at it to 100percent file size to see whatever there is to be seen.]


Nikon Nikkor-N 28mm f/2 ~ Field Flatness Check


Comments

The Nikon Nikkor-N 28mm f/2 pre-Ai behaves similarly to all the Nikkor lenses I've looked at recently.  The field is acceptably flat from wide open, even if the extreme-extreme corners go slightly soft.  One click down and everything is good, even to the very edges.  By f/4 the under-corrected spherical aberration is gone and this lens is as sharp as anything modern.

You'll know what I'm about to say, of course.  Nikon designed their lenses to create a certain out of focus rendition behind the point of focus by designing into their lenses under-corrected spherical aberration.  With very few exceptions, this rendering is consistant across the line of optics from the start of the SLR era right up to the beginning of the advent of the autofocus days.

This is why I am no longer obsessed with "how sharp" a lens is wide open.  In general, wide open is where I get to see what was on the mind(s) of the lens designer(s).  That's where I've found lenses with "character" strut their stuff.

As for using this 28mm f/2, it's slightly bigger than its sisters 35mm f/2 Nikkor-O and 24mm f/2.8 Ai.  Yet it feels good to use, once I got over the impressive Sony A7 + adapter + lens length.  It's not for the faint of heart.  

The overall length observation is where I've wandered down many an old rangefinder lens path to see if there might be something good which might help keep the overall kit size to a minimum.  Alas, no.  I've not come across anything that renders the way these old Nikkors do.  Modern AF glass lack the characteristics of these old lenses, so there's little to no help to be found there, either.

Like the three!!! Nikkor 50mm f/1.4 I recently acquired, I'll have to work with the 28mm f/2 for awhile to fully sort out if I like it, or not.  At first blush, though, it does seem to be a very nice lens.  It fits very nicely between the easily scene distorting 24mm and the pretty but sometimes too tight feeling 35mm.

As I said in the last post, stay tuned.  Photos soon.