Continuing the Mad Quest to look more deeply at this Dastardly Difficult to Wrangle Under Control Pentax 85mm f/2.2 Soft, I'd like to now consider image processing and its influence on soft focus Pictorialist effects.
As I previously wrote, there was an underlying "sharpness" to the 85mm Soft that lay just below the under-corrected spherical aberration "glow." I see this from wide open.
One thing we have today that we didn't back in the Old Film Days are a vast array of tools that can be used to modify various aspects of an image. Certainly, there were processes we could use in those Old Dinosaur Days of Film, such as contrast controls and masking.
Contrast controls should be self-evident.
Masking in the Old Film Days could be used for at least two ends. One was to control global contrast when using contrasty print media. I'm thinking of Christopher Burkett's fabulous works printed to Cibachrome. I've been fortunate to see his work in person. He is clearly a Master Print Maker and his images absolutely "sing." He masks everything he prints.
Another use for masking was to reveal the mid-tones of a scene. We used to do this in a photo-print lab that I worked at. It was a time consuming, exacting, difficult process. It was rather expensive, too. I'm not sure how many clients we actually had, if any, for the service.
A few Dinosaur Age Film Photographers created softened images that had a certain "spark" to them. Considering the works of David Hamilton and his hairspray filters, it's interesting to note that he used Ektachrome 200 film that was pushed to 400ASA or 800ASA (and perhaps more?).
This did two things. First it increased the grain size, as would be expected. I'm convinced the grain added a "artful" distance between the viewer and the subject. I feel this is the case from looking at David Hamilton's last work. It's too "clean" looking, even though the work had his signature soft rendering.
Second, the push development process increased contrast. I'll bet dollars to doughnuts that normally processed 200ASA Ektachrome images would've been seen as too soft, in part due to the lower contrast.
I'm imagining that David Hamilton stumbled upon a process that "worked" for him. The way he lit, filtered (light hairspray on UV filter), composed and printed his images very likely depended on his choice of film and processing. He might not have known "how" to get from here there, yet I'm continuing to imagine that he uncovered a useful process, perhaps by accident and/or by experimentation, liked the results, and made a career out of the whole thing.
That's one of the great things about photography. There's so much room for experimentation and exploration. If something doesn't "work", we can build on what we've learned and try something else. Even if, back in the Good 'Ol Film Days expérimentation could be a lengthy, hit/miss process.
Sometime I might share a black and white film developing process that broke many of the "rules" of film development, yet was the foundation for a successful Lord and Taylor ad compagne that ran for years. The photographer I learned the process from was rather successful and his works looked on some level more like "art" than photography. How Robert Randall came upon the process I'll never know. All I know is it "worked."
Coming to current time, digital image processing includes a number of functions that we would've given our eye teeth for back in the Old Film Days. Luminosity masks being one example. Clarity and Texture functions in Pay-dobe' parlance, or Local Contrast and Micro Contrast in RawTheraee terms being another example. These and many many other tools are well integrated into digital image processing software. One can view the impact/results of these functions instantaneously. No need to wait a few days for results to come back from a laboratory.
In this spirit I experimented using RawTherapee hoping to find a way to unlock the veiled resolution hidden in the Pentax 85mm f/2.2 Soft lens. This post is described what I found.
Setup ~
- Camera -
- Sony A7, 100ISO, 2sec timer, "A" mode
- Lens -
- Pentax 85mm f/2.2 Soft at f/2.2, f/2.8, and f/4
- Bogen tripod
- RawTherapee -
- Global contrast increased by image to taste
- Local Contrast increased by image to taste
Image Processing Comparison ~
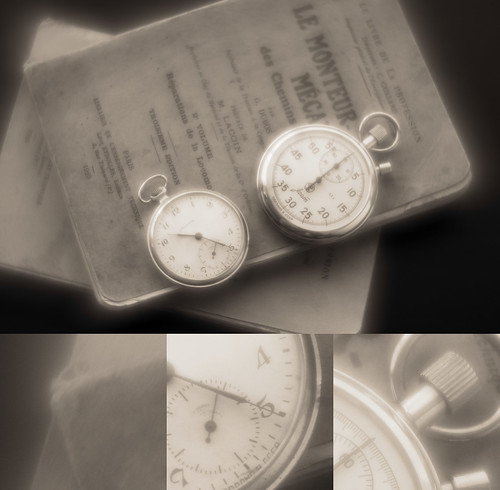
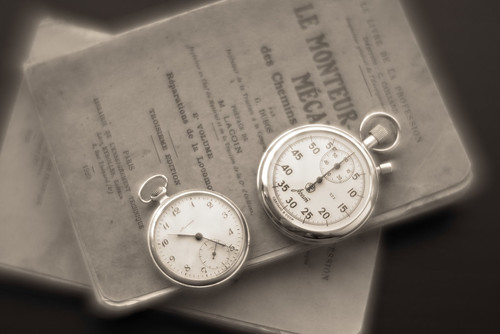
As always, click on the image and enlarge to 100percent to see whatever there is to be seen.
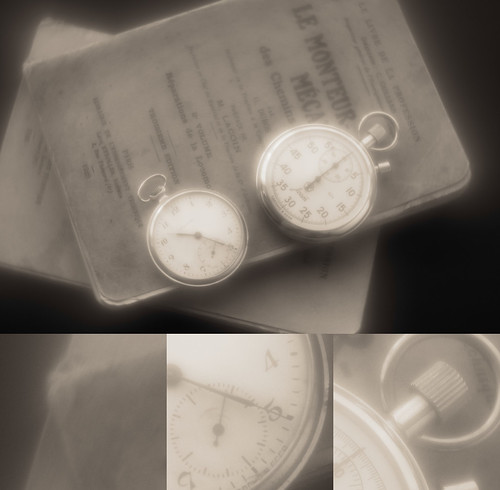
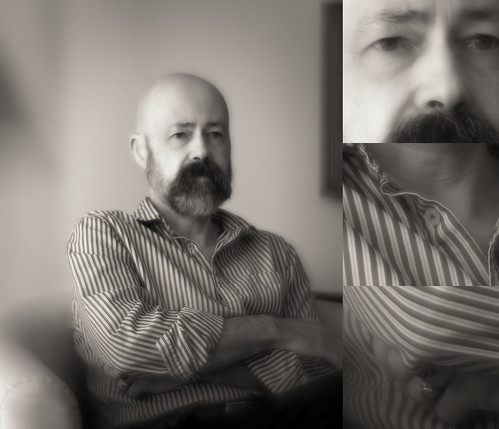
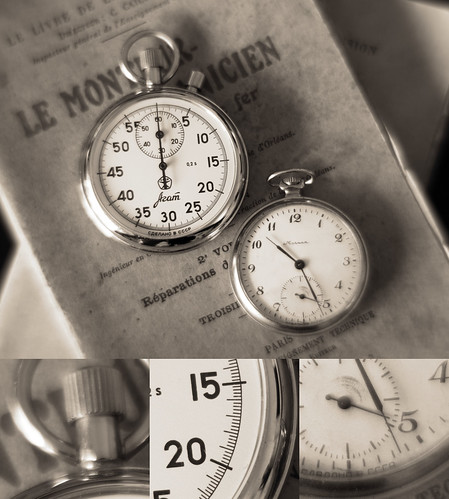
Pentax 85mm f/2.2 Soft at f/2.2
Base Image
Pentax 85mm f/2.2 Soft at f/2.2
+ image processing
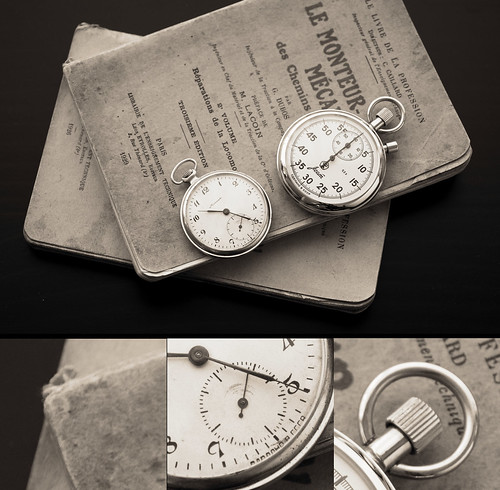
Pentax 85mm f/2.2 Soft at f/2.8
Base Image

Pentax 85mm f/2.2 Soft at f/2.8
+ image processing

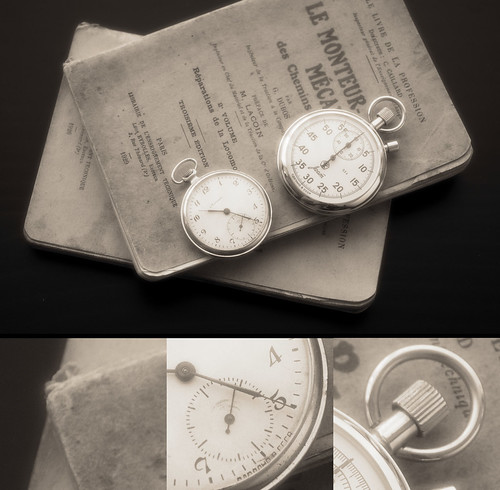
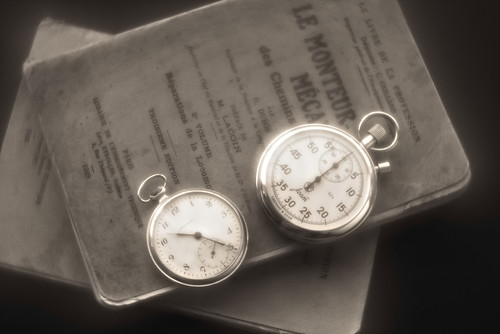
Pentax 85mm f/2.2 Soft at f/4
Base Image
Pentax 85mm f/2.2 Soft at f/4
+ image processing