Monday, January 20, 2014

Photography Around Paris ~ la traversee hivernale 2014

I recently posted a list of events that might be of interest to photographers living or visiting Paris, France.  This is the first installment of a series of blog posts devoted to checking off items on that list.

My sister blog, Retiring Out of America, will cover each event or location from the perspective of "alternative" things to do and see.  This photography blog will cover these things from the perspective of cameras, lenses, and image making technologies.


I begin with la traversee de Paris, hivernale, 2014.

Twice a year, once in January and again in July, l'Association Vincennes Anciennes hosts a great photo-op.  Over 600 old cars, motorcycles, and (in winter) bicycles work their way around the streets of Paris.

In winter, they leave the Chateau de Vincennes around 08h00 in the morning, go to Monmartre thru la place de Republique, come down the hill to spend time in conversation while eating a bit of cheese and baguette, and drink a draught or two of le vin.  They then continue on to la place de Concorde, up the Champs Elysees, around the Trocadero, across the river to le tour Eiffel, down the Blvd Saint Germain des Pres, across Pont Sully, and back to the Chateau.

The summer route is different.  It starts at the Chateau de Vincennes, it ends on the west side of the river Seine at the astronomic observatory at Mudon.

Early in the morning, French enthusiast photographers set up their tripods and get to work photographing the early arrivals.  Later, many tourists wielding low-end cameras can be seen wandering around the city snapping images as the cars blast by.


A good approach to photographing the event could be to spend a few hours in a location where everyone has parked their cars.  There are several such locations around town.   The following is what I've watched being put to good use in those situations.
  • Camera on tripod
  • Standard zoom or fixed focal length lens
  • Image stabilization turned OFF
  • Sensor sensitivity set to a very low ISO (ie: ISO50 to ISO200)
  • Lens aperture set to f/8 or f/11 for crisp detailed static display images.
  • Triggered using the two or three second delay

For wandering the crowds as they gather, here is what I've seen put to good use.
  • Camera hand-held
  • Standard zoom
  • Image stabilization turned ON
  • Sensor ISO set to float
  • Aperture set to wide open (to limit depth of field and separate the subject from the background)
  • Shutter speed set to at least 1/150th of a second (to kill blurry images) 
  • Triggered in Single Shot or Continuous mode

If you choose to photograph the cars as they move, you might keep the following in mind.
  • Camera hand-held panning _with_ the chosen vehicle
  • Longer than standard zoom (I like 70-200 on APS-C or 100-400 on Full Frame, but YMWV)
  • Image stabilization turned OFF
  • If you want sharp images of cars (that might not give a sense of speed) - Sensor ISO and lens aperture set to float, and shutter speed set to 1/500th of a second or higher
  • If you want to capture the sense of speed - Sensor ISO set low, lens aperture set to between f/8 and f/16, and shutter speed set to between 1 second and 1/15th of a second (depending on how much background blur you like)
  • Triggered in Single Shot or Continuous mode (depending on your shutter speed)


When you're done, you can post your images to Flickr for all the world to see and enjoy.

Thursday, January 16, 2014

One camera. One lens.

I know.  This has been plastered all over the 'net.  Still, it's great stuff!

It looks like the artist uses a Canon 5D MkII and a Canon 135mm f/2 L.  That's it.  Or at least that's it for the images shared in the link.

While we're wondering over the sparse equipment she used, consider instead her use of light and composition.  Outstanding, isn't it?  Classic.  Artistic.  Gorgeous.

Why don't we all make images this good?

Something to think about.  I know I am.

Wednesday, January 08, 2014

Canon shutter count and Linux...

Canon is well known for not allowing easy access to a camera's total shutter click count.  Apparently other manufacturers are not so guarded.  I use Canon cameras, so what to do?


A quick search using the Force (google) revealed several methods.
  • EOS Count is a for (small) pay website
  • EOSInfo is free, but can't report some DSLR shutter counts (including the 7D)
  • Linux + gPhoto2 is an Open Source Software solution that might drive some people nuts
You can probably guess which approach I took.  Yes, it was the Linux + gPhoto2 approach.

To be completely honest, I tried EOSInfo first.  It gave a correct count when I connected a 5D MkII, but it did nothing for a 7D.  This is why I turned to Linux and gPhoto2.

My recipe for getting at the 7D's shutter count and confirming the 5D MkII's shutter count is as follows -
  • MintOS Linux
  • Installed on a 4 gig USB stick using unetbootin
  • HP Pavilion dv7 booted to Linux
  • gPhoto2 installed from a terminal command line "sudo apt-get install gphoto2"
  • USB connect a camera to the computer
  • Turn on the camera
  • Open a terminal to access a command line interface
  • Type "gphoto2 --get-config /main/status/shuttercounter" to read the shutter count

I experienced two wrinkles, both having to do with being unable to lock the port or finding the port in use by another program.  The 7D required the following to work -
  • Terminal command line "ps aux | grep gphoto2"
  • Read the process(es) ID (PID(s)) of anything that says "gvfs gphoto"
  • "kill -9 " of all processes found in the prior command
  • In my case, the "gphoto2 --get-config /main/status/shuttercounter" command then worked
 In the case of the 5D MkII, I needed to do the following -
  • Connect a USB cable between the computer and camera
  • Turn on the 5D MkII
  • Terminal command line "gphoto2 --get-config /main/status/shuttercounter"
Attempting the 7D approach of finding and then killing PIDs related to gPhoto2 when connecting a 5D MkII did nothing but bump the PID by 2.  Go figure.  I'm sure there is plenty of detailed information in the various bug lists for Debian based Linux releases for what's happening or how to properly operate gPhoto2.  I didn't take the time to read any of it after finding my own work around. 

Brute Force and Ignorance (BF&I) rules!

In the end, the 5D MkII reports just a few ticks over 58,000 shutter actuations after five years of very hard use.  The 7D is much more lightly used, reporting just over 17,000 shutter clicks.  The 7D is still a youngster.  Though I heard from a friend yesterday that he knows of an original 12.8mpixel 5D that has over 800,000 shutter releases after having it's shutter mechanism attended to on a regular basis.  So with that in mind, the 5D mkII is also a youngster.

Saturday, January 04, 2014

Photo-adventures in and around Paris ~ 2014

When we lived in the US, our city played host to all manner of wild and wonderful parades, festivals, and artistic adventures.  Moving to Paris I learned that I would have to dig a little deeper to find a similar level of creativity.


The laundry list of tourist photo-ops is well known.  I quickly am bored by such things.  While there is always a uniquely personal way of expressing and sharing a scene, Paris has got to be the most photographed city in the world.  People don't typically like to have a camera thrust into their face by strangers, which can make street photography challenging here.  So I tend to prefer the side-shows, the creepy or odd, and the less known events or places where seemingly every is carrying some kind of camera.

With this in mind, here is my short list of must do photography "friendly" things for 2014.  It's a list dedicated to serious photo-making opportunities.  Many of the events involve costumed people who are happy to pose for you.  So dust off your camera gear or cell-phone camera and meet me somewhere around l'isle de France.

Year round -
  • La Rotonde de Longueville ~ steam locomotives.  Lots of them.  Some working.  Some not.
  • Catacombs ~ the remains of millions of Parisians.  Take your own flashlight for the darker, creepier areas.
12 January -
5 to 9 February -
  • Retromobile ~ Old cars, motorcycles, and motor memorabilia at la porte de Versailles.
2 March -
30 March -
  • Carnival of Women ~ Men and women dressed up as royalty, queens, and other femininity.
14 to 15 June -
2 to 6 July -
  • Japan Expo 2014 ~ Anime, Manga, Cosplay, Lolita.  It's how France's youth "puts on the dog."
4 to 6 July -

I'll be attending as many of these as I can.

Friday, January 03, 2014

Now what...?

A recent Dear Susan blog entry sparked my following (edited) response to the questions raised concerning the present state of photography.


There are raised a series of questions that many of us have been struggling to answer.

For me, here is the nub of it: We _must_ decide what is important _to each of us as individuals_.

Why do we pursue photography with the level of passion that we do?

Is it the feeling of joy that a "superior" piece of photographic equipment can give?

Is it the prospect of making money from photography?

Is it the art of a final work-product?  That is, is it an image or project of images that fully expresses what you feel, or what you must say?

I dare say that we must be honest with ourselves.

I put it this way because I see many people tend to confuse these three elements into believing in there somewhere some kind of magic will mystically appear.  It won't.  Not even the world's greatest artist ever had a style or approach drop into their laps, unbidden, without fully engaging their art.  Tools, in those cases, become utterly secondary to what's going on in the artist's head and heart.


If you love camera equipment, then love camera equipment.  Realize that you might not make a pleasing image, but let's be honest about your motives, shall we?

If you want to make money from photography, then pursue it in full knowledge of the styles and practices that are currently selling.  This, so you can increase your chances of financial success.

If you want to make art, then it's possible that money and equipment will only be a means to an end.  Your results may successfully reflect what you feel you must say.

Answers to these questions will be vitally important.  Why?  Because what is happening right now is a redefinition of photography.

It's had a great run for the past nearly (but not quite) 200 years.  The technologies that enable image making have evolved to the place where the act of photography has been made commonplace and easy.  Practically no thought, planning, or practice is required.


Someone wrote an article that triggered a cascade of realizations in me about the present state of photography.  In short, there has been a mass movement from the potential for photographic art and reportage to an instantaneous sharing of experience.

Think about that a moment.  Experience.  Not art. Not informative reportage.  Experience.

When we think about what we want to say to each other (in our blogs and social media outlets) we come constantly straight against the question:  Who cares and why?  Why does what I say matter? 

The worst part if it is that even with all the effort it takes, you run the ego-deflating risk that no one will look.  That no one will care.  Then what?  Why are we doing what we do?

It takes a strong person to look boldly into the face of reality, doesn't it?

Wednesday, January 01, 2014

Study image post-processing in Paris, France

Bonne Année!

I am leading a 4 day, once a week, photographic image post-processing class in Paris, France.  There are three slots left.  So if interested, sign up and take part in the fun!

Here is the announcement.

Here are the details (from the announcement) -

Thursdays Jan 9, 16, 23, 30 3pm - 5:30pm
The "taking" of a good photograph is quite often just the start to "making" a wonderful image.  The great photographic masters learned this by studying the great painting masters.  We, in turn, can learn from all of them.

After reviewing how we can organize our photographic workflow, students will learn how to apply film-era print techniques to digital images.  We will be learning from the Masters of the Chemical Darkroom Age.  Students will explore important details of what goes into making a good photograph great.

We will learn how to properly vignette a scene to direct a viewer's eye.  Next, classic techniques of dodging and burning will be studied.  We will then experience the importance of spotting and correcting image defects.  Using our new-found knowledge, we will review and comment on each other's work.

Course Requirements: Students need to bring their own laptop computer with image processing software, as well as their own images to work on during class.

Instructor: Christopher Mark Perez is an internationally published photographer (LensWork, PhotoLife, Gimp, and SilverShotz Magazines, as well as several books of Steampunk creations) and competition winner (including The Strobist, and The Center for Fine Art Photography). Christopher recently moved to Paris to connect with creative people in the pursuit of making fine photographic images.


Wednesday, December 18, 2013

Creating High Dynamic Range Images with Luminance HDR

Realization came as I waited outside the restrooms at the Charles Russel Museum in Great Falls, Montana. Yes, it felt as strange to me then as it likely does to you reading this now. Fortunately, it had more to do with the relationship of art to photography and tonal values than anything else a person might imagine “realization” to mean.
I was looking at a somewhat recent painting of a grand Montana landscape. I saw clear detail of bark in heavily shaded trees growing in a calm and pretty glen in the foreground. I could see that there was detail in the clouds surrounding a mountain in the background. It was then that I realized the challenges of photography in these kinds of situations that are more easily solved in painting. How do we keep detail in the shadows, prevent bright clouds from being “blown out”, and manage the tones of the overall scene in a realistic manner?

In film photography, contrast can be carefully manipulated through the complex use of color filters to create black and white masks. One of my favorite photographers to use this approach is Christopher Burkett. His work is absolutely stunning and clearly illustrates how photography is art in the manner of controlling all of the tones across the entirety of a vast scene.
For those of us who use digital cameras, there are several software tools specifically designed to help us manage High Dynamic Range images. Such software holds the promise of helping a photographer reveal shadow detail, while retaining highlight tones and pleasing tonal values across a scene. A popular application is Photomatix. It's not too expensive, yet, being a strong advocate for Open Source Software, I used something called qtpfsgui.
At some point, the qtpfsgui project was re-energized with new software developers and the name was changed to Luminance HDR. It was then that the application became rather unstable on my computers. The software would crash when using certain tone mapping operations. I was never able to produce a full resolution Canon 5D Mark II file (5616 x 3744 pixels) without the application suddenly disappearing. So I stuck with qtpfsgui version 1.8.x.

Recently, out of curiosity, I wondered how the Luminance HDR project was proceeding. The software was now up to version 2.3.1. After installing it on my old Windows 7 laptop I quickly saw that much had changed. As I tested the latest version, I realized that Luminance HDR has become a solid, stable piece of software. I can now create full resolution 5D Mark II output files and the tone mapping operations behave in a rock-solid, consistent manner.

I am very happy with the progress that has been made. So, here is an overview of how I use Luminance HDR to process my HDR images.
Step 1 – Capturing an Image
My old Canon 5D Mark II provides a method, called exposure bracketing, to capture a scene in three exposure steps. The ability to over- and under-expose, that is, to set the exposure value (EV) range, is limited to plus or minus 2EV. Still, this is useful for most situations I find myself in.

I use a tripod when making these kinds of exposures in order to keep the three images aligned. It makes the image stacking operations (which we will soon encounter) easier. Many current cameras from Canon, Nikon, and Sony provide in-camera HDR processing, which allow handheld HDR photography, thus eliminating the need for a tripod, unless a photographer finds himself in a dimly lit environment.
In any event, the trick is to capture as much detail in the highlight and shadow areas as possible. This is information the software can use to create a tone mapped image.


Step 2 – Launching Luminance HDR
Starting the Luminance HDR application brings you to a large desktop-like layout. Take a moment to familiarize yourself with the location of the rich selection of operations. To keep things simple, and to show a nicely streamlined process flow, we will use only a few of them here.

Step 3 – Invoking the HDR Creation Wizard
Clicking “New HDR Image”, found on the left end of the tools bar, brings you to an information page which you might find interesting the first time you run the program. Click “Next >” to continue to the next operation.

Step 4 – Accessing the Images
The Creation Wizard helps you locate and load your images into the program. Find the big green “+” in the center of the window and click it.


Step 5 – Selecting the Input Images
The image selection window allows you to navigate to and choose the images to be processed. In this example, I have selected three images of the same scene with exposure values of +2EV, 0EV, and -2EV.
If your camera provides an HDR-ready image, select just the single file. All the highlight and shadow information will already be integrated for further processing.

Click “Open” to continue.


Step 6 – Viewing the Selected Images
You are now returned to the Creation Wizard window. The list under “Currently Loaded Files” displays the names and exposure values of the images that were loaded. The “Preview” area shows the currently-selected image.
If you used an older camera that created three separate files, and if you handheld your camera, you will want to select the “Autoalign images” checkbox found below the preview area.

Click “Next >” to continue.


Step 7 – Passing Through the Editing Tools Window
You will now be in the Editing Tools window. For the way I use the software, there is nothing needing to be done here.

Click “Next >” to continue.


Step 8 – Choosing Settings for HDR Creation
There is a selection for “Choose one of the predefined profiles”. The default is “Profile 1”. The various profiles blend the image layers in different ways. “Profile 1” is a very good place to start. In fact, you might not ever use anything else.

I sometimes use “Profile 6”. It blends with a bit of Gaussian blur and produces an HDR image with less noise than “Profile 1”. Still, much of the time I stay with the default profile.

Click “Finish” to continue.

Step 9 – Choosing Settings for Tone Mapping
The image is finally ready for tone mapping, which is, for me, the entire point of processing HDR images. It is where the tonal values across a scene are manipulated in potentially visually pleasing ways. This is where the magic happens. If an HDR image is not tone mapped, it will likely look flat and unappealing.

Luminance HDR gives the user a rich variety of options for creating wonderful images. These are the “Operator” selections found in the upper left portion of the application desktop. Each operator takes the input HDR image and processes it in its own way. Additionally, each operator has its own collection of parameters with sliders that allow you to further modify the actions of the tone mapping. Exploring the possibilities as they apply to your images is time well spent.
In this example, I have selected the “Mantiuk '06” operator and set the “Contrast Factor” to 0.60. I set the “Result Size” to 5616x3744, which is the full resolution file size of a Canon 5D Mark II.

Step 10 – Initiating Tone Mapping
Press the “Tonemap” button, which is at the bottom of the controls on the left side of the work area.

When completed, the tone mapped image will appear in a new “Untitled” tab window on the right side of the work area.

Step 11 – Adjusting Levels
The dark areas of the tone mapped image in this example were too gray for my tastes, so I decided to adjust the color levels by selecting “Adjust Levels” from the tools bar to open the Levels and Gamma dialog box. Clicking and holding the tiny left-hand triangle under the Input Levels graph, I slid it to the right to the point where the input level information for the image started. Clicking “OK” saved the change and returned me to the Luminance HDR work area.


Step 12 – Saving the Tone Mapped Image
It's now time to save the tone mapped image.

Selecting “Save As” from the tool bar opens a window where you can navigate to the desired save location and gives you the field to enter an output filename. The output filename is preselected based on the tone map operators and parameters. You can, of course, change the name to anything you like.
When ready, click “Save”. You can now safely exit the Luminance HDR application.


Your HDR image is now ready for processing in GIMP. Here is my final image.


Summary
In this example, I took three images of a steam-powered crane with the camera facing into the sun. The three images were underexposed, overexposed, and properly exposed. They were stacked up and tone mapped using the Luminance HDR Open Source Software application.

You can see that the output of the HDR process includes information in the shadows as well as good detail in the clouds surrounding the sun. Compare the Luminance HDR and GIMP-processed file to the original exposures found at the start of this tutorial and you will perhaps see what I mean.
In this way, a photographic artist can create images with as much detail in the highlights and shadows as a painter might paint in extremely high dynamic range lighting situations encountered in the wilds of Montana.

Sunday, December 15, 2013

Tools of the Trade ~ on a Very Inexpensive Means of Making Very High Resolution Images

Exploring the art and craft of image making can lead a person down some rather obscure, but interesting paths.

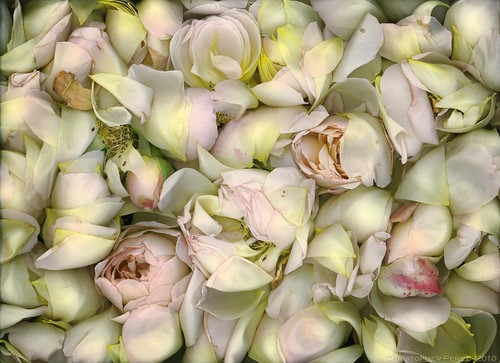
Roses

Looking through the de Groot Foundation exhibit at le Salon de la Photo here in Paris this past Fall, I came across an amazing image.  It was a large print of a dead European blackbird.  Mrs. de Groot shared a story about the French jurors who were working with their California counter-parts.  She said that the French jurors insisted that the Americans see this print.  It was one of the most beautiful images they'd seen this year.  I had to agree.  The image details were phenomenal.  The bird was perfectly composed off-center with parts not captured and out of the frame.  The tonal range and lighting were spot on perfect.  I knew instantly how the image was created.

I recently wrote about cameras, lenses, and optical properties.  In passing, I remarked that there was a way of making very high resolution photographic images for nearly impossibly cheap.  The approach used by the young English artist came to mind when I wrote my earlier blog entry.

Iris and Shell

The technique is sometimes called "scannography".  The tools are the simple, widely available, and nicely inexpensive flat bed scanners.  The attraction is the 1200 to 9600 dots per inch (DPI) resolution (depending make and model) these tools can give.  Image files can be enormous and the image details incredible, far surpassing the resolution of currently available full frame DLSRs and large sensor medium format cameras.

Subject lighting is limited.  Front and sometimes back are the only available lighting options.  In this way, flatbed scanners don't easily lend themselves to general purpose photography.  Yet I feel that anyone who is interested in making very high resolution, very fine art can find a useful creativity tool in a flatbed scanner.  Just look at the kinds of results that are possible and you, too, might agree.

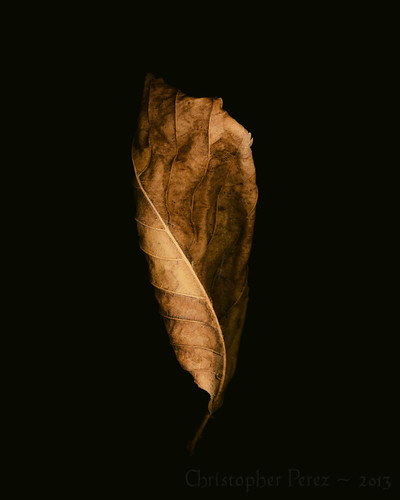
Study in Leaf

In the USA, a person visiting a Goodwill Store can often find a perfectly usable 8.5 x 11 inch flatbed scanner for as little as $5.  Here in Paris, using leboncoin (France's better laid out equivalent to Craigslist), I found a brand new HP scanner for 25Euro.  Sometimes businesses in the state of collapse give these away for free.  It's unlikely a person will find a great condition Full Frame DSLR with lens in a dumpster dive, but a flatbed scanner is not out of the question.

The trick is to find a scanner with a connection capabilities that match your computer.  In my case it's a USB port.  Truly old scanners are commonly found with the old multi-pin D-connector parallel port printer interface spec, which might make connectivity and device driver availability a problem with current computer systems.  Shop carefully and you'll likely find something you can use.

For myself, I love the way a flatbed scanner renders a scene.  The light in incredible.  It's very difficult to get these kinds of "Dutch Masters" lighting any other way.

In fact, there have been times when the Muse was away on holiday that I've felt I should sell my cameras and lenses and do nothing but flatbed scanning.  That's how appealing this approach to image making has been to me.


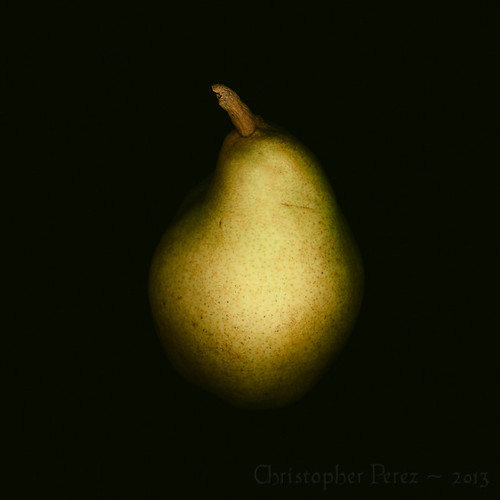
Study in Pear

Saturday, December 07, 2013

Next edition of the Gimp Magazine is about to launch...

... and Your Humble Servant Photographer (YHSP) will have another Masters Class tutorial published therein.

Here is what Steve (the editor) kindly says -

Christopher Perez is back with his master class tutorial titled ”Gum Over Palladium”.  This is an eight page tutorial that shows you how to create the image style shown above using a series of filters and color gradients. We are working hard on the final editing and preparations for Issue #5 of GIMP Magazine.  Please join us on December 11 to make this our best launch ever.  You will not be disappointed!  In the mean time be sure to check out Christopher’s image gallery on flickr linked above.

In related news, I will be leading two workshops early next year at WICE.  The first will be an advanced level image processing class.  This course will cover a lot of ground and will illustrate how to make a good photograph "pop"!  The second course will be a re-run of last Spring's studio lighting photography course.  Following in the footsteps of the Masters, we will explore how to make use of light in the studio.


Betty Page Rocketeer ~ by Riddle

Saturday, November 30, 2013

Tools of the Trade ~ on Making Big Prints

I recently visited the Salon de la Photo and happened to wander by the Canon floorspace.  They had a huge presence at the show, and they hung very large prints.  The images I looked at were made using the 18 mpixel Canon 7D.  I was impressed.  The prints were at least 20 x 30 inches in size.  They remained wonderfully sharp, even on close inspection.  I think anyone believing they need a 36 megapixel sensor to give you a nice, sharp, huge print would have been impressed, even if they had no idea what camera was used to make the prints.


Original image (downsized to 1024 pixels), straight
out of the camera that used "Standard" processing
and in-camera actions.  The photo was made at sunset
on the middle of les Deux Pont next to l'isle St Louis.
The camera was hand-held and the kit len's OSS was enabled.

The experience made me think about an article titled "Big Sticks" that I read over on the Online Photographer blog some years back.  It's a great read and I liked the many points that were being made.  The comment that really grabbed my attention was,

"... a reader named Stephen Scharf not long ago objected to some things I said about the size of prints you can make from various size sensors. He claimed that he could make an excellent 13 x 19" (Super B/A3) print from 4-megapixel image files..."

M. Scharf used, at the time of the article, a Canon 1D.  It has a 4mpixel sensor.  By current standards, that's rather small.  Mike Johnson, the Online Photographer's editor, says "...As proof of concept, he sent me a print..."  M. Johnson was impressed, to say the least.  The print was sharp and beautiful.

M. Scharf shared his process in the article.  This got me to thinking.  So I took a look at what I could do along similar lines using different tools.

Processed original sized image, including
the first pass at Luminocity Sharpen-ing
(downsized to 1024 pixels for this blog entry)

I wanted to test the full sequence to see if I could understand and, perhaps, match M. Scharf's processing path.  If successful, I could put yet another nail in the product marketing coffin filled with half truths and outright lies.

I use the Gimp for the bulk of my image processing.  Taking a close look at M. Scharf's process, I tried to find equivalent Free Open Source Software (FOSS) equivalents to the image sharpening tools he used.  After watching how various FOSS sharpening methods impact one of my images, I settled on a script found in FX Foundary's toolkit.

A simple "unsharp mask" produced much too much noise in the smooth areas for my taste.  Other sharpening methods gave various results, but I still saw too much noise in the smooth regions.  It was after going through nearly every method available to Gimp users that I found "Luminocity Sharpen".  It's under FX-Foundary -> Photo -> Sharpen -> Luminocity Sharpen

For my test, I left the Luminocity Sharpen parameters UnSharp Mask (USM) and Find Edge Amount as default.  More recently, I've found I prefer setting the Find Edge Amount to 1.0,while leaving the USM defaults as is (0.5 in both cases).  The difference is subtle, so you would need to test to see what you like best.

Here is the test process for the images you see here:

  1. Process image in the Gimp to the point I'm happy with it
  2. Luminocity Sharpen with Find Edge Amount set to 2.0, and the USMs set to 0.5 in both cases
  3. Up-rez the file where Interpolation is set to Cubic" from Image -> Scale Image
  4. Luminocity Sharpen a second time with the same setting, Find Edge Amount to 2.0, and USMs to 0.5 in both cases
Original, processed, first Luminocity Sharpen-ed,
up-rez'd to 8000 pixels, second Luminocity
Sharpen-ing ~ This is a MASSIVE file!
(downsized to 1024 pixels for this blog entry) 


The results are enlightening.  Indeed, if I start with a low noise base image, I can up-rez a 4592 pixel in the long dimension image file to 8000 pixels in the long dimension and retain apparent resolution.  I say "apparent" because no information is being added.  It is only contrast that is carefully being added to light/dark transition areas.

For this reason, you can see that the 8000 pixel in the long dimension image has slightly more contrast than the original processed image Luminocity Sharpened just once.

The reason I'm settling on FX Foundary's Luminocity Sharpen script is that it touches only the light/dark transition areas.  The smooth tone areas are left clean and beautiful.  There is no apparent  added noise in the smooth tone regions.

Using the print size calculation I provided in an earlier blog entry, you can see we can take a Sony NEX5 (original) 14mpixel image size and enlarge it to over 30 inches in the long dimension, while retaining apparent resolution.

Obviously, this approach breaks down at some point.  For this reason it is worth the time it takes to test these kinds of processing approaches to see for yourself how far you can satisfactorily push things.  You might find that sensor size simply does not matter for the kinds of images you create.


There are two things illustrated here (you might want to click on the image and make sure you're looking at it full size).  

First, the top row shows what happens when you take the raw original file, the processed original sized file, an up-rez'ed to 6000 pixels file, and the massive 8000 pixel monster file and view them at the same dimension of 8000 pixels.  You will easily see the "pixelation" that takes place up through the 6000 pixel image. 

Second, you can see the bottom row as each file is viewed at it's native size at 100 percent enlargement.  You can easily see the effect of Luminocity Sharpen-ing on the three processed files.  The contrast transitions between the light and dark areas are increased.  The original, straight out of the camera in-camera processed image is "soft" compared to the other image samples.  The simple first step Luminocity Sharpen-ing looks pretty nice and "cleans up" the light/dark transition areas.  Now look carefully at the massive 8000 pixel monster file cropped section and compare it to the other files.  While no information is being added, the up-rez'ed image looks pretty darned fine, doesn't it?

Tuesday, November 12, 2013

Tools of the Trade ~ On Considering an Important Truth

Assume, for a moment, that photographic tools are really no different than tools used by other artists.

Pencil, pen, brush, ink, paint, chisel, forge, and hammer are all tools of art.  When viewing a finished work, how the work was created is, many times, less important than how a viewer responds to a work.

Assume, for a moment, that the goal of photography is to make images that express how you feel and how you "see" the world. 

In this way, cameras, lenses, printers, and paper are simply tools of photographic art.  Carefully consider how you look at a photograph and see if you can tease apart the marketing hype and camera equipment forum driven relationship between how the image was made from how you respond to it.


~ Having a camera is many times better than not having a camera ~ 

For making truly great photos, it simply does not matter what you use. 

The properties of one camera over another are largely unimportant.  Cameras simply enable image creation.  As we have seen, the current crop of imaging sensors are more than sharp enough for just about any subject in just about any situation.  What matters is how you "see" and how you use the tools of photographic expression available to you.

On a practical level, any sensor of 4 megapixels or greater are capable to delivering critically sharp prints up to 13x19inches and well beyond.  I will write more about printing in the next blog entry on Tools of the Trade.  I hope to illustrate that, in making beautifully expressive prints or publishing to the web, sensor size simply does not matter.

Exception:
There is a interesting exception to my statement that having a camera is many times better than not having a camera.  There is a large field of photographic art that is, in the traditional sense, camera-less.  Commonly available and shockingly inexpensive flat bed scanners are the solution I'm considering here.  It is easy to find a perfectly usable high resolution flat bed scanner for 10USD/10Euro or less.

If you are curious about this photographic solution to image making and aren't already aware, check out Flickr's "Interestingness" selection of scannerart.  There are some wonderful ideas to be explored using this approach.


~ Having a lens is many times better than not having a lens ~

As we have seen, optical resolution out-performs currently available imaging sensors.  This holds true with an aperture setting anywhere from wide open down through f/11.

My claim that sensors are the limiting factor in photographic resolution, while seemingly heretical, is easily backed.  A blogger recently compared a Sony 50mm f1.8 against the much vaunted Leica Summicron 50mm f2. The author mis-understands the results by claiming equivalent optical quality between the two lenses.  From what we learn from my preceding blog entries, you can see what the role of the sensor really is.  In any event, results like these must drive Leica users crazy.  If they are interested in the finest image quality, their pricey equipment is really no better than, say, Sony's gear that's available at a fraction of the cost.

We have also seen where chromatic aberrations (CA) can effect resolution near the edge of the frame.  I talked about how to control the effects of CA in reading test results to learn which aperture settings return the lowest CA.

We have learned how to read modulation transfer function (MTF) charts.  Hopefully you can now see how contrast delivered by a lens to a sensor is different from all the other optical properties you might encounter. Field curvature and field spatial distortions could also be considered, but these details are not readily available in MTF chart information.

Yet, with all of this detailed knowledge about lenses and their properties, the single most important factor in image resolution remains the sensor.  Further, optical performance effects can be easily controlled in post-production.  Contrast, CA, and field spatial distortions can all be "processed" out of or corrected for by software you likely already own running on your computer and are many times corrected for in-camera.  In short, base optical performance need not be considered when choosing the best tools for your intended situations.

Exception:
There two interesting exceptions to my statement that having a lens is many time better than not having a lens.  There is a fascinating field of lens-less solutions that date back hundreds of thousands of years and were more recently used by medieval artists.  Solar eclipses have been safely visible for as long as there have been trees and beings to witness the event as images projected on the ground.  Much more recently, Canaletto was only one in a long line of artists who used a "camera" (the word means "room" in Italian) to project an image onto canvas from which he would paint.

In current photography, we have at our disposal two interesting lens-less solutions.  They are the pinhole and the zone plate.  If you like the style and approach of these solutions, you could altogether avoid the costs of a glass optic.  For inspiration, here is Flickr's "interestingness" images for pinhole and zone plate work.

Which might lead a reader to wonder: 
If cameras, lenses, product marketing, and on-going internet forum flame wars are not important in photographic image making, why did I spend four long blog posts and well over a decade of my life considering the minutia of photography equipment?

One answer is that I was trained and worked in software and electronics engineering.  Taking a rational view of the craft and art of photography comes naturally to me.  I have an innate curiosity about things and the way they work.

Another answer is that I felt pushed and pulled by the marketing hype and on-line discussion forums.  It seemed all to easy to be misled and to stumble on irrational explanations of things that simply were not provable.  When I say irrational, I mean it in the sense of being not rational, and in the sense of being emotional and not scientifically thought through.  So much of what passes for discussion about photography gear is nothing more than wishful thinking and unsupportable claims.

I wanted to get to the truth of the matter and that the truth I have come to understood is rationally justifiable.  Once the truth is known, I could then turn my time and energies toward other interesting things.  The truth of things allows me to safely ignore the yammering babbling masses and marketeers while concentrating on making the best images I possibly can.

If, on the other hand, it's easier to see the practical application of my conclusions, what better way than to share the work of someone who is increasingly internationally known, celebrated, and heaped upon with well deserved accolades?  While it will be easy to sort out what the photographer uses, try to postpone that search long enough to look at his results.  Perhaps you will see for yourself how effectively used photographic equipment quickly transcends marketing hype and on-line forum equipment flame wars.

As Bill Gekas recently wrote on Facebook, "Revisiting some photography groups and forums the other day made me a little sad that some things just don't change and probably never will with some people. All gear no idea!!!"

Monday, November 11, 2013

Tools of the Trade ~ Resolution and the Real World

Let's have a serious look at lenses and the ever-popular topics of resolution and IQ, shall we?

After reading my prior two posts (one and two) that set the stage for this series on Tools of the Trade, a reader should be able to easily follow details in this post.  I am about to make a potentially bold series of statements, and then will back them up with what I know from years of my own camera system testing.


1. Camera sensors currently limit image resolution.  Lenses do not. 

I know this is true from my own testing of optical resolution.  I looked at large and medium format lens performance on film, and, more recently, 35mm lens performance on digital sensors.  It took me over a decade of looking at this to understand what the results were clearly showing me from day one.  My understanding of optics, resolution, and true limiting factors to resolution were later confirmed by an optical physics professor who performs research at a university in the US.

It takes a terrible lens to see degradation in image resolution.  Are poor resolution lenses available?  It seem that there are not many, and those that exist tend to be priced accordingly.  Except if it has Zeiss or Leica label it.  Then you see the poor performers termed "quaint" or "having a certain look."  At the other end of cost, inexpensive kit lenses have had enough pressure from "pixel peepers" to force manufacturers to improve those optics (simply look at the number of 18-55mm kit lenses Canon has offered over the past decade).

Readers need to approach comments such as "...It is crop, not FF, that requires sharper lenses, since for photos displayed at the same size...", or any combination of "...this new big sensor requires sharper lenses..." with extreme caution.  The only factor of interest in terms of physics and resolution are the number of line pair per millimeter the sensor resolves.  The present limit of sensor resolution of any APS-C, micro 4/3rd's, Full Frame, Medium Format sensor remains less than 120 line pair per millimeter.

An optical physic effect called diffraction limit effects optical resolution only at very small apertures.  If your sensor resolves around 123 line pair per millimeter (center diffraction limit of any optic at f/11), you may begin to see resolution degradation start at f/16 and continue through to the end of your aperture range (to f/32 and beyond).  This leaves a very long aperture range available to you.  From wide open down through f/11, all these apertures will be available to you, and in terms of resolution, will out-perform your sensor.  This physics effect won't be seen on lower resolution sensors (including most APS-C and all Full Frame sensors in current production) until an optic is stopped down to f/16 and beyond.

Note: The obvious exceptions are "soft focus" optics that deliberately smudge a scene.  Nothing in over a hundred and fifty years of photography has changed.  


2. Modulation Transfer Function (MTF) charts do not tell us how sharp a lens is.

MTF charts only tell us the amount of scene contrast a lens is capable of passing along to the sensor at various low resolutions.  Look closely at any MTF chart and you will see lines that show the contrast given at, for instance, 10 line pair per millimeter resolution and another set of lines that show contrast retention at, for instance, 40 line pair per millimeter.  Given the physics of optics these are rather low resolution settings (scroll down to see the diffraction limit chart).

If MTF testing is not a measure of resolution, why then do lens manufacturers publish MTF charts?  It's because the human eye perceives resolution in most cases as contrast.  In practical terms, digital sensors will be able to capture a quick transition from black to white as long as a lens to provide it.  It's as simple as that.

When reading comments across the 'net, statements such as "...as you can see from the above MTF charts, now that you know how to read them, the difference that are seen can be easily be quantified..." need to be approached with extreme caution.  There is nothing in a MTF chart which correlates in any meaningful, direct way to other optical properties what you may find important.  This includes sensor resolution, field flatness, lens distortions, or chromatic aberrations.

Again, the only thing MTF is attempting to show is a lenses ability to pass contrast to the sensor.  And that, only on a flat two dimensional plane.  This last sentence has importance when we talk about field flatness.


3. Chromatic Aberrations (CA) can be measured and provide useful information about how a lens can perform at the edges of a scene at different apertures.

Many currently published lens tests measure a lenses CA.  It's worth the time it takes to review lens tests in this area as there is a real world and meaningful correlation between test results and real world camera system performance.

Let's take a look at three lenses: Canon 50mm f/1.4 USM, Zeiss 50mm f/1.4 Planar T* ZF, and Leica 50mm f/1.4 Summilux R.

What do we see?  Canon's CA, as measured at the edge of the image frame, is substantially less than one pixel width from f/1.4 all the way through f/11.  The Zeiss' CA is at least one pixel width, and varies according to aperture.  The Leica's CA also crosses over 1 pixel width at all apertures.

In the real world when using a Zeiss or Leica 50mm lens, a single pixel at the edge of a light to dark transition at the edge of the image frame may show purple or blue/green "fringing".  Is it enough to worry about?  That depends on your "pixel peeping" experiences.  A lenses inability to bring together the visible color spectrum to a common point may not be visible in a very large print.  You would need to decide.

Let's say you decide that a pixel's width of CA is important enough to you to avoid.  Taking this position, the currently priced 300USD new auto-focus Canon 50mm easily out-performs both the manual focus new 725USD Zeiss ZF and a used eBay'd 1100USD to 1600USD Leica Summulix R.  So understanding the level of CA a lens exhibits might be important in evaluating it's "performance" (using the subjective word).

Further, processing (either in-camera or on a computer) can eliminate CA effects.  Olympus and Panasonic are well known for providing this kind of processing in-camera.  In-camera CA correction by Canon, Nikon, and Sony should be catching up shortly (if they haven't already).


4. Different lens render the out of focus (OOF) areas in a scene differently.

The highly subjective phrase of "good" OOF attempts to define something called "bokeh".

You may read arguments on the 'net about OOF of one lens or other and which gives a better result than something else.  If "bokeh" is important to you, all that matters is that out of focus areas in an image give an even distribution of light across OOF highlight areas.

Out of focus area rendition testing is quite common.  On a practical level, any desired "bokeh" effect can be reviewed and compared between various lenses.  Note that there is nothing in a lens design nor in a MTF chart which would indicate how OOF will be rendered.

The exceptions, of course, are lenses that deliberately manipulate OOF areas.  Way back in the mid-1800's OOF effects were mathematically manipulated, starting with Petzval lenses.   The optical effects are in great demand today, if eBay auction results for Petzval lenses are any indication.

In the early part of the 20th century, Contax designed their lenses to produce a "creamy" OOF.  Leica lenses, on the other hand, were and are designed in a way that tend to give a "harsh" OOF.

In current times, Nikon offers two wonderful lenses, the 105 f/2 DC and 135mm f/2 DC.  Nikon's optical team used well understood optical principles that allow a user to change the lens element spacing which directly effects OOF. Twist the ring and change the OOF.


In reading comments across the 'net, statements such as "One of the areas of image quality that MTF can help determine is bokeh..." need to be approached with extreme caution.  There is absolutely nothing in a MTF chart that meaningfully relates to "bokeh".  A whitepaper from Zeiss confirms this.


5. Field flatness, or field curvature in lenses can be an important factor in determining optical performance.

Macro lenses are typically designed to ensure a flat field.  They are many times used in photographing documents, stamps, and other flat subjects.  On the other hand, many zoom and wide angle lenses suffer from varying degrees of field curvature.  Photographers using such lenses may feel, under certain circumstances, that a lens is not "good" (to use the subjective word).

If you photograph a flat two dimensional surface, such as a painting, and see that the edges are out of focus, but that the center is correctly sharp, you may be experiencing the effects of field curvature.  In this situation you could set the aperture to f/11 (which is at or above the limits of your sensor's resolution) and try again.  If the edges come into acceptable focus, your lens might suffer from only mild field curvature that is easily handled by selecting an aperture with sufficient depth of field to cover for the effect.

If you try to use MTF charts to fully evaluate a lenses performance, you can miss something important.  Take the MTF examples in this "test".  In noting the "drop off" of contrast toward the edge of the frame, the writer suggests the performance of Canon 400mm f/5.6L is superior to Canon's 100-400 f/4.5-5.6L.  It's important to realize that most MTF tests do not account for field flatness and will limit testing to a two dimensional surface.  In this case, if there is field curvature in the 100-400L the MTF results would not accurately illustrate the lenses contrast capturing abilities on the curved regions of focus.  To the MTF test, the edges of the frame would be less contrasty than the center by a fair amount.  I am making this particular point since there is a large community of photographers who claim their 100-400mm Canon L lenses are indeed quite sharp and contrasty across the field to dispute the Luminous Landscape writer's claims.

Before claiming that a lens is "bad", a user might want to check to see what the field curvature is before tossing the optic out.


6. Lens distortions (barrel or pincushion) can easily be seen and are a nuisance to correct when straight lines are important.

Lens distortions are easily measurable and many testers report their findings.

Back in my old film days, it was commonly accepted that 35mm wide angle, some "normal" and "short telephoto" lenses suffered from field distortions.  One of the most vivid examples came from a Canon SLR shooter who used an 85mm f/1.2L to photograph trains.  The photographer complained that the lenses barrel distortion was bad enough that straight lines were nearly always bent in his images.

Shooters of architecture are well aware of the issue of distortions.  I am convinced this is why companies like Sinar and Schneider continue to make cameras and lenses.  It's important to have an accurate and correct solution when you need it, and when cost is not the prime force in image generation, such solutions can provide a most direct solution..

From a lens design perspective, it is easier to control the broad range of design issues with a symmetrical lens than it is with a complex asymmetrical optic.  Look at a cross section diagram of a plasmat lens and compare it against a low cost kit lens.  What do you see?  Count the number of lens elements in each design.  Now imagine building one?  Which would be "easier"?

With the advent of software driven lens designs, manufacturers are able to build lenses of incredible complexity, while at the same time controlling and balancing trade-offs between resolution, contrast, chromatic aberration, field flatness and optical spatial distortions.

Which brings us back to resolution.  When a photographer "pixel peeps" and claims one lens is better than another, most of the time they woefully mis-understand the camera system's imaging system and it's capabilities and actual characteristics.  Further, readers of "tests" that share photos made with various lenses may be confused or under-educated by the lack of carefully gathered and properly understood and shared information.

While this blog entry has become much more complex than I originally intended, I remain interested in making sure the proper background is set for my making the claim that it does not matter what camera or which lens you use as long as you know how to use what you have.


Thursday, October 31, 2013

Tools of the Trade - Some Interesting Properties of Digital Sensors

In the previous blog post, I wrote about optics and various properties that are commonly discussed.  This post is devoted to a discussion of the other end of a camera kit, the image capturing device called a digital sensor.

Much discussion in the camera world is devoted to cameras, their sensors, and who is trouncing whom in the Great Megapixel Race.  Without using an inaccessible scientific or engineering language, I will try to shed useful light (oh, yes, keep those puns coming) on the subject.

To start, there are many sensors made by many many manufacturers in a great many sizes.  Frankly, I was shocked to see the list of all the companies that make sensors for various photographic applications.  Most of us only know the more popular camera brands, such as Canon, Sony, Nikon, Olympus, Panasonic, Sigma, Fuji, Phase One/Mamiya, Hasselblad, Leica, Samsung, and a very long list of cellphone manufacturers.  Their sensors may be manufactured by the parent camera company, but sometimes they are not.

The basic function of a photographic digital sensor is rather simple and obvious.  That is, a sensor receives light rays directed to it by a lens.  Upon receipt of these light rays, a series of very tiny sensors record the intensity and the color of the light.  Each very tiny sensor's record is an electronically generated series of numbers.  Records from millions of tiny sensors are gathered and presented in a way that we, as viewers, can interpret as an image.


Sensor Size Descriptions -
There are primarily two aspects of "size" that are used in describing photographic sensors.

The first is the physical size, or dimensions, of a sensor.  Useful physical photographic sensor sizes span everything from amazingly tiny cell phones through to medium format.  That is, some sensors are truly small and others are seemingly quite large.  When discussed, you will hear cell-phone, or APS-C, or Full Frame used as a description of the physical dimensions of the sensor. 

The second size important in understanding photographic sensors are the number of light recording sights a sensor implements.  In common language, this is the number that we refer to as megapixels, or millions of light recording sites.  You will see everything from 3.1 megapixel (from some of the earliest commercially available sensors) through to 120 megapixel sensors (as of this date) that sit on a lab bench somewhere in a camera manufacturer's Research and Development facility.


Light Sensitivity -
In the real world, lighting conditions are highly variable.  When we experience full mid-day sun, the amount of light reaching us from the sun is quite high.  When we experience light from a single candle set in the middle of a large room, the light reaching us is comparatively low.  For a camera sensor to be useful in as many lighting situations as possible, we need a camera/lens/sensor system that is flexible enough to enable image capture across a broad range of light conditions.

Lenses provide an aperture that is used to provide one of three ways to control the amount of light hitting a sensor.  For instance, the smaller the diameter of the aperture opening, the less light that will hit the sensor.  Aperture control is as old as photographic lenses (from the early 1800's).

A second way to control light reaching a sensor is with a shutter.  This is particularly useful when trying to "stop action" when shooting sports or when capturing the Milky Way on a particularly clear and beautiful night.  Shutters have been used since shortly after sensitive film emulsions required accurate control of exposure (mid to late 1800's).

The third way that is used to help balance shutter speed and aperture against the amount of light hitting a sensor is by varying the sensitivity to light of the sensor itself.  This is accomplished in a camera by controlling electronic signals to the sensor.

Borrowing terminology from the original chemical, atomic silver halide film technologies that describe how reactive a sensor is to light, we have the acronym ISO. The lower the ISO, the less sensitive a sensor is to light.  Conversely, the higher the ISO, the more sensitive a sensor becomes.


Interesting Properties to be Aware of - part one

There is an interesting relationship between image resolution and senor megapixel count.  It is precisely as follows.

As previously described, an image consists of a collection of pixels that describe light intensity and color.  It is safe to assume that, in terms of image resolution, that a sensor can accurately capture a sharp edge and reproduce it by moving from a white pixel to a black pixel.  Using this, we can look at the number of image pixels and use ideas from the USAF Resolution Test Chart and determine the maximum resolution a sensor can return.  The math is quite simple.

Resolution in Line Pairs = [(Number Information Sites) divided by (Physical Dimension of Sensor)] divided by (2 Line Pair per Millimeter)

For example, looking at an 8 megapixel Canon DSLR sensor, the 30D, we see the maximum output file dimensions are 3504 by 2336 image information sites.  The physical dimensions of the APS-C sized sensor are 22.5 by 15 millimeters.  The answer is calculated as follows.

78 Line Pairs per  millimeter = [(3504) / (22.5)] / (2)

Continuing a little...

78 Line Pairs per  millimeter = [(5616) / (36)] / (2) - Canon 5D MkII 22 megapixel full frame sensor
116 Line Pairs per  millimeter = [(5186) / (22.3)] / (2) - Canon 7D 18 megapixel APS-C sensor

102 Line Pairs per  millimeter = [(7360) / (35.9)] / (2) - Nikon D800 36 megapixel full frame sensor

97 Line Pairs per millimeter - [(10380) / ( 53.7)] / (2) - Phase One IQ180 80 megapixel medium format sensor

This information will be useful when we evaluate lens performance against sensor capabilities, and when we look at people's ideas of image quality and the need to buy "better" lenses.


Interesting Properties to be Aware of - part two

Looking at the number of line pairs per millimeter that the best human eyes can resolve (5 line pair per mm), we can calculate the maximum print size we can make while retaining all of the sensor resolution.  The math is, again, quite simple.

Maximum Print Size = [(File Image Information Dimensions) divided by (2 Line Pair per Millimeter)] divided by (Maximum Human Eye Resolution in Line Pair per Millimeter)

Converting for English and Metric centimeters, we see, again using our example cameras, roughly the following.

13 x 9 inches or 35 x 23 centimeters - Canon 30D

22 x 14 inches or 56 x 37 centimeters - Canon 5D MkII

20 x 13 inches or 52 x 34 centimeters - Canon 7D

28 x 19 inches or 73 x 49 centimeters - Nikon D800

41 x 31 inches or 104 x 78 centimeters - Phase One IQ180

This information will be helpful when we evaluate the relative maximum print sizes that each imaging system is capable of, and compare it against the needs of the publishing industry and making fine art images that hang in galleries.


Interesting Properties to be Aware of - part three

The last thing I would like to note here are the effects of changing the light sensitivity of a sensor.  Measured in terms of dynamic range, or the range of light from dark to light that a sensor can capture, something interesting happens.

Take a look at any sensor's ISO chart (here is the Canon 5D MkIII example) that tests for dynamic range and what do you see?  At low ISO, a sensor is capable of capturing a broader range of light than the same sensor set to a high ISO.    The dynamic range delivers 12 EV (or f-stops of light) at ISO 100.  The range of light captured drops to 8 EV at ISO 12800.  The sensor is loosing sensitivity to a broad range of light as the ISO rises.

Now compare a full frame sensor against the smaller physical dimension APS-C sized sensor (in this case, a Canon 70D).  What do we see here?  The 70D's sensor captures a similar 12 EV of light at ISO 100.  But in this case, the sensor's ability to capture light at high ISO drops quicker than the full frame sensor.  The 70D captures less than 7 EV of light at ISO 12800 or 1+ EV less than the full frame sensored Canon 5D MkIII.

This information will be helpful when we evaluate actual sensor development advancements and high ISO performance against marketing hype.


I realize this may be a lot of information to absorb.  Each piece is vital to understanding the current generation of cameras, lenses, and their real world capabilities.  I will try to tie all these sensor numbers together with optical performance, marketing hype, un-enlightened commentary, and Reality in the next blog entry.

Well, perhaps it will take several blog entries...