Monday, May 29, 2017

Portraiture ~ Equipment Logic

Now that I've had a chance to publish my approach to portraiture, I think it could be helpful to explain the reasoning behind some of the steps in the process.  Using the order and a bit of the format that I posted the original series in, we will start with camera equipment.
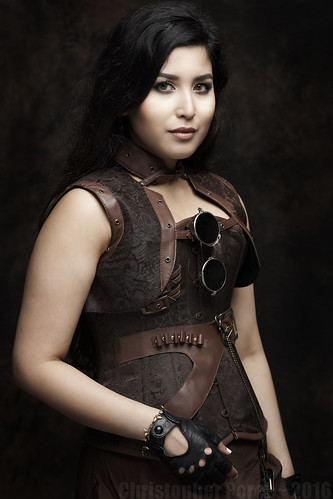

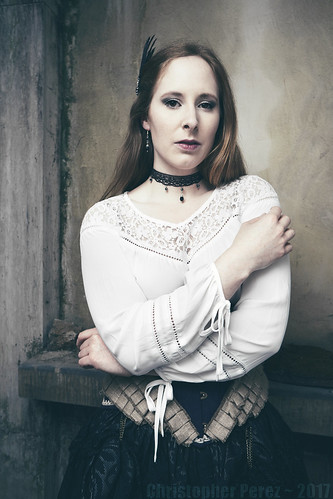
Nora.Wild ~ Steampunk

Equipment -


A camera that offers manual mode as a shooting mode option -
We need to be able to select the shutter speed, aperture, and iso so that when we find the correct flash intensity, photographs will be consistent for the duration of the flash/camera/subject positioning.

Any camera that allows for these kinds of controls can be used in portraiture.  The brand and style of camera does not matter, as long as you can control the important parameters of portraiture.

A camera that comes with a "hot shoe" or the ability to control a flash triggering device -
We need to be able to trigger the flash unit when the shutter is tripped and a hot shoe adapted remote trigger is currently the most common approach to making this happen.  You will need a place to mount the triggering device and the hot shoe is where you will mount it.

Standard focal length lens (in full frame terms, anything from 24mm to 85mm will do, including standard "kit" zoom optics) -
This is a potentially interesting point for some people to think about.  In traditional portraiture image distortions are considered rather bad form.  Yet I've looked closely at images that were made using a 24mm full-frame equivalent lens that had zero distortion.  

Usually photographers are encouraged to use 85mm full frame equivalent optics, but to me, the focal length can "flatten" the scene.   I wonder if this focal length was recommended as it was easy to avoid subject distortions and yet wasn't too long (like a 135mm lens) where framing and composition could be difficult.

If you are new to this and if all you have is the standard kit zoom that comes with many cameras (mirrorless and DSLR), my suggestion would be to try the same subject at varying focal lengths and see what you prefer.  If, OTOH, you have only a single focal length lens, don't worry.  Just use it.  As long as it's something between 24mm and 85mm, you're Good To Go (as they say).

Perhaps it would be helpful to know that some of the finest portrait photographers from back in the day of film used a single camera (a Rolleicord, a Rolleiflex, a Mamiya, or a large format view camera) that had a simple, single, fixed focal length "taking" lens.  If that's all they needed, why would we require more?

Electronic flash that is separate from the camera - often called an off-camera or remote flash -
This is your light source.  It will be the thing you move to achieve different qualities of light (from Notan to Chiaroscuro).  This need not be expensive.  One of the typical selling sites on the 'net sometimes offers their own brand for less than 30USD.  

Some flash units connect with the exposure system of a camera, and these will be more expensive.  This kind of sophistication can be helpful in situations where the light is changing from shot to shot. The approach I'm suggesting here removes changes in lighting.  You might not need a TTL enabled flash, and thus avoid its cost.

Remote flash trigger - that sits on the camera and triggers the flash remotely -
There is a separate device that sends a signal between the camera when the shutter is tripped and the flash so that the flash knows when to light off.  Many times these triggers come in two pieces.  One mounts on the camera and the other that mounts on the flash.  These need not be expensive, but you might have to pay attention to the hot-shoe specifications.  Some camera manufacturers have added things to their hot shoe interfaces.

Photo "bounce" umbrella - with "shoot thru" capabilities as an option -
We need one of these to spread the light out.  If we used just the flash itself, it would act more as a pin-point light source and the portrait lighting could be rather harsh.  What I suggest is a broad surface that spreads and softens the light on our subject.

There are many ways of spreading the light.  There are "octagons", there are "parabolas", there are "strip lights", and there are "beauty dishes."  To keep things simple, I feel a simple, collapsible photo umbrella should do the trick just nicely.  They are cost effective, too.  Besides, I have yet to meet anyone who, when looking at an image, can tell which kind of light modifier was used.

Tripod-stand to hold the flash and umbrella
This should be self explanatory.  We need to hold the light and light softener so that we don't have to try and hold it all while also trying to trigger the camera's shutter.  Sometimes you can find a tripod, umbrella, flash adapter "kit" on the usual selling sites for not much money.

In summary, I feel that camera and lighting gear are as an artist would view their brush.  They are tools to an end.  In this case, that end is to the making of fine portraits.

The next blog entry will present my logic behind the lighting setups that I recommend.

Monday, May 22, 2017

Portraiture ~ Art Considerations

Continuing my series on portraiture, we will now turn our attention to art.  Specifically, we will look at the topic of art from the perspective of history and how we might apply art principles to the photography process.  To make this as concrete as possible so we can directly apply concepts to our work, we will consider composition, backgrounds, and viewing (ie: lens) position.

I contend that if we can take at a potentially large, complex subject such as "art" and look at it in smaller, easily manageable pieces that we can begin to understand what we are doing, knowing that our knowledge will fit into the broader context.  If we can take the process of creation and move enough of it out of the realm of "feelings" and "emotions" and put them into the knowable, rational parts of our being, then we can control and perhaps create an even stronger "feeling" and "emotional" response in our viewers.

Before we begin, let's revisit my motivation for doing this (one last time).

Grand Question -  

Looking back 50 years, what would I have liked to have known that would've helped me make better progress swiftly and with more confidence?

This post will attempt to address the "touchy", "feely", "squishy", artistic part of that question. 

Art History - 

I realized it was easy to get all the camera and lighting gear as well as lighting setups "right" and still come away with something that, while pleasing on some level, might not have the impact I was hoping for.  Looking for a way to address this deficit, I found there is a lot we can learn from the Old Masters.  Their paintings are still beautiful, even after, in some cases, 500 years.  I felt it was important to take the time to look at their work and to think about what they did and to try and sort out why the did it.  Then I had to find a way to apply what I learned to my portraiture.

It took me moving to Europe to "see" and experience something that is helpful and important.  Fortunately, the internet provides access to the best paintings.  You don't need to leave the comfort of your own home to consider the things I propose in the following sections.


Subject Composition -

There are many guides to portraiture composition.  You perhaps have heard about the Rule of 1/3rd's.  It proposes a way to determine where to place the subject.  Many cameras come with guide lines laid out in this "rule" as well with perhaps 5 by 4 and square ratio "rules", too.  The Pictorialist, William Mortensen, had a more subtle, but more complex way of compositing his subjects.  Yet, when I looked at certain paintings, things like arms or hands or even portions of the head, in other words things we might consider important in photography were cropped and were lost entirely out of the frame.  So what is "right" and what is "wrong?"

For classic portraiture composition I feel a lot can be learned by looking at Dutch Masters.  Look at images of a single subject and make sure the scene includes the entire canvas out to the frame images.  What do you see?  Where is the subject placed?  How much space around the subject has the artist left?

Whatever answers you come up with, try composing your scene in exactly the same way.  It might take a bit of practice, but your efforts will be rewarded.  In my case, it's taken some 50 years of stumbling and failing, so hang in there, you're sure to get there much quicker than I.

Exercise 1: Go to Google, type in "rembrandt self portrait", and select "Images."  This is a great place to start.  Try composing your subject exactly as the portrait that most appeals to you.  Take a photo and compare it against Rembrandt's.  Study your results and make any changes you feel might be necessary.


Background Choices - 

Classic portrait paintings seem to have something in common.  Their backgrounds tend to be mostly plain and uncluttered.  Some will be dark and some backgrounds will be much lighter.  Some will contain information about the setting the subject is found in.  None of this will dominate the subject.  Your subject will have the feeling of being "brought forward" in the frame.  Nothing will compete with your subject. 

Look at a broad range of portrait paintings.  Do you find the soft hill scene behind la Joconde, Mona Lisa distracting?  Do you like Rembrandt's nearly black backgrounds of his self portraits? Do you like the light backgrounds that Renoir sometimes used?  Do you prefer the muted tones that Vigee Lebrun used behind her royal subjects?  Or do you prefer the kinds of backgrounds that explain where a subject is, such as that found in Manet's "Olympia"?  Think about what appeals to you.  

Exercise 2: Use what you've thought about as important pieces of information and find/create/buy a background that you find pleases you.  Take a photo and see how close you are to what you thought you wanted.  Make changes and try again if things don't match your original ideas.


Viewing Position -

Everything I have presented and the primary reason for sharing these blog entries is to get us to this one single point in the discussion.

Viewing Position is, perhaps, the most important feature of any portrait you will ever make.  What I mean by this is you must make a conscious decision as to exactly where you place the lens with respect to your subject. 

To get a sense of what I'm talking about, go back to Google and type in "Vigee Lebrun" and select "Images."  Study her portraits carefully.  Where was she, the painter, looking from?

Now go back to "Rembrandt self portrait" in Google Images and study his work very carefully.  Where was he looking from?  Is he looking at his subjects from eye level?  Likely not.  Is he looking at his subject's shoulder level, or somewhere else?

Taking a photographic example, search "Joel Grimes" in Google Images.  Don't be distracted by his sometimes very complex backgrounds.  Look only at his subjects.  Study these very very carefully.  Where, exactly, does he place the lens?

Exercise 3: Place the camera's lens exactly where you have learned it should be.  At first you may not know the answer to this puzzle.  So study the problem by raising or lowering the camera and the flash/umbrella (particularly if you are using Light Setup 1), taking photos as you go, studying them, and learn what the effect is.  Compare your results against the works of the Old Masters and fine tune your viewing position (ie: lens position) until it exactly matches the Old Master's. 

Guidance - Keep your camera's sensor plane parallel to your subject  (or, if it's easier to think of it this way, perpendicular to the floor) as you carry out Exercise 3.  Some cameras come with spirit levels (typically used for keeping horizons straight) and if your's is one of them, you might find it useful.  Failure to keep the sensor/subject planes parallel as you carry out this exercise will lead to undesirable image distortions, such as hands that are too big or small, or key-stoning the torso, or making the head too big or small.

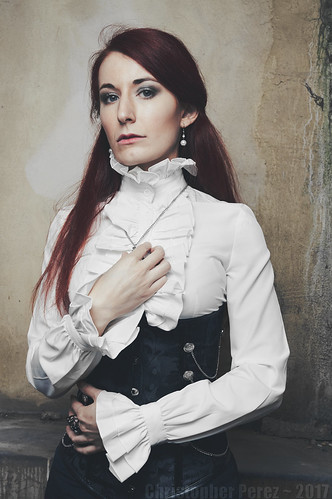
Sœur Vampire ~ Paris


Summary - 

I have attempted to present many practical aspects of making a fine portrait.  You should now have all the tools and skills required to make a good portrait.  

Think of it this way; the camera is like an artist's brush.  It's not the brush that counts, it's how you actively, in a practical manner, choose to use it.  These blog entries are my attempt to help you learn how to use your photographic tools as an artist learns how to use a brush.

Earlier in this entry I suggested that "feelings" and "emotions" are built in to an image.  These things are not a product of how a photographer "feels" nor "emotes."  Nor are these things the product of how your subject "feels" nor "emotes" at the time their photograph is made.  Rather, what a viewer of your work "feels" will be a result of the rational, cognitive choices you make throughout the photographic process, using your imaging tools as a painter uses his brushes.

Good portrait photography is, to my way of thinking, a result of making a series of well understood, well executed choices.

Thursday, May 18, 2017

Portraiture ~ lighting considerations

Continuing my series on portraiture, we will now turn our attention to lighting.  Specifically, we will look at strobe lighting.  I typically use strobes when photographing indoors under carefully controlled circumstances.

Before we begin, let's revisit my motivation for doing this.

Grand Question -  

Looking back 50 years, what would I have liked to have known that would've helped me make better progress swiftly and with more confidence?

This post will attempt to address the lighting part of that question.  Again, I would like to propose a cost effective approach that illustrates just how little investment in tools it takes to create wonderful portraiture.

I will start with a simple one light setup.  This is something I have tested over the years and is based on the ideas of William Mortensen, Robert Balcomb, and Joel Grimes.  I feel these three photographic artists have a lot of great things to say about photography and how to create art through the photographic processes.


Camera Setup - 

For the sake of consistency and controlling many of the variables that can come into play I use the following for all my work in a studio and other indoor spaces.
  • Set the Exposure by using 
    • Manual Mode (typically "M" on most cameras)
    • 1/125th of a second for the shutter speed
    • f/5.6 or f/8 for the aperture
    • 100 for the ISO (or whichever is the lowest sensor sensitivity your camera offers)
    • Daylight for the White Balance

Set the Exposure -

The following assumes you are using your flash/camera combination in the flash's manual mode.  This method for correctly setting the exposure is easy to follow.  Once the exposure is set and for as long as your camera/flash/umbrella/subject distances do not change, your exposure should not change.
  • Set the exposure by taking a photo and look at the histogram of the resulting image.  
    • In general, if the image is too dark, the histogram levels will "bunch" toward the dark end of the range.  
    • In general, if the image is too light, the histogram levels will "bunch" toward the bright end of the range.
    • Adjust the flash intensity until the histogram of your images shows information recorded in the highlights and shadow areas - making sure the skin tones are neither over-exposed nor under-exposed.  Most cameras can show you in-camera the areas that are too dark and too light when reviewing photos you've taken.
NOTE 1: Setting the exposure correctly "in-camera" will help minimize the adjustments you make to an image later in processing.

Let's get started with our first lighting setup.

Lighting Setup #1 -

This lighting setup is very useful for not only portraiture, but also fashion and pictorial representation.  I don't see this used very often these days, but it gives a very beautiful light.

Note 2: The bigger the umbrella the softer the light.  I use an umbrella that is approximately three feet/1 meter in diameter.
  • Compose your subject by looking at and moving your camera and your subject to exactly achieve what you want the final image composition to be
  • Place a single flash/umbrella set-up facing your subject at a distance of two and a half to three feet.  
  • Move light standard up or down until it is situated just outside and above the field of view of your camera.  That is, you can not see the umbrella in your camera's field of view, but the umbrella is as close as possible to coming into that field.
  • Set the exposure (see set the exposure description above)
You are now ready to photograph your subject.

Here is an example of what this lighting setup can do.

Sœur Vampire ~ Paris
Lighting Setup #2 -

This lighting setup is also very useful for portraiture, fashion and pictorial representation.  This is the kind of light you encounter most of the time in publications and advertising.  It's currently called cross light, or in former times it was known as plastic light.  The Grand Masters of paint used this light fairly often (though I have seen a surprising number of Grand Master works where the artist used the kind of light used in setup #1 above).

For this lighting setup you might want to use a black or white surface that subtracts or bounces light into your subject's shadow areas.  Using a non-reflective black surface can add drama to an image by helping create deep/dark shadows.  Using a white reflective surface can soften the subject's shadow area by bouncing a bit of light into the dark areas.  Which way you proceed will be a matter of personal taste.  There is no right nor wrong answer.  Additionally, I've easily found foam core board at our local art supply that is white on one side and black on the other.
  • Compose your subject by looking at your camera and moving your subject to exactly achieve what you want the final image composition to be
  • Place single flash/umbrella 45 to 60 degrees to the side of your camera with the umbrella facing your subject.  Set the distance between the flash/umbrella and your subject to three or four feet.  
  • Move light standard up or down until the umbrella is pointing head height at your subject.
  • (optional) Set a non-reflective or reflective surface facing your subject on the side opposite the flash/umbrella.
  • Set the exposure (see set the exposure description above)
NOTE 3: When using Lighting Setup #2, if you're not sure which side of the camera to place the flash/umbrella, take a photo and see what the effect is.  If it's not what you want, move the flash/umbrella to the other side and try again.

NOTE 4: When using Lighting Setup #2, if you're not sure of the effect of using a black or white surface on the shadow side of your subject, set your flash/umbrella placement, set your exposure, and take several images using black or white surfaces while varying the distance from the surface to your subject, and compare the results.

You are now ready to photograph your subject.

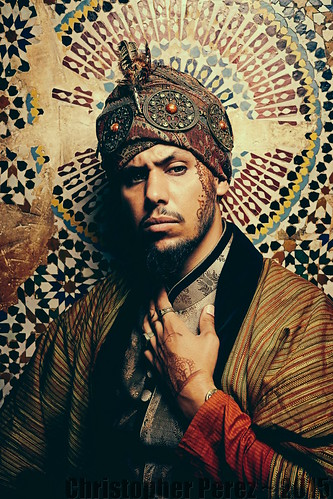
Here is an example of what this lighting setup can do.

Out of Marrakesh ~ Naos Al Kymaris


Certainly there are other more complex lighting setups a photographer can implement.  They will cost more money, of course, for the additional equipment.  Such approaches fall well outside my intended scope of low-cost yet beautiful lighting.  If you are interested, Joel Grimes gives a very good description of how to use three light systems.

Notes - 

I feel it is valuable to repeat the notes that I provided above.  For portraitists new to this approach, the details of a shoot can at first be confusing.  But with repeated use (dare I say practice?) the value of these notes will be seen.

NOTE 1: Setting the exposure correctly "in-camera" will help minimize the adjustments you make to an image later in processing.

NOTE 2: The bigger the umbrella the softer the light.  I use an umbrella that is approximately three feet/1 meter in diameter.

NOTE 3:  When using Lighting Setup #2, if you're not sure which side of the camera to place the flash/umbrella, take a photo and see what the effect is.  If it's not what you want, move the flash/umbrella to the other side and try again.

NOTE 4: When using Lighting Setup #2, if you're not sure of the effect of using a black or white surface on the shadow side of your subject, set your flash/umbrella placement, set your exposure, and take several images using black or white surfaces while varying the distance from the surface to your subject, and compare the results.

In the next post I would like to talk about the art of portraiture.  It turns out buying equipment and learning how to use it is the easy part.

Sunday, May 14, 2017

Portraiture ~ equipment considerations

What I would like to do here is share a few things that I've learned.  The following posts expand on materials I've generated for portraiture classes that I teach.  This series consists of three separate blog entries; equipment, lighting, and art.

I have been photographing people for fifty years.  Yet it's only recently that I have come to feel I can understand and control the most important aspects of the craft.

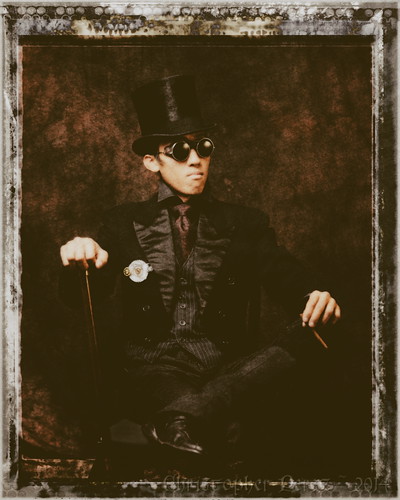
French Steampunk


The Grand Question - 

Looking back 50 years, what would I have liked to have known that would've helped me make better progress swiftly and with more confidence?

For years I have concentrated my attention on the equipment and tools of making images of people.  This has meant I've paid an inordinate amount of attention to cameras, lenses, lights, and backdrops.  These things were not enough, but one needs to begin somewhere, right?

To begin to answer this question I would like to propose a cost effective approach that illustrates just how little investment in tools it takes to create wonderful portraiture.  This approach is flexible enough that it can be expanded to include fashion and pictorial photography.


Equipment List -
  • A camera that...
    • offers manual mode as a shooting mode option
    • comes with a "hot shoe" or the ability to control a flash triggering device
  • Standard focal length lens (in full frame terms, anything from 24mm to 85mm will do, including standard "kit" zoom optics)
  • Electronic flash that is separate from the camera - often called an off-camera or remote flash
  • Remote flash trigger - that sits on the camera and triggers the flash remotely
  • Photo "bounce" umbrella - with "shoot thru" capabilities as an option
  • Tripod-stand to hold the flash and umbrella

Sensor sizes -

Given the present state of imaging technologies, how many mega-pixels a camera has may not be important.  Any camera with 12 mega-pixels will give you a print that out-resolves what your eyes are capable of up to 11x17 inches.

If your goal is to make prints larger than 11x17 inches, then perhaps a sensor with more than 12 mega-pixels would be beneficial (as well as easy to find).  Keep in mind, too, that magazine reproduction sizes typically are much smaller than 11x17 inches and reproduction technologies may or may not yet approach the resolution limits of what our eyes can resolve (depending on the printing equipment).  Computer/cell-phone/tablet displays have even less resolution than a magazine and a high quality print.

In short, mega-pixel counts are unimportant.  The final image will be the only thing that matters.

Animated Spirits - reborn

Monetary Considerations - 

At the beginning of this post I suggested that making wonderful portraits need not cost very much.  Here is an illustration of how inexpensively you to produce professional quality images.

Lighting Costs (new, not used, equipment as seen on Amazon US) -
  • $35 - Flash unit (such as Newer TT560)
  • $20 - Flash remote trigger (mounted on camera - such as Newer 16 channel triggers)
  • $20 - Photo umbrella (bounce/shoot-thru)
  • $20 - Tripod-stand
  • $10 - Flash and Umbrella to tripod-stand adapter
  • TOTAL - $105 

Camera/Lens Costs (as seen in eBay completed auctions for good, clean used equipment)
  • $250 to $400 - DSLR with kit lens - such as Canon 1200D or Nikon 3300
or...
  • $150 to $300 - Mirrorless with kit lens - such as Olympus EPL or EM, Panasonic GX, or Sony NEX
My Camera Kit -

One of the combinations I use and like is built on WiFi/NFC capable camera bodies and fixed focal length lenses.  I can transfer images to a tablet, process the images quickly, and share them directly to photo-sharing platforms and social media sites.  Since I'm retired and living on a fixed income, my money goes further buying used equipment locally off such sites as in-country eBay, Craigslist or Leboncoin. 
  • $175 - Sony NEX-5T body only (Wifi and NFC capable)
  • $90 - Sigma 30mm f/2.8 EX DN E
  • $10 - Hot shoe adapter for NEX

In Total - 

The all up costs of building a portraiture system from scratch are between $250 to $500, give or take a few pennies.  If you can tell a difference in image quality between photos taken using this low-cost approach verses images made using "pro" gear costing north of ten times more, I'll buy you a beer and take this post down.

In the next post I would like to talk about the a flexible lighting setup that is very good for portraiture.