In an earlier post I shared that two people have helped me immensely to increase my understanding of how soft focus lenses are best used.
For years the eminent Chetworth delGato has guided my thoughts. His thesis is the only one I've encountered that takes a serious academic look at Pictorialist era photography and the soft focus lenses that were often used. I am forever indebted to him for his wise insight and deep knowledge on the topic.
In a conversation about an image I'd made using a Mamiya 150mm f/4 SF, Bonzo Din provided a brief translation of a Pentax 85mm f/2.2 Soft instruction manual from the original Japanese. From this I learned several things -
- The Pentax 85mm f/2.2 Soft was designed for -
- Closeup photography
- Portrait photography
- The lens is not recommended for landscape photography
- Except when used with a telextender/teleconverter
That last bit caught my attention. Pentax knew that this lens had certain limitations and they tried to guide users to get the best possible results. The only problem is, I've yet to see an instruction manual of any kind for this f/2.2 Soft. As I've found out, the 85mm lens is really difficult to come to grips with and perhaps it is simply too complex a lens that many photographers have ended up shying away from it.
I'm only guessing here, but if others have experienced what I have, I'm sure we'd all be tempted to convert this optic into a paper weight or something more useful.
One of the many problems I've encountered include figuring if it is possible to make a nice landscape image using this Pentax. The problem is I see that as the lens is stopped down what I've been calling a "resolution hole" opens up in the center of the frame. The center becomes sharper than the edges of the frame, where the effect is like looking through the bottom of a bottle. Edges swirl and go soft, where the transition from sharp to soft is dramatic and obvious.
I've been thinking that this "resolution hole" effect was limited to this specific difficult to understand lens. Then, just the other day when I was looking for Wollensak Verito inspiration I came across something interesting. See that? Right there. That's what I found with the small Pentax, too. A very similar phenomenon. Here's another Verito example. The effect appears to exist in others of the earliest soft focus lenses as well. A quick Flickr search confirms this.
Armed with new insight I'm now thinking that meniscus lenses (new and old) have a region where sharpness over rides softness as the lens is stopped down. This region, or "resolution hole", is a simple fact of optical physics life.
Interestingly, photographers who shoot meniscus optics wide open to get the maximum softness effect might never ever see a "resolution hole" in their work. It certainly doesn't appear in the smaller lens until around f/4.
That's the other thing that makes these lenses complex to use, variable rendition based on aperture. And this is why I'm sure that when people find something that "works", they stick with it. Don't mess with success. If it's working for you, don't "fix it" by changing things up.
One more thing comes to me. In early large format Pictorialist photography, lenses could be matched to film size. Longer focal length lenses relative to film size could be shot all the time in the middle of the "resolution hole." With a longer focal lengths comes bigger the fields of coverage in terms of absolute dimension. In this situation a practioner could shoot smack-dab in the middle of the field of coverage and avoid the sharp/soft transition zone entirely, regardless of aperture.
With this in mind I could begin to see that by using a telextender on the small format Pentax 85mm Soft that the telextender would enlarge the center of the field of view. It might enlarge the image to just the center of the "resolution hole."
Conversely, I could also use a smaller format camera, such as an APS-C Sony instead of a Sony full frame device. That might crop the field of view to include just the "resolution hole." Though I have to say that I've fallen under the spell of the Sony full frame A7 (early/original) for the way it renders down at the pixel level. It feels rather "film like" to me.
So, I picked up as good a telextender/teleconverter as I could afford to see how it might change the Pentax 85mm f/2.2 Soft's landscape rendition. A Sigma APO 1.4x off That Auction Site happened to meet the price/quality trade-off I was looking for.
This post has a very brief look at how a telextender mated to the Pentax Soft on full frame deals with the meniscus lens' "resolution hole."
Setup ~
- Camera -
- Sony A7, 100ISO, handheld, "A" mode, +1EV
- Lens -
- Pentax 85mm f/2.2 Soft at f/4, f/4.5, and f/5.6
- RawTherapee -
- EV increased to increase the highlight tones
- Global contrast increased by image to taste
- Local Contrast increased by image to taste
Image Processing Comparison ~
As always, click on the image and enlarge to 100percent to see whatever there is to be seen.

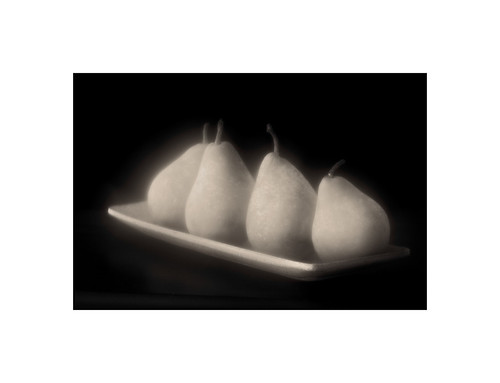
Full Frame Uncropped
Pentax 85mm f/2.2 Soft at f/5.6
+ Sigma 1.4x telextender
Global and Local Contrast enhanced
Looking around the corners of the frame I see the transition zone that forms the edges of what I've been calling the "resolution hole." Does it remind you of anything? Like, say, a Wollensak Verito stopped down? Hmmm...
Even though the transition zone has been moved toward the edges of the frame, I still don't like it. Though I do like how the center of the frame renders.

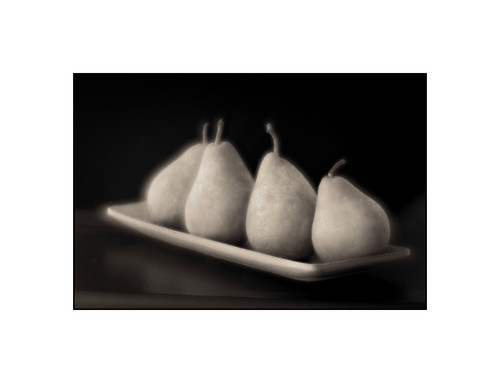
Pentax 85mm f/2.2 Soft at f/4
+ Sigma 1.4x telextender
Global and Local Contrast enhanced
Starting at f/4, I cropped to the center of the telextended Pentax and, well, for me it does the trick. The "resolution hole" transition effect has been cropped away and I'm left with a more or less usable image. The telextender does what Pentax' instruction manual hinted that it would do. The Soft becomes usable for landscape work.

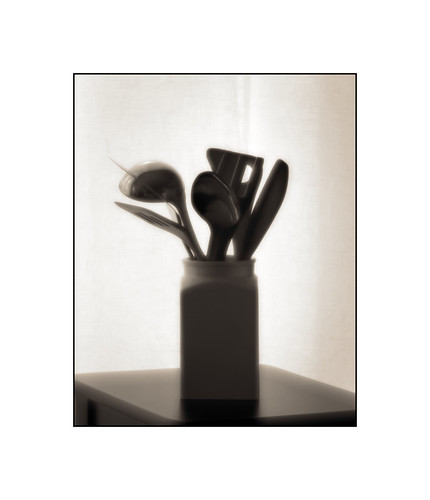
Pentax 85mm f/2.2 Soft at f/4.8
+ Sigma 1.4x telextender
Global and Local Contrast enhanced
I have to say that having explored the limits of what this lens is capable of, I rather like this exact aperture for just about every subject I photograph at closeup, portrait, and now telextended landscape distances. F/4.8 is a "sweet spot" for me. It tickles my funny bone like no other aperture on this optic does.
Though, me being me, maybe next week I'll find another "magic" aperture that I prefer. Anyways, the point being, shooting/practicing/processing/thinking-about/retrying seems to be the best way to come to grips with soft focus lenses.

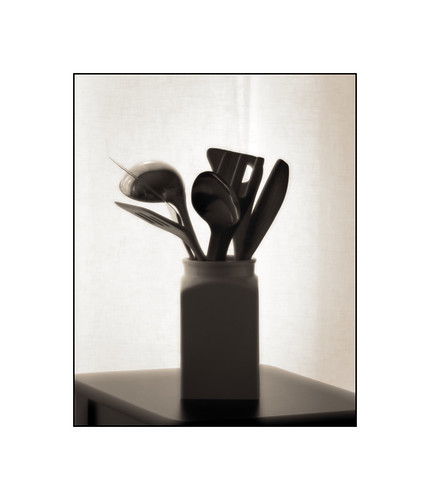
Pentax 85mm f/2.2 Soft at f/5.6
+ Sigma 1.4x telextender
Global and Local Contrast enhanced
Yes, I just said that my favorite aperture on this lens is f/4.8. Um, but have a good look at this f/5.6 image. It's not half bad, either, right?
Gack. So many possibilities. So many complexities. So many subtleties. So little time.