After falling into a Waskuwy Wabbit hole labeled "Fat Pixels", I realized under the name of the hole was scrawled by a rough hand "Enhanced Image Quality." At least I had a rough idea of where this time I was headed. It pays to read such scribbles carefully.
Image quality interests me because of my large format film and photo-print-lab experiences. I shot a lot of 4x5inch film (many many 100sheet/each boxes), some 5x7, a lot of 8x10 (many 25sheet/each boxes), a little 7x17, and a bit of 12x20 (whew! that stuff was expensive, even back in the day).
On the smaller side, I pulled hundreds and hundreds of rolls of 120 through Rolleiflex, Mamiya 7, and, for a very short time, Hasselblad cameras. Prints that I made from that time in the lab and at home are deep and rich. It goes without saying that seldom was there ever a problem with resolution/sharpness nor image quality, once I aligned the negative carrier and made sure the negative flattened under the heat of the condenser lens.
Moving to digital at first felt like I was giving up a lot, and I was. The Canon DSLR gear I had was simply absolutely awful. I didn't fully appreciate it at the time, but this early digital gear was quite soft and all I knew was "that's just the way things were." It was State of the Art for the time. Today when I try to do anything with those early images I remember there's nothing to be done, except to keep the final image size very very very small.
All this changed when, on a whim, I picked up a brand new Sony A6000. I instantly had a little photographic device that was sharp straight off the sensor. Good prints up to 20x30inches were no longer a digital challenge. In fact, the little APS-C A6000 image quality felt to me a lot like large format film.
It didn't entirely surprise me when Mike Johnson wrote something equating the small 1 inch sensor with medium format film output. He said "...while there are differences, 1" sensors are now virtually as good as medium-format film was in 1991." Yikes! Digital can be (insert Elmer Fudd voiceover) Weely Weely Gud!
Taking this a Small Step Further For Mankind, in using Sony A7 Full Frame bodies there are
times when I feel the image quality exceeds that of some of my old
8x10inch contact prints. Pushing 600 linear pixels per inch to print can be pretty darned beautiful.
So here's a thought that I have. And I've had this thought for some time, now. In a fair approximation, digital sensor output to film equivalents (in terms of image quality) -
- 1inch sensor == medium format film
- APS-C sensor == 4x5 inch film
- Full Frame sensor == 8x10 inch film
As a purely intellectual exercise I wondered if there were ways I could extend old A7 24mpixel performance to rival that of my old 12x20inch contact prints. Tall order, eh? Well, the scribble on that "Fat Pixel" sign pointing to the Wabbit hole did mention "Enhanced Image Quality", right?
There are several ways of going about exploring "Enhanced Image Quality." I can stitch a large photo from several smaller sections. I've done this and it works nicely. Or I could work from a single scene image. Or I could stop being cheap and simply buy a camera with more megapixels. Nah. Too expensive for this Old Fart who lives on a Fixed Income. So single scene image it shall be. Just to see. If it works? Yea! If it fails? I still have very beautiful 24mpixel images from the A7 cameras.
Borrowing from astro-photography work I considered the single scene approach in two ways. One was noise reduction as a software function and the second was noise reduction by image stacking. Noise reduction by software is easy. Just hit the button and move a couple sliders until things Look Gud(tm).
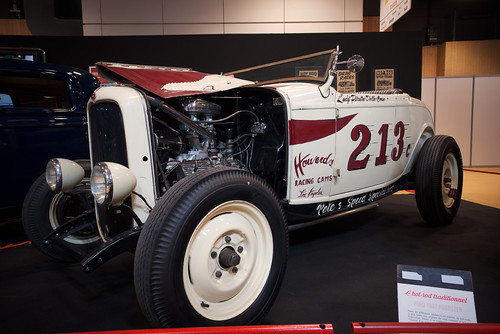
Image stacking for noise reduction takes a little more time and care. It is, how shall we say, and "interesting exercise." Particularly while shooting right in the middle of an enormous major-event level classic car show. Which I did. At Retromobile. In 2023. With tens of thousands of people milling around.
Ah, the Silly Things I do for small gains in obscure, arcane knowledge...
Setup
To capture three images to stack as a noise reduction exercise -
- Sony A7
- ISO100
- 2second timer
- Back-button focus (to maintain image alignment - focus once, shoot three)
- Sigma 24mm f/3.5 DG DN
- Set to f/8
- Manfrotto tripod
- Rawtherapee
- Curves setting
- Capture Sharpen
- Noise Reduction
- Kodak film emulation
- Gimp
- 3 image stacking in layers
- Opacity setting of layers
- Additional sharpening application (various G'Mic integrated operators)
Comparison
[As always, click on the following image and inspect it at 100percent to see whatever there might be to see]
For this exercise I will look at the first 4 rows in the following image only. These represent a simple base Capture Sharpened image version, Capture Sharpen with Noise Reduction, Capture Sharped with Noise Reduction and 3 image stacking, and then all this with G'Mic Diffusion Sharpening.

Comments
Starting with the Sony A7 Rawtherapee Capture Sharpened image I see a low noise, beautiful, sharp image. There is certainly nothing to complain about. And yet, if I stare for long while with the image displayed at 200 or 400 percent there is just a hint of color variance in the smooth areas.
Which brings me to the second row. Now the image has the lightest possible Rawtherapee luminance noise reduction applied to it. The smooth areas are now very smooth. The hard to see color variance is now gone. It's replaced by a very very hard to see pattern of monochrome noise. I could stop right here and call it a day. Job done. Time to move on. It's Fizz Time (as in a decent French crémant or Italian prosecco).
But I'm after Deep Knowledge and Understanding, right? So I continued down this Wabbit hole with a Gimp processed (Rawtherapee does not allow the use of layers) three image, Capture Sharpened, noise reduced, layer stacked photo. Since I used a tripod I could simply open three different images as a stack and set the opacities of the upper two layers. The first and top-most layer opacity at 25%, and the second layer opacity at 50%. I then re-confirmed the images were correctly aligned by looking at the stack at 200% or 400%.
Not only do I now have a very very smooth rendition from the noise reduced image stack, but I feel there is more color information. The image is becoming deeper and richer than the base A7 single image. There's "something" in here that is nearly compelling from an image quality perspective.
There's yet one more step to take.
With the additional information in the three image stacked photo has come a slight loss of micro-contrast. The image doesn't have the single image level of "crunchiness" that comes from the very subtle color variations that the basic sensor gives when run through Rawtherapee's Capture Sharpen function.
To counter this I used the Gimp integrated G'Mic Inverse Diffusion sharpening tool. It's a light, subtle, and very effective way of increasing local contrast in a controllable manner. For many things where I want just a bit more "snap" I often turn to just this operator.
Now we're getting somewhere!
This is a glorious image. Well, to me at least. The image quality is out-freak'n-standing. This will print very very well to just about any size I... um... hold on... what's that?... oh no... not another sign pointing to yet another Wabbit hole... geez... when will this Wonderland of Wackiness ever end...?
Stay tuned for part Three to find out.
No comments:
Post a Comment