In a prior blog entry I described a simple means of toning the mid-range of a black and white photograph while keeping the blacks black and the whites white.
Some years ago I remember reading where one of the attractions to using carbon tissue layers in registration to create a black and white photographic print was that a person could vary the colors of each layer. That is, each carbon tissue layer represents some narrow range of overall image intensity and by carefully selecting the colors of each layer a printer could, for example, use cool tones in the shadows and warm tones in the highlights.
We can achieve the same effect with perhaps even finer tonal controls than carbon prints by using digital black and white images.
Here is another of perhaps many valid methods for achieving the carbon tissue colorizing controls in digital image processing.
Setup -
- Gimp v2.10+
- Luminosity Masks filters
- Here is a python based implementation (and here are instructions on how to install these masks)
- NOTE that if you are using Linux as your base OS, you will need Gimp-python installed - if you are using an Ubuntu based version, running a simple apt install gimp-python command could help - regardless of the base-OS, when Gimp-python is not installed you may not even see Luminosity Masks grayed out in the Filter->Generic pulldown menu
- If you would like to understand how Luminosity Masks are created in the Gimp, here is an explanation and method to creating them
Processing -
I will give a very specific set of instructions. However, keep in mind there are many combinations and variations that might help you express your intentions better.
Before we begin, I want to note that in this example I'm using three strong primary colors so that you can see the blending transition effects from light to dark. For a proper black and white image we would like never do something like this.
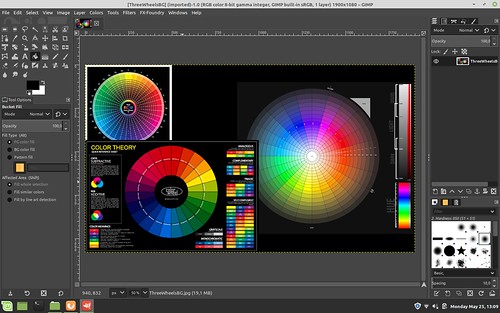
Step One - Create the Base Black and White Image
Open an image in the Gimp.
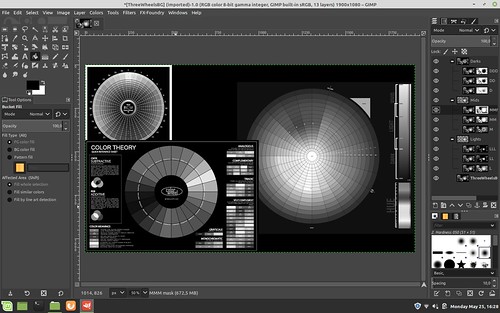
Add a black layer over the base image and set the blend mode of the black layer to "Lch Color". Flatten the image in preparation for the next steps.

Step Two - Create 9 Luminosity Layers and Masks with One Click
Open Filters -> Generic - Luminosity mask setup and watch as new masked layers are generated. Note how they are arranged with the "Darks" layer set of three grouped layers labled "DDD", "DD", and "D". Similarly, note how the "Mids" and "Lights" are organized. We are about to rearrange them.
But before we do, take a close look at how each set of three sub-layer masks are slightly different from one another. They define how much of a region will be affected when we make changes to the layer image. Said another way, each mask uniquely describes what portion of the image will be affected by any changes we make to each layer image that each mask is attached to.
Step Three - Re-Order Luminosity Mask Layers
When we add color to these Luminosity layers, their arrangement and order will be
important. How the colors will blend and transition between the layers
will be determined by the order you choose. We will now rearrange them to prepare for sample colorizing.
Click on the "Mids" top of group layer (where the "MMM", "MM", "M" sub-layers are organized just below it) and select the up arrow carrot. When you click on the up arrow carrot after selecting "Mids", the entire "Mids" layer structure will move. The up arrow carrot is found on a tool bar just below the base image. Verify that "Mids" collection of three layers and masks are now positioned above the "Darks" collection of three layers.

Now click on the "Lights" collection of three layers and masks and again using the up arrow carrot click twice to move "Lights" first above "Darks" and then above "Mids". "Darks" will now be the first Luminosity layer collection above the base image. We have simply reversed the order of the layers and their masks.

Step Four - Add Highlight Color
Select a foreground color.

Deselect visibility (the "eye" found just to the left of the layer image) of the "LL" and "L" layers.
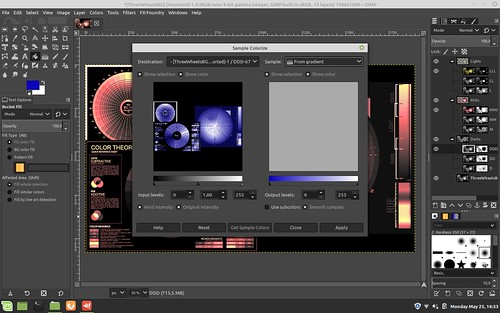
Select Filters -> Map -> Sample Colorize
Select Sample: From Reverse Gradient
Select Get Colors (perhaps not strictly required)
Select Apply
Select Close

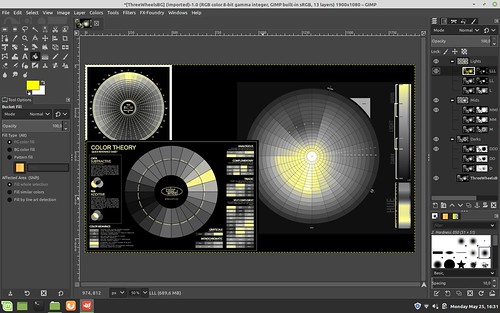
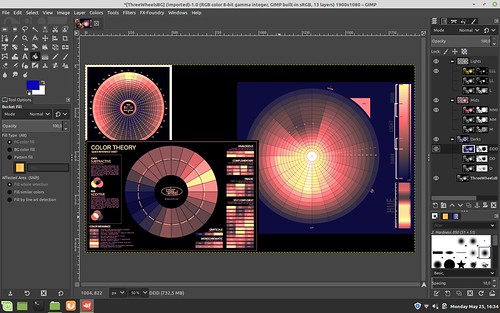
Here is how the image looks after adding color to the "LLL" highlights layer. You can begin to see where we are going with all this by looking carefully at the various color wheels in the image we are working on to observe what just changed.
Step Five - Add Mid-Tone Color
Select a new foreground color.

Deselect visibility (the "eye" found just to the left of the layer image) of the "MM" and "M" layers.
Select Sample: From Reverse Gradient
Select Get Colors (perhaps not strictly required)
Select Apply
Select Close

This is how the mid-tones are colorized and blended with the "Lights" "LLL" layer that we added in the prior toning step.

Step Six - Add Low-Tone Color
Select yet another new foreground color.

Deselect visibility (the "eye" found just to the left of the layer image) of the "DD" and "D" layers.
Select the "DDD" layer image (and not the "DDD" mask since we cannot add color to a mask) under the "Darks" layer grouping.
Select Filters -> Map -> Sample Colorize
Select Get Colors (perhaps not strictly required)
Select Apply
Select Close
Here is how the "Darks" look after following this, the final step, in this example. Carfully observe how the colors transition between colorized regions. This may have important consequences for the colors you choose in your own work. There is potentially a lot to consider here.
Summary -
As you can see, we have successfully added different colors to the highlight "LLL", mid-region "MMM", and shadows "DDD". We did this by sample colorizing copies of the base image that are included in each of the 9 layers that were generated by the "Luminosity mask setup". Each Luminosity layer has a unique mask that defines the region and extent to which the sample colorization will be applied. In this way we can control the exact colors of, in this example, three different regions - highlights, mid-tones, and shadow.
Remember, we have 9 masked layers to work with. So we have the possibility to further "finesse" the colors and their transitions. If/when you choose to take advantage of the 6 masked layers that we did not use in this example, I suggest that you will want to invert the order of "Mids" under the top layer grouping. That is to say, instead of ordering the "Mids" sub-layers as "MMM", "MM", and "M", reverse this too "M" first, you can leave the "MM" where it is, and move "MMM" to the top.
The "Lights" and "Darks" sub-layer ordering can be left alone. As a potentially mind-bending exercise I will leave the reasoning for this to the reader. On second though, maybe I should cover it here.
If you look at the masks for the "Lights" and "Darks" sub-layers you will see that the most restricted mask is on top, with the following two layers expanding the regions affected by color changes. So you will want the most restricted color mask on top in the "Mids" so that its color effects will be seen and not hidden _below_ upper more expanded layer mask.
In any event, as you add colorized layers, re-select the visibility "eye" found just to the left of each layer image to make that layer "active" and its effects visible in the overall image.
There you have it. A potentially mind-bending, mind-exhausting way of subtly controlling colors of different tones across an image. All this in the pursuit of old carbon tissue photographic image style.
Now, honestly, wasn't that fun? Well, maybe not. But at least you have real control over your image, right?
No comments:
Post a Comment