Here is my last blog entry on this topic, I promise. I know. I know. There are so many things to be looked at, but enough is enough. For now, at least.
It seems strange to me how I vacillate between extremes. I recently sold most of my Nikon manual focus lenses because I'm reaching that age where AF isn't just a luxury. My Nikkors were getting to be too difficult to use in fast changing situations. So I now have three wonderful fixed focal length lenses for the Sony A7, three for my APS-C Sonys, and two zooms for the APS-C for when I'm out photographing motorsports. I'm keeping several old Nikkors "just in case" I might wake up one day and find I "need" them.
One of the lenses I've had forsale for several years is a Nikon F mount Pentax 85mm f/2.2 Soft. Recently I got frustrated at the lack of interest in the optic and decided to try and sort out how to use it once and for all time before I let it go. Hence the Prime Mover of this entire series of blog entries.
Pictorialist Photo-Sessionist style images are sometimes built on soft focus lenses and their "interesting" properties. So I thought it might be interesting to take one more look at this Pentax Soft from the perspective of Pictorialism. Of course the style is just as importantly built on lighting, composition, subject, image processing and printing techniques. I had the lens and that seemed the most reasonable place to start.
I have said little to nothing about lighting, composition, and printing techniques in this series. But I was able to explore a little of what might be possible using image modifiers (lenses and filters) and current digital image processing tools. The three tools I used were to try and reveal underlying sharpness of a soft lens. The tools are global contrast, local contrast, and micro-contrast.
With softening filters (Cinebloom, Nikkor Soft, nose grease, hairspray, etc.) as well as with Soft Focus lenses I believe an image can benefit from carefully controlling global and local contrast.
In these ways, I believe from a technical, commercially available camera equipment perspective that current practitioners of the craft can rather closely emulate the Pictorialist style.
What I would like to do with this one final blog entry is to look at completely piercing the "resolution hole" that meniscus lenses are prone to. To do this I will now try a smaller format Sony A6000 APS-C camera and combine it with the Pentax 85mm f/2.2 Soft and the Sigma APO 1.4x teleconverter. This makes it a rather long focal length setup, but this seems on some levels to be in keeping with the use of long Soft Focus lenses in large format film work.
Was you may recall, my Full Frame digital camera still showed a bit of uncontrollable sharp/soft transition zone effects near the edges of the frame. With luck the narrower APS-C field of view might fit _inside_ the "resolution hole" and render scenes at any distance more easily controllable.
Setup ~
- Camera -
- Sony A6000 APS-C, 100ISO, 2sec timer, "A" mode
- Lens -
- Pentax 85mm f/2.2 Soft
- Sigma APO 1.4x teleconverter
- Bogen tripod
- RawTherapee -
- Global contrast increased by image to taste
- Local Contrast increased by image to taste
Image Processing Comparison ~
As always, click on the image and enlarge to 100percent to see whatever there is to be seen.
I now present two scenes. Each scene was shot at multiple apertures - f/2.2, f/2.8, f/4, f/4.8, and f/5.6. We can see how the veiling softness changes with aperture settings. I tried to keep the image processing results similar to better evaluate the aperture, "resolution hole", scene rendering effects. For this reason I used slightly different processing (heavier local contrast and different brightness settings) at f/2.2 and f/2.8 than I did with the other images. The aperture progression should be fairly obvious.
Without further ado, and starting with f/2.2 down to f/5.6 -
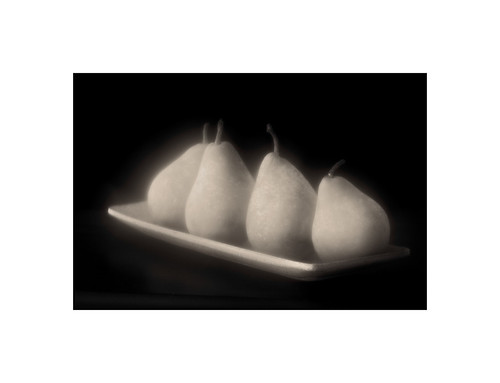

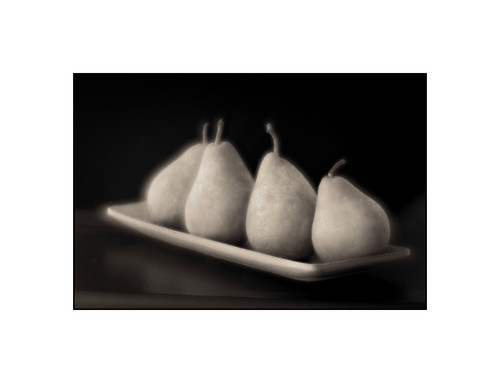


Scene One
Light Pears against
a Black Background


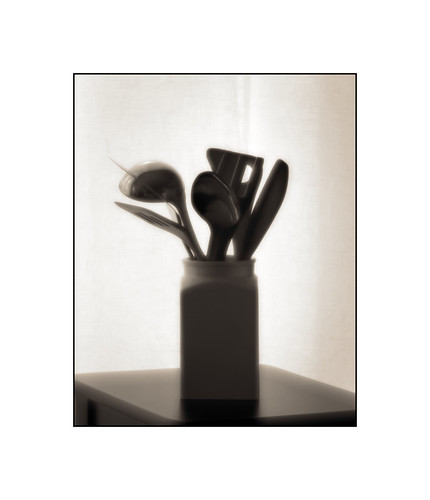
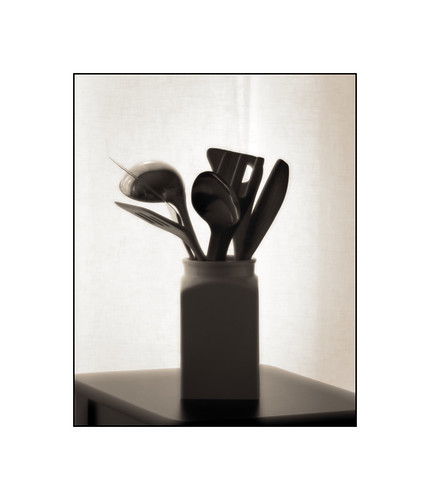
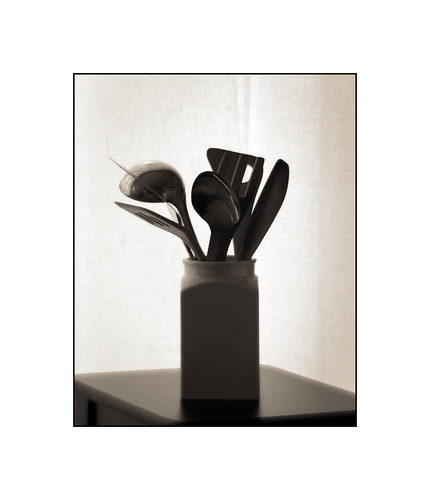
Scene two
Light Kitchen Utensils backlit
against a Bright Background
After I'd run this series of images I realized I hadn't captured a landscape scene. So I used the A6000's "magnifier" functions, put the focus point at the edge of the frame, and focused the Pentax/Sigma setup at infinity. I was able to prove to myself that the edges of the frame remain optically correct and that the "resolution hole" has finally and completely been pierced.
To recap how I see best using a Pentax 85mm f/2.2 Soft and in believing the following also can apply to just about any meniscus-based soft focus lens of any focal length and any imaging format, here is what I found -
- Control ~ subject matter distances
- Close-up ~
- NOTE: put the subject dead center in the frame and crop accordingly in processing so as to avoid any "resolution hole" transition area effects as the aperture is stopped down
- Portraiture ~
- NOTE:
put the head of the subject dead center in the frame and crop accordingly
in processing so as to avoid any "resolution hole" transition area
effects as the aperture is stopped down
- Control ~ aperture
- Maximum under-corrected spherical aberration (veiling softness) is seen at f/2.2
- Decreasing under-corrected spherical aberration in the center of the frame as the aperture is stopped down
- Opening
of a "resolution hole" in the center of the frame from f/4 thru f/5.6 -
with attendant edge softness and harsh sharp/soft transition zone
effects
- Control ~ telextender/teleconverter
- Enlarge the center of the field of view...
- ... thus pushing the harsh sharp/soft transition zone to the edges of the frame
- Useful for landscape work
- Prediction has been proven to my satisfaction
that a 2x telextender does indeed completely pierce the "resolution hole". The behaviour is very similar to a designed for whole plate 11.5inch (292mm) Wollensak Verito
f/4 shot on 4x5 inch film that completely avoids the "resolution hole" effect in that large format case.
- Note: Nothing is being said about city scapes, street photography, large man-made objects, or technical applications were accuracy and clarity tend to be preferred. I believe that people and nature may be the areas where soft focus lenses succeed most easily. YMWV.
I'm now satisfied that I'm able to control this previously nearly impossible to come to grips with Pentax 85mm f/2.2 Soft. I'm happy to learn that controlling contrast can have a "improving" effect on soft focus images. And I'm happy to have experienced a little more deeply the possibilities that lay in nose-greased/hairsprayed UV filters as image softeners.
My next project? After a little "time out", I may try and buy a Pentax 85mm f/2.8 AF Soft to see how the extra lens elements modifies that soft focus lens' behavior. Until then, have fun. Go out and photograph. Enjoy life.
No comments:
Post a Comment