Tuesday, February 15, 2022

Nikon Nikkor-UD 20mm f/3.5 ~ Lens Turbo II APS-C vs Full Frame

I recently groused about how slow I was to realize that field curvature that I'd observed in an otherwise beautiful Nikon Nikkor 24mm f/2.8 Ai was the fault of the Lens Turbo II focal length reducer and not the Nikkor lens.

Once I worked through more than a few "DUH!!!! How stupid can I be?" moments, I thought I'd confirm my updated understanding and have a careful look at several lenses of various focal lengths to see how the Lens Turbo worked.

I'll begin by looking at a well-used Nikon Nikkor-UD 20mm f/3.5 pre-Ai objective and in future blog posts work my way up to 105mm's.


Setup - 

  • Sony A7 with straight-thru adapter - ISO100, 2 second timer, in-camera levels used to square the whole plot up
  • Sony A6000 with Lens Turbo II focal reducer - ISO100, 2 second timer
  • Manfrotto tripod - it's capable of securing an 8x10inch view camera, so it's sturdy enough for this
  • Nikon Nikkor-UD 20mm f/3.5 pre-Ai - shot at two f-stops - f/3.5 and f/8
  • Rawtherapee RAW to jpg conversion - Auto-Match function (no "Capture Sharpen")


Comparison - 

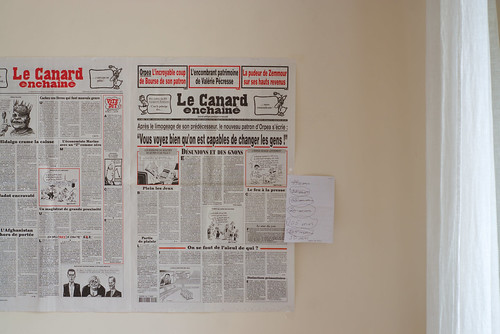
Here is the scene setup.  As you can see, I moved away from using the apartment scrims (curtains) to shooting a copy of le Canard Enchaine' tapped to a flat wall.  I'm looking more carefully at field flatness, right?  Even given the all-too-often shoddy work standards around Paris, this wall is sufficiently flat for my purposes.


Scene Setup ~ A6000 + Lens Turbo II+Nikkor-P 105mm


[As always, click on the image and look at it to 100percent file size to see whatever there is to be seen.]


Nikon Nikkor-UD 20mm f/3.5 pre-Ai


Comments - 

The Nikon Nikkor-UD 20mm f/3.5 pre-Ai looks sharp in the center wide open and at f/8 on both the A6000 APS-C with Lens Turbo II and the Sony A7 full frame cameras.

Checking the extreme lower left corner of the scene, however, reveals that the Sony A6000 with Lens Turbo II focal reducer does introduce a focus shift.  The corners at f/8 don't "clean up" as well as they do on the Sony A7.

The induced field curvature "feels" minor in this setup.  I'm not sure how obvious the induced field curvature would be in "real life", but based on years of using Lens Turbo II adapters I doubt there would be much of a problem.

Monday, February 14, 2022

Nikon 75-150mm f/3.5 series-E Ai ~ Yet Another Look

Having looked at Nikon Nikkor 24mm f/2.8 Ai, an old Nikon Nikkor-O 35mm f/2 and a Nikon Nikkor 50mm f/1.8 AiS for field flatness on full frame Sony A7, here is a look at a Nikon 75-150mm f/3.5 series E AiS.


Nikon 75-150mm f/3.5 E ~ Lens Stories


Setup - 

  • Sony A7 - ISO50, 2 second timer, in-camera levels used to square the whole plot up
  • Manfrotto tripod - it's capable of securing an 8x10inch view camera, so it's sturdy enough for this
  • Nikon 75-150mm f/3.5 AiS - shot from f/3.5 through f/8
  • Rawtherapee RAW to jpg conversion - Auto-Match function, but nothing further (ie: NO Capture Sharpening)

Comparison - 

Here is the scene setup.  It's just a pair of closed gaze scrims in our apartment.  The details are interestingly small, so therefore useful for this kind of "wee look-see."  The center section, upper left corner, and lower right corners were used in the comparison.


Nikon Nikkor-O 35mm f2 Scene


[As always, click on the image and look at it to 100percent file size to see whatever there is to be seen.]


 Nikon lens comparison - 55mm to 150mm

Comments - 

I know I'm beginning to sound like a broken record, but, wide open the 75-150mm Nikon is a bit soft.  

At f/5.6 and f/8 this un-loved under-appreciated ancient 2x good-for-nothing $25 lens is plenty "sharp" to my eyes, even though I think I see just a hint of field curvature at the extreme edges.  

I think there might be a bit of magic in this cheap optic. 

After having worked with manual focus Nikon lenses for many years I think I finally understand that this softness is deliberate.  I think it's how the Japanese express their sense of "delicateness" in photographic images.

Nikon's "Thousand and One Nights" says -

"...Although the E 75-150mm f/3.5 was manufactured as a popular lens for use with the Nikon EM, the finished lens was, in fact, sufficiently well executed as to find favor with the experts...

... the background blur is delightful, and makes the lens suitable for portraits... -–in line with the original concept for the lens. As on the AI Nikkor 135mm f/2 lens, the secret behind this is the deft use of close-range aberration fluctuations-–the correction for spherical aberration being slightly attenuated at close range in order to smooth the background blur..." 

What I think I see is that Nikon has developed a lens design approach that favors under-corrected spherical aberration behind the point of focus when a lens is shot wide open.  They seem to do this as a way of lending an image the Japanese "delicateness" I mentioned at the top of this section.

Sunday, February 13, 2022

Nikon Nikkor 50mm f/1.8 AiS ~ Yet Another Look

Having looked at Nikon Nikkor 24mm f/2.8 Ai and an old Nikon Nikkor-O 35mm f/2 for field flatness on full frame Sony A7, here is a look at a Nikon Nikkor 50mm f/1.8 AiS "pancake".


Lens Stories ~ Nikon Nikkor 50mm f/1.8 AiS


Questions of field flatness arose when I used a Nikon Nikkor 24mm f/2.8 Ai in conjunction with a Lens Turbo II focal reducer on Sony APS-C mirrorless cameras.  I couldn't find a way to get that combination sharp in the corners, even stopped down and I couldn't believe that Nikon would ever design a lens with that much curvature.  

After moldering around for four or five years, the idea finally hit me that maybe the problem was the Lens Turbo II focal reducer and not the Nikkor.  Duh.

For completeness, I mounted a Nikon Nikkor 50mm f/1.8 AiS "pancake" on my low-mileage Sony A7 using a straight-thru adapter and pointed the lens at a fine-detailed subject.  The fine-detailed subject just happened to be our daylight back-lit apartment gaze curtains.

Setup - 

  • Sony A7 - ISO50, 2 second timer, in-camera levels used to square the whole plot up
  • Manfrotto tripod - it's capable of securing an 8x10inch view camera, so it's sturdy enough for this
  • Nikon Nikkor 50mm f/1.8 pre-Ai single coated - shot from f/1.8 through f/8
  • Rawtherapee RAW to jpg conversion - Auto-Match function, but nothing further (ie: NO Capture Sharpening)

Comparison - 

Here is the scene setup.  It's just a pair of closed gaze scrims in our apartment.  The details are interestingly small, so therefore useful for this kind of "wee look-see."  The center section, upper left corner, and lower right corners were used in the comparison.


Nikon Nikkor-O 35mm f2 Scene


[As always, click on the image and look at it to 100percent file size to see whatever there is to be seen.]


Nikon Nikkor 50mm f/1.8 AiS


Comments - 

Wide open the 50mm Nikkor is a bit soft.  What was important to me was to confirm there was a similar level of softness across the field from the center all the way to the edges.  This appears, in fact, to be the case.

From f/2.8 on down through f/8 this little "pancake" lens is plenty "sharp" to my eyes.

I believe the Nikon Nikkor 50mm f/1.8 AiS "pancake" is the same design as the Nikon 50mm f/1.8 series-E and the more recent Nikon Nikkor AF-D 50mm f/1.8.

Nikon's "Thousand and One Nights" says -

"...the Series E 50mm f/1.8, sold in some regions including the U.S., and the AI Nikkor 50mm f/1.8S were actually sister lenses designed with the same basic optics, but different outward appearance and coatings...

What's more the same basic optical design was reborn as the AI AF Nikkor 50mm f/1.8S (coatings and such were modified), and is still available today (2016) in the AI AF NIKKOR 50mm f/1.8D. When this lens was reborn as an AF lens, it lost its slim, pancake design, but its rendering characteristics remain the same..." 

I've owned several series-E 50mm f/1.8 lenses over the years, and they performed for me the same way the AiS Nikkor version does.  All were/are slightly soft wide open and with a pleasing out of focus rendition.

This compares with my experience of using a Nikkor f/2 pre-Ai and Ai 50mm.  These are wickedly sharp wide open, but the out of focus rendition can be very harsh "soap bubble."  For those who believe that lens formulas hold the secret to great out of focus performance, both the harsh f/2 and beautiful f/1.8 50mm lenses are the exact same 6 element, 4 group plasmat layout.  The difference is in the calculation of the curves of the various lens elements.

Coming back to the original question, I don't recall seeing field curvature issues with the 50mm Nikkor f/1.8 AiS lens when combined with a Lens Turbo II focal reducer.  So, for whatever reason, there might not be the set of circumstances that lead to the effects I saw clearly with a Nikkor 24mm with a Lens TurboII.

In any event, this confirms the 50mm Nikkor is respectably flat field across the field and very sharp when shot on full frame.

Saturday, February 12, 2022

Old vs New ~ Nikon Nikkor 50mm f/1.8 AiS vs Sony 50mm f/1.8 SEL OSS (APS-C)

Continuing in the style of recent posts and asking a question about how old lenses compare with current day computer designed optics, I take a quick look this time at a Nikon Nikkor 50mm f/1.8 AiS "pancake" lens and compare it against an APS-C format Sony 50mm f/1.8 SEL OSS.

Setup - 

  • Sony A7 - ISO50, 2 second timer, in-camera levels used to square the whole plot up
  • Manfrotto tripod - it's capable of securing an 8x10inch view camera, so it's sturdy enough for this
  • Lenses -
    • Nikon Nikkor 50mm f/1.8 AiS - shot from f/1.8 through f/8
    • Sony 50mm f/1.8 SEL OSS (APS-C) - shot from f/1.8 through f/8 shot Full Frame which shows the edge of the frame clipped due to the lack of FF coverage
  • Rawtherapee RAW to jpg conversion - Auto-Match function
    • "Capture Sharpen" used on the f/1.8 images to see how they compare with other apertures without "CS"

Comparison - 

Here is the scene setup.  It's just a pair of closed gaze scrims in our apartment.  The details are interestingly small, so therefore useful for this kind of "wee look-see." 


Nikon Nikkor-O 35mm f2 Scene


[As always, click on the image and look at it to 100percent file size to see whatever there is to be seen.]


Nikon Nikkor 50mm f/1.8 AiS, Sony OSS SEL 50mm f/1.8


Comments - 

At f/1.8 the Nikkor 50mm is slightly softer than the Sony.  I figured this might be the case based on a webpage that has long disappeared that compared the Sony against Leica's latest 50mm and won.  Though I see nothing wrong with the Nikkor, this Sony optic is very special.

From f/2.8 on down through f/8 I have a difficult time telling the difference between the Nikkor 50mm lens and the Sony 50mm.

This comparison includes "Capture Sharpen"'d f/1.8 images.  It's interesting to see how much "crisper" these images become with a simple push of a button.

As I've suggested in the past, I suspect "Capture Sharpen" removes the character of a lens when shot wide open.  It's at the widest apertures where I've seen the designed-in effects of spherical and chromatic aberrations of old Nikkor manual focus lenses.

After seeing a large show of Steve McCurry's glorious images at the Musee Maillol where I studied his images with an eye toward such things, I may have more to say about "Capture Sharpen" and optical effects in the future.

Thursday, February 10, 2022

Old vs New ~ Nikon Nikkor-O 35mm f/2 vs Sigma 30mm f/2.8 EX DN E

From a recent post, the Nikon Nikkor-O 35mm f/2 pre-Ai looks pretty good, regardless of age.  For me an obvious question is how it compares with current day computer design optics?

I have a Sigma 30mm f2.8 EX DN E that is wickedly sharp from f4 on down.  So I mounted the Sigma on my Sony A7 and shot it in full frame mode (no APS-C cropping).  I did this to keep things more or less equal between the newer and old lenses.  All I needed to do was move the tripod to account for the 5mm focal length difference.

Setup - 

  • Sony A7 - ISO50, 2 second timer, in-camera levels used to square the whole plot up
  • Manfrotto tripod - it's capable of securing an 8x10inch view camera, so it's sturdy enough for this
  • Lenses -
    • Nikon Nikkor-O 35mm f/2 pre-Ai single coated - shot from f/2 through f/8
    • Sigma 30mm f/2.8 EX DN E - shot from f/2.8 through f/8 shot Full Frame which shows the edge of the frame clipped due to the lack of FF coverage
  • Rawtherapee RAW to jpg conversion - Auto-Match function, but nothing further (ie: NO Capture Sharpening)

Comparison - 

Here is the scene setup.  It's just a pair of closed gaze scrims in our apartment.  The details are interestingly small, so therefore useful for this kind of "wee look-see." 


Nikon Nikkor-O 35mm f2 Scene


[As always, click on the image and look at it to 100percent file size to see whatever there is to be seen.]


Nikon Nikkor-O 35mm f/2, Sigma 30mm f/2.8 EX DN E Comparison


Comments - 

At f/2.8 the Nikkor-O is just a touch softer than the Sigma.  Not by much, mind you, but just enough that I can see it pixel-peeping.

From f/4 on down through f/8 I have a difficult time telling the difference between the 50+ year old Nikkor-O 35mm lens and the 10 year old Sigma 30mm.  In terms of how I "see sharpness", the images are equivalent.

Though I don't show it here, by applying Rawtherapee's "Capture Sharpen" to any of the images, Nikon or Sigma, the "apparent sharpness" will visibly increase.

Coming to subtle differences between how the Nikon and Sigma lenses "render" an image, I found it interesting the way the tree in the background appears to be "softer" and "smoother" with the Nikkor-O than with the Sigma.  I could've predicted this based on earlier comparisons of point light sources out of focus.  Nikkor lenses, historically, have been designed for this kind of smooth out of focus rendition behind the point of focus.

So what, if anything, has been gained in commercial optics between the time of the Nikkor-O seen here and the Sigma Art DN?  Not much optically, maybe.  Additionally, perhaps not all lens manufacturers have Nikon's sensitivity to how the out of focus regions are rendered, either, but, a lot of other closely related things _have_ changed in 40 years.

We now have autofocus, as well as very small, sharp lenses like this little 30mm f/2.8.  It weighs all of 140grams compared with the Nikon 35mm f/2 at one aperture stop wider and 285grams, which comes without autofocus (of course).  

I'm certain that vast improvements have been made in "manufacturability" over the years.  It takes fewer steps to make a lens these days and with higher assembly accuracy (though I have a Sony 16mm f/2.8 SEL that might suggest otherwise).

Sunday, February 06, 2022

Nikon Nikkor-O 35mm f/2 pre-Ai single coated ~ yet another look

After recently reconsidering what turns out to be a brilliant little Nikon Nikkor 24mm f/2.8 Ai, I thought it might be time to have yet another look at my old Nikon Nikkor-O 35mm f/2 single coated optics.


Lens Stories ~Nikon Nikkor-O 35mm f/2


For this look at things, I wanted to confirm the field of this focal length lens is as flat as the newer 24mm Nikkor.

I mounted it up on the Sony A7 using a straight-thru adapter and pointed the lens at a fine-detailed subject.  The fine-detailed subject just happened to be our daylight back-lit apartment gaze curtains.

Setup - 

  • Sony A7 - ISO50, 2 second timer, in-camera levels used to square the whole plot up
  • Manfrotto tripod - it's capable of securing an 8x10inch view camera, so it's sturdy enough for this
  • Nikon Nikkor-O 35mm f/2 pre-Ai single coated - shot from f/2 through f/8
  • Rawtherapee RAW to jpg conversion - Auto-Match function, but nothing further (ie: NO Capture Sharpening)

Comparison - 

Here is the scene setup.  It's just a pair of closed gaze scrims in our apartment.  The details are interestingly small, so therefore useful for this kind of "wee look-see."  The center section, upper left corner, and lower right corners were used in the comparison.


Nikon Nikkor-O 35mm f2 Scene


[As always, click on the image and look at it to 100percent file size to see whatever there is to be seen.]


Nikon Nikkor-O 35mm f/2 pre-Ai


Comments - 

Borrowing from my Comments on the 24mm Nikkor, nearly everything I saw with that lens can be applied to this Nikkor-O 35mm f/2.

The Center images at f/2 looks a bit soft.  Is it the lack of contrast?  Or perhaps a bit of spherical aberration?  Both, probably, as it's certainly softer and less contrasty than at f/2.8 or anything further south than that. 

From f/2 down to f/8, the extreme corners clean up incrementally.  The corners are certainly not bad, even at wide open, but the improvement as the lens is stopped down is apparent.

Thinking about this, isn't it remarkable how a lens manufactured in the early 1970's, is single coated, and designed sometime in the 1960's can still look half way decent on modern digital cameras?  Standing alone without a reference, the lens looks nice.

It makes me wonder what useful gains have been made in optical design between then and now?  I'll consider this quesion more fully in a future post.

Tuesday, February 01, 2022

Nikon Nikkor 24mm f/2.8 Ai ~ AA filter "sharpening" effects

Writing a recent entry on rediscovering the Nikon Nikkor 24mm f/2.8 Ai and the fact it actually has a flat field afterall, I stumbled on something that I'd like to consider here.

Capture Sharpening.

This is something that Lightroom and Rawtherapee provide.  It is a function that attempts to offset the effects of Anti-Aliasing filters.  AA filters are used to combat moire in digital sensors.  Canon is famous for using strong AA filters.  Sony, from what I understand, has much lighter AA filters in many of their mirrorless camera offerings, including the NEX/A6xxx and A7 products.

I've been using Rawtherapee's Capture Sharpen without really thinking about it.  My images are "sharper", so what's not to like, right?

A couple years ago I acquired a very low mileage (ie: <700 click) Sony A7 full frame light grabbing mirrorless monster.  While this is only the Mark I version of a long line of great Sony 24 mpixel cameras it really performs.  The sensor is very quiet (ie: no noise) and is far sharper than any Canon DSLR I ever used (and I used a lot of them). Do I really "need" Capture Sharpen to crisp images up???

Using images from a prior post I applied Capture Sharpen to images at two apertures to see what effect the function had on the basic off the sensor image.

Setup - 

  • Sony A7 - ISO50, 2 second timer, in-camera levels used to square the whole plot up
  • Manfrotto tripod - it's capable of securing an 8x10inch view camera, so it's sturdy enough for this
  • Nikon Nikkor 24mm f/2.8 Ai - shot at f/2.8 and f/8
  • Rawtherapee RAW to jpg conversion - Auto-Match function plus Capture Sharpen

Comparison - 

Here is the scene setup.  It's just a pair of closed gaze scrims in our apartment.


Nikon Nikkor 24mm Ai F-stop Comparison


[As always, click on the image and look at it to 100percent file size to see whatever there is to be seen.]


Nikon Nikkor 24mm Ai Comparison


Comments - 

Looking at the images at f/2.8 we can see where Capture Sharpen function lives up to its name.  Capture Sharpen'd images at f/2.8 are "sharper" looking that images out of the camera at f/8.  And at f/8, Capture Sharpen takes images yet another step further into "sharp."

I am "good" with all this, until I start looking at the contrast in the out of focus regions (that little peek between the scrims).  It's there that something interesting is taking place.  The "soft smoothness" of the out of focus rendition is starting, to my eyes, become a little harsh.  The light/dark transitions have become rather "steep" and "contrasty."

Now I'm confronted with a reality of software processing "enhancements."  I ask myself several things - 

  • Is this really how I want my images to appear?
  • Does software intervention go some ways toward eliminating optical effects?
  • What if native lens rendering, defects and all, are what attracted me to a set of lenses in the first place, only to be removed by software?

That last question is something rather interesting.  

For instance, let's say a lens manufacturer like, oh, let's take Nikon as an example, _deliberately_ designed their old manual focus lenses to be soft wide open and sharpen up as the aperture is stopped down.  

Let's say Nikon knew their Japanese customers _loved_ soft rendering under certain circumstances to create a "delicate" look.  

Let's say Western customers know little to nothing about any of this and just want "sharp", "sharp, "sharp" at all costs and at _all_ apertures.  Or, let's say that modern AF systems require a certain level of resolution wide open to focus accurately.

Which leads me to a related conversation made some years ago around the photo-forums.  That was the subject of "focus shift" between wide open and stopped down.  In particular, I remember comments about Nikon Nikkor 50mm f/1.4 lenses being prone to this dastardly defect.  Oh the horror.  Oh the hopelessness.  Oh the hand wringing.

Only... if a lens is designed to be deliberately soft wide open it will give the Japanese markets desired "delicate" effect.  It will exhibit under-corrected spherical aberration behind the point of focus.  One of the things about under-corrected spherical aberration is that there is a region, not just one point!, where an image will appear to be in focus.  

The implications of this are several fold and it might take several tumblers of the "Good Stuff" to think through all this and to come to an enlightened understanding of what's really going on.  I'll comment a bit more on these things in a future post.

Coming back to the effects of Capture Sharpen on softer images shot wide-open, I see where it's possible to make such an image appear as "sharp" as anything shot at other apertures.

The questions are: Is this really what I want?  Or do I want to retain the "character" of a lens as it was originally designed?


Saturday, January 29, 2022

Nikon Nikkor 24mm Ai ~ a reconsideration

Four years ago I wrote a little entry where-in I bemoaned field curvature that I found in a pretty little Nikon Nikkor 24m f/2.8 Ai.  This was "confirmed" in images shot at or near infinity that were distinctively soft in the extreme corners of the frame.


Lens Stories ~ Nikon Nikkor 24mm f/2.8 AiS


Since then I've thought a lot about that blog entry and the pretty optic in question.  I couldn't believe that Nikon would design a lens with that much field curvature.  Certainly, there had to be some "reasonable" explanation, or so I posited.

Some time between then and now I acquired a very low mileage (ie: <700 click) Sony A7 full frame light grabbing mirrorless monster.  While this is only the Mark I version of a long line of great Sony 24 mpixel cameras it really performs.  The sensor is very quiet (ie: no noise) and is far sharper than any Canon DSLR I ever used (and I used a lot of them).

If I weren't already wedded to the super small very light NEX/A5000/A6000 APS-C series of Sony cameras (which also outperform any Canon DSLR I ever used), I think I'd be sorely tempted to trade it all in on more Sony Full Frame Insanity.

Which leads me back to the Nikkor 24mm.  I finally found time to mount it up on the Sony A7 using a straight-thru adapter and point the lens at a fine-detailed subject.  The fine-detailed subject just happened to be our daylight back-lit apartment gaze curtains.

Setup - 

  • Sony A7 - ISO50, 2 second timer, in-camera levels used to square the whole plot up
  • Manfrotto tripod - it's capable of securing an 8x10inch view camera, so it's sturdy enough for this
  • Nikon Nikkor 24mm f/2.8 Ai - shot from f/2.8 through f/11
  • Rawtherapee RAW to jpg conversion - Auto-Match function, but nothing further (ie: NO Capture Sharpening - that will be in a future blog entry)

Comparison - 

Here is the scene setup.  It's just a pair of closed gaze scrims in our apartment.  The details are interestingly small, so therefore useful for this kind of "wee look-see."  The center section, upper left corner, and lower right corners were used in the comparison.


Nikon Nikkor 24mm Ai F-stop Comparison


[As always, click on the image and look at it to 100percent file size to see whatever there is to be seen.]


Nikon Nikkor 24mm Ai Capture Sharpen Comparison


Comments - 

Considering just the Center images, f/2.8 looks a bit soft.  Is it the lack of contrast?  Or perhaps a bit of spherical aberration?  It's not bad to my eye, but it's certainly softer and less contrasty than at f/4 or anything further south than that.  I'll have more to say about this, too, in a future post.

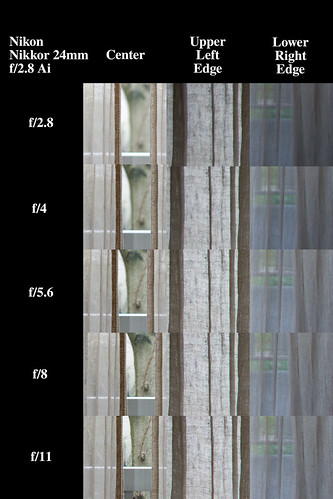
Looking at the question of field curvature, I feel I learned an important lesson. From f/2.8 I can see that the extreme corners of the frame are sharper than they ever were with the APS-C systems used with a Lens Turbo II focal reducer.  The corners get sharper from there on down through f/11.

So, what did I learn?  I learned that I can't just slap a lens on a focal reducer and expect it behave the same way a 35mm manual focus lens would on Full Frame.  There may be important changes to the way an image is rendered.  It's worth the time to test and evaluate something without drawing any early, hard, fast conclusions.

I need to update that old post to point out that "field curvature" is not necessarily a question of the lens.  In this case, the Lens Turbo II focal reducer induced field curvature when used with the Nikon Nikkor 24mm f/2.8 Ai lens.


Saturday, January 15, 2022

Looking Forward to 2022

Even as Omicron is surging wildly out of control around the world I can't help but dream, hope, and wish the following events actually get to see the light of day.

These are all motorsport related photo-opportunities -

Retromobile - 16-20 March

Foire Photo - Chelles - 20 March *ADDED 27 January*

la traversee de Paris - 27 March *ADDED 27 January*

Tour Auto - 25-30 April

Vintage Revival Montlhery - 7-8 May

Rallye des Princesses - 14-19 May

Paris - Rambouillet avec les Teuf-Teuf - 28, 29 May *ADDED 3 March*

Cafe Racer Montlhery - 18-19 June

le Mans Classic - 30 June, 3 July


With luck, I will see you there!


*UPDATED 27 January* It appears that Europe will be opening up in two weeks.  So all these events and MORE will be on schedule.  It'll be a very busy year after all.

la traversee de Pari estivale ~ 2021 redo

Sunday, January 02, 2022

Someone who performs outstanding optical testing...

I've known of the Lensrentals blog for some time, now.  Yet it's only very recently that I came to more fully understand and appreciate what Dr. Roger Cicala has to say. 

I enjoyed reading Dr.Cicala's comments on prime lenses and think his conclusions are interesting.  Of course I'm now considering adding a Sigma 30mm f/1.4 DC Contemporary lenses to my always too long list of optics that I might _have_ to have.

Dr. Cicala's conclusions were based in this article on traditional MTF measurements.  That is, contrast measurements were made along a single 2D line.  No attempts were made to account for optical field curvature in a 3D space.

Then I came across a current article and it really caught my attention.  Roger writes about integrating MTF information in a way that goes beyond simple flat field measurements.  

This is wonderful in the way the information helps one "see" how lenses behave in three dimensions. I think what Dr. Cicala & Co are now doing is ground breaking. I love it!

Additionally, I appreciate is that he clearly states that he is _not_ testing for out of focus rendition.  His tests might at best remotely hint at how out of focus regions can be rendered, but that is an area he is currently leaving to others.

Which leads me to something I read some years ago.  This was something that David Duncan Douglas wrote about when he first encountered Nippon Kogaku lenses.  His story, in general, is very well known.

M.Douglas' colleague made a nicely sharp image and was asked what lenses he was using.  M. Douglas' glass was designed and manufactured by Leitz and Zeiss and he was finding his lenses were rather soft and unremarkable compared with the photo his colleague had made.

On his first visit to Nippon Kogaku (now Nikon) they used a display method where one could clearly see and evaluate the performance of a lens.  A lens projector was the display method.  The way it worked was to have a grid image projected onto a screen through a lens.  As a lenses focus ring was turned a person could judge for themselves not only resolution, but _how an optic transitioned from out of focus into focus and back out of focus_.

There is a standard, albeit subjective, method for considering out of focus rendition of optics as well as "sharpness". Lens projectors are still used today for evaluating lenses used in cinema.  In fact, at least one testing lab has added out of focus rendition information to their web pages. 

Coming back to Dr. Cicala's lens tesing, I wish I had access to the kinds of equipment he uses.  Lens Rentals looks at the latest generation lenses.  I'd like to see how the old manual focus Nikon Nikkors behave.  There would be a lot for me to learn.

Both methods (MTF in 2D/3D and grid image projection) do not take into account the image recording materials.  These methods consider only the lenses.  I will leave the pros and cons of this for perhaps another time.  

Until then, and only if you're really interested in the subject and haven't already encountered Lens Rentals blog, consider what Dr. Cicala has written.


Nice Port ~ 2021


Thursday, December 09, 2021

... from a time long before...

I was cruising through my Flickr site and stumbled on an image.  

It was entered in one of David Hobby's Strobist contests and surprisingly to me it won forth or fifth place.

Did I really do this?  Wow.


Radiant Bones - All Hallows Eve

Tuesday, December 07, 2021

Do lenses matter as much as we're lead to believe they do?

Here I am, staying for yet another three months in Nice, France.  After this year is said and done we'll have been here 6 months.  Half a year.  Extraordinary year, this.

There's not been much time this trip to consider photography, the craft, the art, the tools, nor the techniques.  Yet I snapped a couple images recently that reminded me of something that I've thought about posting.

I wanted to call into question the little matter of lenses and how much importance we place on them.


Cimiez Nice ~ 2021


Sure, most people who make images couldn't work without at least one lens.  As we know, and without cutting things too fine, there are plenty of photographers who use pinholes and zone plates.

No.  That's not my point.  My point is lenses and the minutiae of optical performance and image rendering are largely subjective and up to the image maker.  

Outside of ourselves as photographers, who really cares what lens made which image?  The viewer?  I think not.

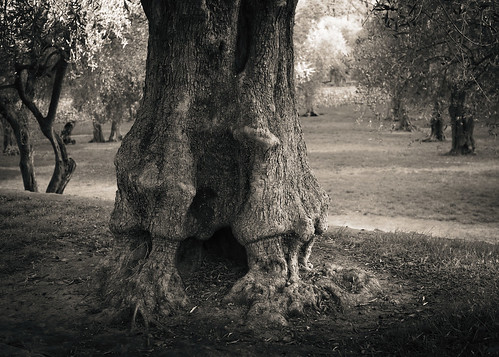
Without looking at the EXIF data, here's what I mean.  These ancient olive trees are found in the park where they used to play jazz into the wee-hours of the morning during a Nice summer give me pleasure.

I'm happy I had a camera and a lens.  I don't think these could be any better to me had I used my "favorite" optics that stayed home back in Paris.

And yet I fret and look and explore and ponder and search and am ready to buy yet another little optic that will somehow make my photographic life "perfect."

I'm a strange being.  Really.  I am.


Cimiez Nice ~ 2021

Saturday, October 02, 2021

Image Creation ~ "Ecosystems"

It looks like The Online Photographer may be changing the frequency of Mike's posts.  Putting food on the table is, of course, the most important thing, right?  Sounds like Mike is taking up writing.  It'll be interesting to see what he comes up with.

I have followed Mike's blog for years and I've been very happy to have learned as much as I have from reading his posts.  His insights into how digital files can be made to look good in black and white are particularly instructional.

Alas, the knowledge of what it takes to convert color into black and white, how to make very large prints from small digital files, how lens designs that influence out of focus rendition, all these things and much much more, when done properly, have been subsumed by and "baked into" the underlying software in current digital systems.

Color grading selection defaults can be set to ensure consistency from image to image.  Human perception modeling color to black and white conversion might be the very thing software is based on (and not based on simple color de-saturation).  Image stacking for noise reduction, image "up-rez"ing, and resolution improvement now can happen without us even knowing nor caring about what it takes to make the magic happen.

Over on Thom's website, he shared some thoughts on how small the standalone camera photography "ecosystem" has become.  The points he makes are, to me, quite valid and relate directly to the "baked into" comment I just made.

Back in film photography days the "ecosystem" was very large.  We had the camera and lens makers. We had the film manufacturers.  We had photo-labs and camera shops that sold chemistry for film development.  We had print paper manufacturers and companies that made enlargers and lenses for enlargers.  We had negative and print processor machines we could buy if we could afford them.  We had a gallery system and a vast book and magazine publishing engine.

The "ecosystem" was not dominated by a single manufacturer.  It couldn't be.  The "ecosystem" was simply too large.  For all its size and weight, the infrastructure each piece of the system integrated into was complete.  Everyone needed everyone else for the whole thing to work.

Today?  Things are, quite obviously, different.

Cell phone cameras have become the epicenter of a no-film, no-chemistry, low-overhead, all-electronic "ecosystem."  Cameras.  Lenses. Network connectivity.  Image sharing platforms. Communications.  Sharing.  Everything is well integrated, even down to having direct connections with the original film-era hold-overs of print making and book and magazine publishing.  The number of suppliers that it takes to create this "ecosystem" are substantially fewer than during the film era.

Several short years ago I watched as a tethered camera captured images of a fashion model along the Seine River here in Paris.  The images were edited by a small team of people on a laptop computer, color-graded on-site and posted directly to the 'net.  All in realtime.

Today I no longer see tethered cameras.  Sure, you can take just about any digital stand-alone camera and tether it to a power laptop computer, but why take on that level of overhead when you can do everything from a single device?

Everything can now be shot with a cellphone, by-passing the need for a laptop computer.  The team of people is downsized to just one or two people.  Everything is transmitted straight across the network to its destination.  The distance from idea to final results and distribution can now be incredibly short.

All this leaves me wondering what to do, if anything, with the old, traditional, stand-alone camera/optics systems?

Over a decade ago I mused that wouldn't it be interesting if someone integrated Linux as the base operating system into a camera?  Samsung tried this using the Linux derivative, Android, but the project was something of a disaster.

More recently, as in something less than ten years ago, I commented that Sony, the electronics company who should know well how to do this and how to market it, should take the Android OS, throw away the old embedded OS they currently use in their Alpha-series cameras, and create a fully networked, fully integrated, fully connected camera system.

I feel the opportunity is still there for the taking.  Except, as Thom notes, there might not be the "vision" of stand alone camera manufacturers to make the logical (to me, at least) leap into the cellphone present.
Musee des Arts et Metier ~ Paris 2021


Wednesday, September 01, 2021

RIP "Don't Take Pictures"

I'm sure everyone already knows, but "Don't Take Pictures" has shuttered its publication.  Perhaps you've read their announcement.

"Dear Readers,

Don’t Take Pictures will cease publication on September 1, 2021. When we launched in the fall of 2013, my Editor’s Letter explained the magazine’s mission as a space to celebrate the thoughtful, creative act of making photographic art. The following year, we launched online to include more timely features about the photographic community. We found that our online and print components needed one another in order to survive. 
 
The world has changed a lot since 2013 and our consumption of print media has evolved as well. In print, our writers and designers spent six months diving deep into the issue’s theme and each artist’s work. Without the distractions of a screen, our readers were encouraged to focus on photography on paper. Online publishing has changed as well. It is time to rethink the purpose of a magazine in the age of social media. For all that is gained by the ability to find photographers with a few clicks of a mouse, much of the grandeur and magic of their artwork is lost when viewed in slideshows, as thumbnails, or as part of an infinite stream of images. The demands of the internet era require a churning of content that is both unfeasible for Don’t Take Pictures’ staff and antithetical to our mission.
 
The decision to close Don’t Take Pictures was difficult, but its ending should not be mourned—change is not a bad thing. As the art world continues to evolve, our team is constantly rethinking how best to engage with photography in print and digital spaces. We are very proud of our past eight years, 16 beautifully designed print issues, and hundreds of online articles that exemplified what Don’t Take Pictures is about—great photography and great writing. We would like to extended a special thanks to the 90 artists we were honored to feature in print. 
 
Readers whose print subscriptions included an issue this September have been refunded. The Don’t Take Pictures website will remain online as an archive and resource for the foreseeable future, with all previous issues available as PDFs. It has been an absolute honor to share the work of emerging photographers and arts writers in print and online for the past eight years. We appreciate everyone who read our articles online, engaged with us on social media, or read Don’t Take Pictures in print.
 
Sincerely,
Kat Kiernan, Editor-in-Chief
"

I feel at the bottom of all this is an important point. The purpose of a photograph has changed dramatically in recent time. How we consume images, how we look at them, why we look at them, and what they mean to us has little relation to how we engaged images just a decade ago.

This is why I've scaled back my online presence. I now have just this blog and my Flickr page.  That's it. Nothing more.

Us older folk who tend to "remember when" are dying off. Photography had its day in the sun. Now the experience of image making is, for me, reduced to sharing what I still find interesting and pleasurable. I do this regardless of if there is an audience or a group of photographers I can share with, or not. 

Someday I may feel differently, but for now, that is how it is. 


Château de Fontainebleau ~ 2021
 

Tuesday, August 31, 2021

Super Resolution ~ research

Super Resolution, where you take a small image and increase its spacial dimensions and try to retain as much detail as possible, has been an interesting topic for photographers over the years.

Google recently published something related to two different approaches.  

They used an artificial intelligence to learn and then apply results.  

 "...diffusion models, originally proposed in 2015, have seen a recent revival in interest due to their training stability and their promising sample quality results on image and audio generation. Thus, they offer potentially favorable trade-offs compared to other types of deep generative models. Diffusion models work by corrupting the training data by progressively adding Gaussian noise, slowly wiping out details in the data until it becomes pure noise, and then training a neural network to reverse this corruption process. Running this reversed corruption process synthesizes data from pure noise by gradually denoising it until a clean sample is produced. This synthesis procedure can be interpreted as an optimization algorithm that follows the gradient of the data density to produce likely samples..."

I wonder how well it might work for amateur and professional photographers?  Perhaps we'll get a chance to see some day.


Château de Fontainebleau ~ 2021

Sunday, August 15, 2021

The size of things...

The older the I get the more important the size and weight of camera gear has become.

In fact, there was a time about seven years ago when I started doing push ups to build up my arms.  The Canon 5D MkII and 7D cameras owned then, along with two or three L-glass lenses were becoming too much for me to carry for a long time.  I would come back from a la traversee de Paris event exhausted.

One of the conversations folks were having online at the time was how nice it would be to have a full frame digital camera that had dimensions and weight similar to the old Canon AE-1.  If I remember correctly, Canon was saying they considered that to be the "perfect" camera size.  I can't recall their reasoning, but looking at the 1D and 1Ds I wondered why they felt they had to make those cameras so huge.

Not too long after I bought a new Sony A6000.  At first I didn't use it much as I thought the full frame Canon 5D _must_ have better image quality than the smaller APS-C A6000.  I caught on to the truth soon enough.  Sony sensors were and are nothing short of brilliant and I soon sold all my Canon gear.

I'm not sure why I thought about this recently.  Perhaps it has to do with the sizes of the Nikon and Canon mirrorless offerings.  They're still quite large and I wondered why that could be?

In any event, I thought I'd put down sizes and weights just to compare various cameras, new and old.  So, starting with the shortest base-length camera body and ending with the longest -

*Sony NEX-5T - 111mm x 59mm x 39mm - 329grams with 16mm f/2.8 pancake lens

*Sony NEX-5T - 111mm x 59mm x 39mm - 392grams with 16-50mm kit lens

*Sony NEX-5T - 111mm x 59mm x 39mm - 421grams with 30mm Sigma EX DN lens

*Sony A6000 - 120mm x 67mm x 45mm - 468grams with kit lens

*Sony A7 - 127mm x 94mm x 48mm - 769grams with kit lens

Nikon Z7 - 134mm x 101mm x 68mm - 1175grams with kit lens

Leica M4 - 138mm x 77mm x 38mm - 550grams body only

Canon R5 - 138mm x 97mm x 88mm - 738grams body, battery, CF card

Canon AE-1 - 141mm x 87mm x 47mm - 590grams body only

*Sony cameras were weighed with batteries and memory cards.

A quick glance at the list re-confirms for me that Sony continues to meet my lightest/smallest camera goals. 


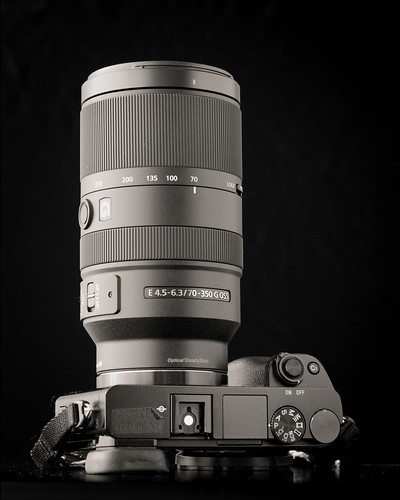
Lens Stories ~ Sony 70-350mm G-Master

Tuesday, July 27, 2021

Sony NEX-7 back button focus setup

Here is how I setup the back button focus on a Sony NEX7.


Menu -> Setup -> Custom Key Settings -> AF/MF Control

Menu -> Camera -> AF/MF Select -> Manual Focus

Menu -> Setup -> AF/MF Control -> Hold

Menu -> Setup -> Function Settings -> Function Settings 1 -> Focus Settings (though I really don't use this one at all)


I like using this setup for nearly all situations when using this NEX.  The only problem with the Sony NEX-7 AF system is that it is slow compared with the Sony A6000.  If memory serves, the 7's AF system is contrast detect and not phase lock.

For this reason I tend assign the heavy lifting for motorsports activities to the A6000.  I quite happily use, on the other hand, the NEX-7 in low stress, slow change situations, such as travel. 

Eze ~ in B&W ~ 2021

Monday, July 26, 2021

Sony A6000 back button focus setup

I see that I need to document for future reference how I set my Sony A6000 to back button focus.  I have reached the age where I forget things.

The whole "back button focus" interest started when I found the camera would select something of stronger contrast in the background to focus on when the subject was smooth and of lower overall contrast.  

For example, when I photograph cars they tend to be smooth, broad areas that the AF system might have trouble locking onto when something in the background is so much easier for it to acquire.

Diving into the menu system...

  • AEL button ~ AF On
  • AEL w/ shutter ~ Off
  • Pre-AF ~ Off
  • AF w/ shutter ~ Off
  • Lock-On AF ~ Off

Then I set the AF system to the smallest center point.  The "wide" and "center" selections are too broad and things in the background might be selected instead of the precise thing I want.  Hence the selection of an AF "point".

When I want to focus, I press the AEL button on the back of the camera.  There is no AF when I press the shutter release.

The usage steps are -
  • Place the center "point" over the thing I want precise focus on
  • Press the AEL button on the back of the camera and watch for when the "point" bracket outlines turn green, then release the AEL button
  • Recompose the scene as needed
  • Press the shutter release

I like this approach when using AF lenses.  It is a way of emulating the point of focus of a manual lens without the hassle of toggling the magnifier, focusing, then turning the magnifier off before re-composition.

Once I got into the habit of using back button focus on certain subjects, I found it was easiest for me to simply use this approach for nearly everything.  It makes me think a moment or two about what I want in best focus before hitting the shutter release.


Senlis ~ 2021


Sunday, July 18, 2021

New vs Old ~ a little experience

Readers likely by now know how much of a nut I am about optics and minutia and details and things that really don't seem to matter to normal people.  

Certainly I've learned a lot over the years by poking and prodding at the subject, including that well designed optics are a result of balancing trade-offs. However, explanations of these trade-offs are all too often are missing from the marketing literature.  It seems as if there is a distinct disconnect between engineering and marketing.  

Helpful descriptions like what makes a good portrait lens are very rare.  In fact, I only know of one document that a manufacturer produced that guided users.  That was with the specialized Kodak Portrait lenses.

More normally interested parties are left to sort things out for themselves.  

A good example of this is Nikon's famous 105mm f/2.5 Nikkor-P.  It was commonly accepted that it is a wonderful optic, but no one could tell you _why_.  The marketing literature of the day is woefully lacking in explaining the unique property of that lens.  

It is only relatively recently with Nikon's 1000 and 1 Nights lens history series that we learn the designers controlled the under-corrected spherical aberrations behind the point of focus.  Here is how Nikon now explains it.

"... The lens also has characteristics of spherical aberration and coma. Basically close-range aberration variation is small, but at portrait distances the correction for aberration seems to be slightly insufficient. The insufficiency as far as spherical aberration in particular is what makes defocus background appeared beautiful. The aberration balance has been calculated carefully for use in portraits. When the aperture is open contrast is good, and delineation is soft..."

That, right there, is why that 105mm lens is so gorgeous. 

Being left to sort things out for myself, with years, experience, and patience, I think I've hit upon the things that make a lens interesting to me.  Resolution is a given.  As it turns out that is probably the easiest quality to design into a lens.  Even sub-$100 kit lenses are "sharp."

Field flatness is not all that important to me, unless, as in the case of the Nikon Nikkor 35-105mm f/3.5-4.5 zoom, the field curvature is extreme.  There is also the case of the Zhongyi LensTurbo II focal reducer with, with certain lenses, such as the Nikon Nikkor 24mm f/2.8 Ai, introduces an obvious amount of curvature to the field.  Other than that, field curvature is just one of those things to think about in specialized applications, such a document photography where a flat field might be helpful.

Other lens "faults" such as chromatic aberration can now be corrected in image processing software.

Which leaves me with the aforementioned spherical aberration.  When a designer deliberately uses this form of aberration in a lens, it can help lead to "creamy" smooth out of focus rendition.  This, I've come to learn, is what Nikon carefully considered in their manual focus lens designs.  I'm thinking of the fabulous 85mm f/1.8 H/H.C./K and famous 105mm f/2.5 P lenses, as well as, perhaps surprisingly, Nikon's 75-150mm f/3.5 and Nikkor 100-300mm f/5.6 AiS optics.

As I said, it can take time to sort out which properties might matter to you.  This is why I'm pretty sure why Leica once advised that photographers use a lens for a year before deciding if they liked it or not.   

Et voila! this is how I settled on Nikon lenses.  I've been using them consistently for many years after having used Canon lenses for even longer.

I recently picked up an attractively priced very low "mileage" (less than 800 clicks on the shutter) Sony A7 to use with a rather too big a stack of Nikkor manual focus lenses that I have.  Since I'd convinced myself that I'd find no better out of focus rendition than with these lenses, wouldn't it be nice to be able to use them without a focal reducer to get in the way of things?

 
Lens Portrait ~ 2021

~ Stack of Nikkors ~
Too many choices?
Worse, I've added two lenses
to this stack since the photo
was made.


Shortly afterward, in search of a lens that I could take on our travels and that was demonstrably better than the Sony APS-C mirrorless kit lenses, I bought off that auction site an inexpensively priced Zeiss 16-70mm f/4 OSS ZA.

The Zeiss has a very very small mark on the front glass.  It's really difficult to see the defect and it might only be a rub on the coating as the glass looks to be OK.  The lens has proved to be a good choice, being well constructed and pleasingly sharp and all that.  

However, I hadn't taken it as "seriously" as I do the Nikkors. The new to me Zeiss lens remained "just another lens." 

In fact, just the other day I enthused over a beat-up Micro-Nikkor 105mm f/4 Ai and its out of focus rendition.  So many project possibilities came to mind and I was excited to haul this thing into the wild to make a few images with it.

An opportunity to photograph a music group plopped into my lap and I wanted to confirm which lens(es) I would use.  Wanting the most flexible solution for this studio photoshoot I thought perhaps I should use the 16-70mm ZA.  And I'd better check things out beforehand.  As "beautiful out of focus" references I used my 85mm and 105mm Nikkors to compare them with the new to me Zeiss ZA.

I didn't expect much out of the Zeiss for out of focus rendition.  I'd read, for instance, that Zeiss' 24-70mm f/4 lens for full frame Sony cameras had "busy" out of focus rendition.  Could the little ZA lens really be any different?

... er... yes... I was in for a little surprise... and I like good surprises... so yipee!!!  Looking at the results at 70mm f/4 with the smaller APS-C 16-70mm Zeiss forced me to evolve my thoughts on the subject.  

Take a look at the following images, and as always, click on and enlarge them to 100percent.  Pay particular attention to the lettering/numbering around the inside front ring as well as the out of focus qualities of the rear cap.


Nikon Nikkor 105mm f/2.5 (Xenotar version) ~ Lens Stories

Nikon Nikkor (Xenotar version) 105mm f/2.5
photographed with
Sony A6000 - ISO100
Zeiss 16-70mm f/4 ZA OSS

Lens Stories ~ Nikon Nikkor-P 105mm f/2.5
 
Nikon Nikkor (Xenotar version) 105mm f/2.5
photographed with
Sony A7 - ISO50
Micro-Nikkor 105mm f/4 Ai

The differences are rather subtle between the images.  Yet to my eyes the Zeiss is "smoother" in the out of focus regions than the Micro-Nikkor 105mm f/4.  The "edges" rendered with the ZA lens are "rounder."  

Don't get me wrong.  The Micro-Nikkor is quite wonderful and I'm certainly not in any hurry to kick it to the curb. It's just that the Zeiss does something that I find "special."

To continue my little exploration I took a look at the out of focus rendition with subject matter a couple meters from the lens and at other focal lengths across the Zeiss' zoom range.  What I found with the closeups at 70mm holds true when photographing at greater distance.  This Zeiss' out of focus rendition is "smooth" nearly everywhere and at nearly all focal lengths.

It turns out the 16-70mm f/4 ZA OSS is actually a very nice lens.  Whoever designed it really put effort into it to get so many details "right."

What a find, eh?


Lens Stories ~ 16-70mm Zeiss ZA OSS 
Sony NEX-7
Zeiss 16-70mm f/4 ZA OSS
~
Which is not much bigger
than the same camera with
Sony's 18-55mm kit lens.


Monday, July 12, 2021

Digital "Copy Stand" ~ magnification studies

In a prior article I took a look at copying 4x5inch black and white negatives using a 24megapixel full-frame digital camera and an old film-era macro lens.

It left me to ponder the question of how much more "resolution" could be gotten by moving the lens closer to a negative and stitching several image sections together.  It could be interesting to find the point where the digital system would start recording film grain and give no further "resolution" increase by moving even closer.

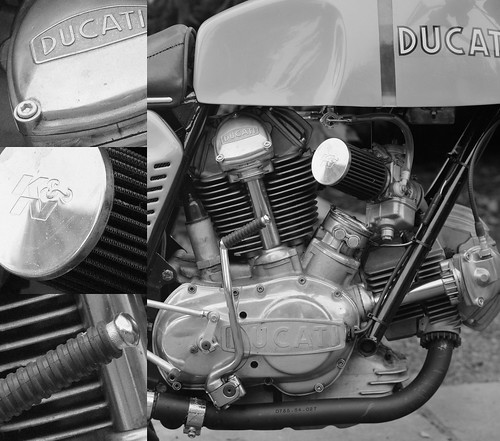
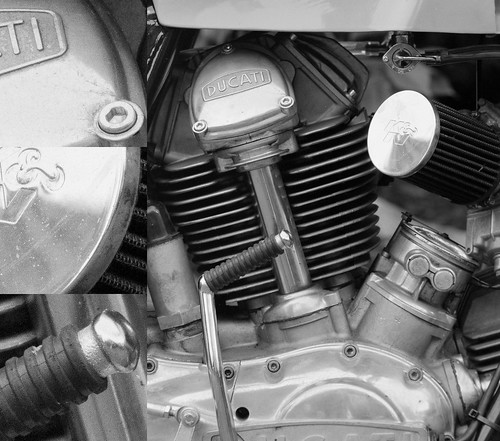
The subject is a lovely 1975 Ducati 750GT.  I bought this from a friend who had made it into a quasi-"750 Sport."  It was a gorgeous bike and I loved riding that Duc.  One year I rode it to the Steamboat Springs motorcycle racing event from Oregon.  She delivered 55miles per gallon a 75 miles per hour.  Talk about efficiency!

This version of the 750cc 90 degree V-twin came with spring actuated valves, not the more legendary desomodromic valve train that Ducati is rightfully famous for.  Still, the motor was sufficiently powerful, easy to control, and had nothing to rate against it as far as I was concerned.

Fabio Taglioni had designed or specified nearly everything about these bevel-drive bikes. The layout, engineering, and manufacturing were outstanding.  My bike worked like a beautifully made watch.  There was a finesse that seemed missing from all other motorcycles i ever rode (and I've ridden just about every road bike ever made from 1973 through to the late-1980's).

I owned another interesting spring valve Ducati.  It was a 1977 860GT.  Few people liked the bike and I can remember seeing new, unsold examples sitting of showroom floors well into the 1980's.  

Never sure why people didn't like it, I found it had "grunt" on the road.  It felt like a person could pull tree stumps out of the ground with one.  I rode mine for years without experiencing any problems.  It, too, had a finesse that was undeniable.

Even if I find such details interesting, these have nothing to do with photography.  So back to is, shall we?

The following image is a single photograph taken of the entire negative using an early model Sony A7 24mpixel camera and an ancient Nikon Micro-Nikkor 55mm f/3.5 lens.

[As always, click on the images and then enlarge them to 100percent]


4x5inch negative to digital conversion

Entire negative in one shot -
Scene on the right
100percent enlarged sections on the left

The following image is a single photograph that represents approximately 50 percent of the area of the entire negative.


4x5inch negative to digital conversion

50percent negative -
Scene on the right
100percent enlarged sections on the left

Lastly, the following image is a single photograph that represents approximately 25 percent of the are of the entire negative.


4x5inch negative to digital conversion

25percent negative -
Scene on the right
100percent enlarged sections on the left

As you can see, film grain is just becoming visible in the 50 percent enlargement.  A stitched image of this magnification would be approximately 10,000 pixels across on the long dimension from a 4x5inch negative.  Image details look pretty good to my eyes. 

From the last image we can see that film grain is clearly visible in the 25 percent area enlargement.  I'm not sure how useful it would be to make an image 15,000 or 20,000 pixels across on the long dimension with this grain size, but, as you can see, such a thing would be easily possible.

If I were to make prints larger than 20x24inches, perhaps I would "feel better" about photographing a negative in sections, and then stitching them into a rather large file. 

I'm not sure how this would look in practice as I no longer have a printer and no place to store prints.  On the other hand, for sharing some of my old work, I think a single full negative digital image should work just fine.

Wednesday, July 07, 2021

Digital "Copy Stand" ~ working with old B&W negatives

Even as we are opening up over here after 18+ months of a pandemic I find I still have a bit of time on my hands.  

I also have a medium sized box filled with black and white film negatives that I brought back with me the last time we were State-side.  What better thing to do than to see if my work has at all progressed over the decades?

To find out what I wanted to find out I needed to make digital "scans" of a few negatives.  I was concerned that 24mpixels would be "enough" resolution to make a "one shot" copying effort worthwhile.  It's all I have on hand at the moment as the higher megapixel cameras are well out of my financial reach. 

My fear was that I might need to photograph each negative in sections, then stitch them together into a larger file to get the kind of "resolution" I felt large black and white negatives were capable of.

Here is the "copy stand" setup I used -

  • Sony A7 24mpixel full-frame camera - ISO50 + 2sec delay shutter release
  • Nikon Micro-Nikkor f/3.5 pre-Ai shot at f/8
  • Lens adapter
  • Mamiya RB67 compendium lens shade - to eliminate reflections coming from behind the camera
  • 77mm to 52mm filter thread adapter - to mount the Mamiya lens shade
  • Big Beefy Bogen tripod
  • White translucent "scrim" - to provide soft/even light behind a negative
  • Negatives taped to glass - with the scrim behind the neg as per above
  • In-camera "level" function to square things up

Negative Copy Setup

The first train image is of SP4449, a 1941 Lima manufactured streamlined 4-8-4 Northern class steam locomotive.  She was the locomotive that pulled the "Freedom Train" around the USA in 1976.  

The film is Polaroid Type55 Positive/Negative.  I wish someone could reliably reproduce this film.  If they could I'd be sorely tempted to buy another 4x5 camera and a lens or two.  This was wonderful material to work with.

As you no doubt are already aware, this film gave a print and a negative at the same time.  I loved working with this material.  To get decent density in the negative I usually shot it at ISO32 or ISO25.  This would leave the print slightly over-exposed, but this didn't matter to me as what I was really after was the neg.

I lived for 18 years in Hillsboro, Oregon.  Occasionally the city of Portland's big steam locomotives could be heard on the tracks that ran to the south of the house.  Often I'd grab a camera and jump into the car to head over to see what I could see.

Coming to the subject of deciding if 24mpixel is enough "resolution" to capture something decent off an old 4x5inch negative in a single shot, here is a photo of SP4449 at rest during one of its Hillsboro runs.

Train Resolution ~ 4x5 negative

SP4449 ~ Hillsboro
Schneider 110mm XL f/5.6
Full Scene on top
100percent crop sections across the bottom

To my eyes things don't look too bad.  In fact, this looks entirely usable.  Just to confirm this I would like to look at a second image.

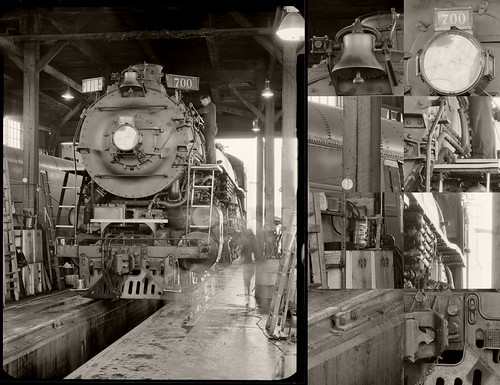
The city of Portland owns another steam locomotive.  SPS700 is an "E1" 4-8-4 Northern class steam locomotive that was built by Baldwin Locomotive Works in 1938.  She is physically larger than her SP4449 sister.

After I started chasing these around Hillsboro I made a concerted effort to find the roundhouse that I heard they lived in.  It wasn't exactly easy and one had to be careful about visiting.  At that time the roundhouse was on heavily rail-trafficed BNSF property and the steam locomotive crews were only on site at the roundhouse on certain days of the week.

Once I sorted all this out, I found the roundhouse to be a magical place.  There were actually three steam locomotives housed there, along with several early diesel electric locomotives, passenger cars, with various parts and pieces laying all around.

Train Resolution ~ 4x5 negative

SPS700 ~ Roundhouse
Schneider 110mm XL f/5.6
Full Scene on the left
100percent crop sections down the right

I have to say that, yes, this "works."  And, yes, those are backlit/sidelit raindrops you see hanging off the bell.  The resolution is, again to my eyes, outstanding.  The dynamic range of that old Polaroid film is truly outstanding, too.

What I have on hand is a small fraction of the film I had up until a few years ago when I whittled everything down to just what I could carry back to Europe with me.  I tried to keep the most interesting images. A lot has been left behind in a landfill somewhere.  Fortunately I still retain a satisfying number of negatives. 

A larger project, or series of projects, now appears on the horizon. I'm really enjoying working with these old train photos.

Friday, July 02, 2021

Godox MS300 + XT16 ~ communications setup

I recently purchased a new studio strobe and remote trigger and had trouble getting the system set up to communicate between the trigger and the strobe.

This article documents a setup that seems to work for me.  At least for now.

The strobe is a Godox MS300.  The instructions on its use are found here.

The trigger is a Godox XT16.  The instructions on its use are found here.

Looking at the back of the trigger I saw a dial that goes from 0-F and is labeled POWER. Hmmm.  What does _that_ mean?

I found a video on YouTube, but my Hindi isn't up to scratch.  I turned the sound off and tried to follow along with the button pressings.  I kind of got the hang of it, but I watched a second video that proved to be a little more helpful, even though the remote trigger was not the model I have.

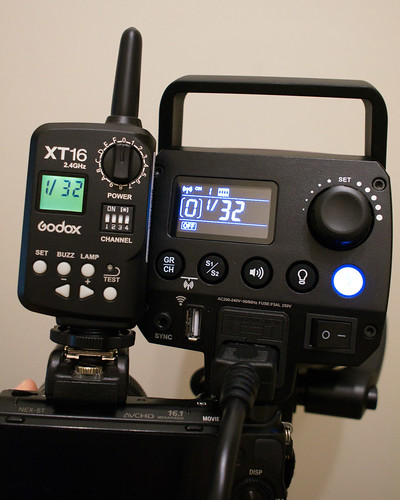
Godox MS300 XT16 setup

Shown here are
the Godox XT16 remote controller
mounted on a Sony NEX-5T and
MS300 strobe side by side
so I can see both display
and button systems

In short, here is what I found - 

On the MS300 strobe -

  • Pressing the GR/CH and S1/S2 buttons simultaneously turns on/off the strobe radio.  In my case I wanted the strobes radio turned on.
  • Pressing the GR/CH button with a short duration press causes the GROUP indicator to blink.  Turing the strobes dial changes the GROUP.  Selecting a GROUP is confirmed by pressing the center of the dial (it pushes down).
  • Pressing the GR/CH button for 2 seconds causes the CHANNEL indicator to blink.  Selecting a CHANNEL is confirmed by pressing the center of the dial (it pushes down).

On the XT16 remote trigger -  

  • Set the POWER dial to the GROUP number/letter selected on the MS300 strobe.  I think the dial is mislabeled and really should have been labeled as GROUP.  The actual On/Off power is a slider button the side of the remote trigger.  Again, I think the engineers/designers screwed this up.

    Godox MS300 XT16 setup


  • Set the dip-switches to the CHANNEL selection made on the MS300 strobe.  As a guide there is an indication on the strobe to how the dip-switch settings are to be made on the remote trigger.

    Godox MS300 XT16 setup

There are two things that remain a mystery to me.

On the XT16 remote trigger there is a button labeled SET.  Pressing it for 2 seconds changes the display.  Pressing it again for 2 seconds changes to something different on the display.  

It appears there are three modes or styles for displaying the light output of the MS300 strobe, if indeed these are what the three different numbering systems refer to.  One display style representation is a fraction of the overall light output (ie: 1/32 +0.3EV).  Another style starts with the number 1 and the other starts with the number 5.  

I can't find a clear indication of how these three XT16 display labeling styles correspond to the MS300. 

A second thing that confuses me is that there doesn't seem to be any way of controlling the light output display value on the strobe.  I have seen the MS300 display two different light output styles - the fractional light output and the display style numbering system that starts with "5."  

Worst still, the MS300 light output display style changes randomly.  Even worse than that, these display styles appear to be independent of what is displayed on the XT16 remote trigger.  

I expected that once I'd selected the display style on the XT16 that these would be communicated to the MS300, but they are not. Or, minimally, I thought I would be able to select the light-output display style on the MS300, but I can't find the magic incantation.

Nowhere is there any description of how these things should or could inter-relate.  There is no indication of their meaning, other than what is clearly implied by the fractional light-output style of display.

[rant on] The inconsistencies in these products bother me.  From an engineering, marketing, and product integration perspective the Chinese could have done a far better job.  This isn't complex stuff, really.

They are very good at ripping off western product implementations, but the Chinese still have seemingly zero understanding of the importance to also rip off western designers sense of what it takes to build a system of well integrated products.  Based on my initial experience, usability and labeling is a mess chez Godox.

Further, there isn't enough "tribal knowledge" that comes with use that can help guide newbies to this kind of product set such as myself.  So I'm left thrashing things out as best I can.

In the end, I feel I got exactly what I paid for.  I have an adjustable light output remote controllable strobe with rather little to guide me as to how the system actually works nor what parts of the display system are trying to communicate. [rant off]