Wednesday, May 03, 2023

Soft Focus Pictorialist Effects - part Six

In an earlier post I shared that two people have helped me immensely to increase my understanding of how soft focus lenses are best used.

For years the eminent Chetworth delGato has guided my thoughts.  His thesis is the only one I've encountered that takes a serious academic look at Pictorialist era photography and the soft focus lenses that were often used.  I am forever indebted to him for his wise insight and deep knowledge on the topic.

In a conversation about an image I'd made using a Mamiya 150mm f/4 SF, Bonzo Din provided a brief translation of a Pentax 85mm f/2.2 Soft instruction manual from the original Japanese.  From this I learned several things -

  • The Pentax 85mm f/2.2 Soft was designed for -
    • Closeup photography
    • Portrait photography
  • The lens is not recommended for landscape photography
    •  Except when used with a telextender/teleconverter

That last bit caught my attention.  Pentax knew that this lens had certain limitations and they tried to guide users to get the best possible results.  The only problem is, I've yet to see an instruction manual of any kind for this f/2.2 Soft.  As I've found out, the 85mm lens is really difficult to come to grips with and perhaps it is simply too complex a lens that many photographers have ended up shying away from it.  

I'm only guessing here, but if others have experienced what I have, I'm sure we'd all be tempted to convert this optic into a paper weight or something more useful.

One of the many problems I've encountered include figuring if it is possible to make a nice landscape image using this Pentax.  The problem is I see that as the lens is stopped down what I've been calling a "resolution hole" opens up in the center of the frame.  The center becomes sharper than the edges of the frame, where the effect is like looking through the bottom of a bottle.  Edges swirl and go soft, where the transition from sharp to soft is dramatic and obvious.

I've been thinking that this "resolution hole" effect was limited to this specific difficult to understand lens.  Then, just the other day when I was looking for Wollensak Verito inspiration I came across something interesting.  See that?  Right there.  That's what I found with the small Pentax, too.  A very similar phenomenon.  Here's another Verito example.  The effect appears to exist in others of the earliest soft focus lenses as well.  A quick Flickr search confirms this.

Armed with new insight I'm now thinking that meniscus lenses (new and old) have a region where sharpness over rides softness as the lens is stopped down.  This region, or "resolution hole", is a simple fact of optical physics life.

Interestingly, photographers who shoot meniscus optics wide open to get the maximum softness effect might never ever see a "resolution hole" in their work.  It certainly doesn't appear in the smaller lens until around f/4.

That's the other thing that makes these lenses complex to use, variable rendition based on aperture.  And this is why I'm sure that when people find something that "works", they stick with it.  Don't mess with success.  If it's working for you, don't "fix it" by changing things up.

One more thing comes to me.  In early large format Pictorialist photography, lenses could be matched to film size.  Longer focal length lenses relative to film size could be shot all the time in the middle of the "resolution hole."  With a longer focal lengths comes bigger the fields of coverage in terms of absolute dimension.  In this situation a practioner could shoot smack-dab in the middle of the field of coverage and avoid the sharp/soft transition zone entirely, regardless of aperture.

With this in mind I could begin to see that by using a telextender on the small format Pentax 85mm Soft that the telextender would enlarge the center of the field of view.  It might enlarge the image to just the center of the "resolution hole."  

Conversely, I could also use a smaller format camera, such as an APS-C Sony instead of a Sony full frame device.  That might crop the field of view to include just the "resolution hole."  Though I have to say that I've fallen under the spell of the Sony full frame A7 (early/original) for the way it renders down at the pixel level.  It feels rather "film like" to me.

So, I picked up as good a telextender/teleconverter as I could afford to see how it might change the Pentax 85mm f/2.2 Soft's landscape rendition.  A Sigma APO 1.4x off That Auction Site happened to meet the price/quality trade-off I was looking for.

This post has a very brief look at how a telextender mated to the Pentax Soft on full frame deals with the meniscus lens' "resolution hole."

Setup ~ 

  • Camera - 
    • Sony A7, 100ISO, handheld, "A" mode, +1EV
  • Lens - 
    • Pentax 85mm f/2.2 Soft at f/4, f/4.5, and f/5.6
  • RawTherapee - 
    • EV increased to increase the highlight tones
    • Global contrast increased by image to taste
    • Local Contrast increased by image to taste

Image Processing Comparison ~

As always, click on the image and enlarge to 100percent to see whatever there is to be seen.


Pentax 85mm f2.2 Soft at f5.6 with SIgma APO 1.4x teleconverter ~ NoBorder

Full Frame Uncropped
Pentax 85mm f/2.2 Soft at f/5.6
+ Sigma 1.4x telextender
Global and Local Contrast enhanced

Looking around the corners of the frame I see the transition zone that forms the edges of what I've been calling the "resolution hole."  Does it remind you of anything?  Like, say, a Wollensak Verito stopped down?  Hmmm...
 
Even though the transition zone has been moved toward the edges of the frame, I still don't like it.  Though I do like how the center of the frame renders.


Pentax 85mm f2.2 Soft at f4 with SIgma APO 1.4x teleconverter ~ Cropped

Pentax 85mm f/2.2 Soft at f/4
+ Sigma 1.4x telextender
Global and Local Contrast enhanced

Starting at f/4, I cropped to the center of the telextended Pentax and, well, for me it does the trick.  The "resolution hole" transition effect has been cropped away and I'm left with a more or less usable image.  The telextender does what Pentax' instruction manual hinted that it would do.  The Soft becomes usable for landscape work.


Pentax 85mm f2.2 Soft at f4.8 with SIgma APO 1.4x teleconverter ~ Cropped

Pentax 85mm f/2.2 Soft at f/4.8
+ Sigma 1.4x telextender
Global and Local Contrast enhanced

I have to say that having explored the limits of what this lens is capable of, I rather like this exact aperture for just about every subject I photograph at closeup, portrait, and now telextended landscape distances.  F/4.8 is a "sweet spot" for me.  It tickles my funny bone like no other aperture on this optic does.

Though, me being me, maybe next week I'll find another "magic" aperture that I prefer.  Anyways, the point being, shooting/practicing/processing/thinking-about/retrying seems to be the best way to come to grips with soft focus lenses.


Pentax 85mm f2.2 Soft at f5.6 with SIgma APO 1.4x teleconverter ~ Cropped

Pentax 85mm f/2.2 Soft at f/5.6
+ Sigma 1.4x telextender
Global and Local Contrast enhanced

Yes, I just said that my favorite aperture on this lens is f/4.8.  Um, but have a good look at this f/5.6 image.  It's not half bad, either, right?  
 
Gack.  So many possibilities.  So many complexities.  So many subtleties. So little time.


Monday, May 01, 2023

Soft Focus Pictorialist Effects - part Five

As I continue to consider soft focus Pictorialist effects including lenses, processes, and printing, I thought it might be worthwhile to explore for a moment how to emulate early film emulsions.

At the dawn of photography emulsions were sensitive to blue light only.  This is why skies in many images from the 1800's were white.  This is why skin imperfections could be rather prominent.

By the start of the 20th century film became available that could record a broader spectrum of light.  These were called "pan chromatic", as in sensitive to all colors.  What's interesting to me is that these early film types couldn't see all colors equally.  There were subtle differences in gray recording for different colors of exact same intensities.

Late in film history and before the time digital sensors, black and white film could "see" all colors fairly equally.  If you took a picture of red, green, and blue values of exactly the same intensity, film would record them at the exact same level of gray.

This background is important if one wishes to try and accurately reproduce Pictorialist images.

I know I've said it before, but it bears repeating as color sensitivity of the recording medium had a important influence on how early photographs were made.

Returning to the primary object of this series of posts, the Pentax 85mm f/2.2 Soft, here is what I have thus-far learned.

This is not a general purpose lens.  It appears this lens was designed for close-up and portraiture work.  Period.

While the aperture controls in a very broad sense the level of under-corrected spherical aberration (veiling softness), it's more complex than just that.

It's blastedly difficult to use this optic on subjects beyond a medium/portraiture distance due to the way a sharper central region appears in the middle of what can look like a coke bottle bottom of softness around the edges as the aperture is stopped down.  The effect becomes particularly apparent and troublesome as the focus approaches infinity.

Image processing can be used to help reveal the underlying "sharpness" of the lens by increasing overall and with digital image processing tools, local contrast.  In early photography history these things were very difficult to control.

In summary of my current understanding of how best to use the Pentax 85mm f/2.2 Soft, from image capture through to image processing, there appears to be no simple, single answer on how to achieve success.  It seems to me that a photographer would be best served to build a matrix of subject distance, aperture (including 1/2 stop settings), and image processing based on personal experience, study, tastes, and desired final image presentation.

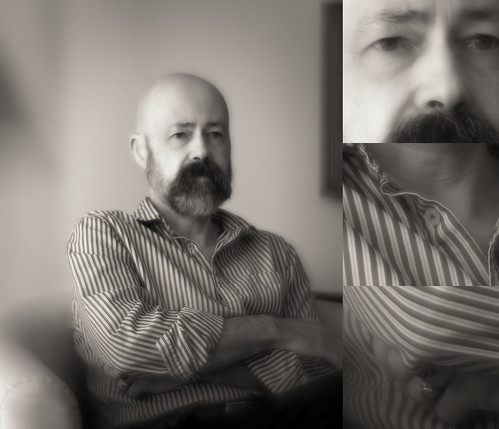
As in the previous portraiture distance blog entry, I used myself as the subject.  It's darned difficult to find or hire decent help these days.  The modeling industry has changed significantly since we moved to Europe.  It wouldn't surprise me to learn that cell-phones, and now AI have taken their toll on the old practice of modeling.

So as to not scare the women and horses, viewer discretion is advised.

Setup ~ 

  • Camera - 
    • Sony A7, 100ISO, 2sec timer, "A" mode, +1EV
  • Lens - 
    • Pentax 85mm f/2.2 Soft at f/4
  • Bogen tripod
  • RawTherapee - 
    • Global contrast increased by image to taste
    • Local Contrast increased by image to taste
    • B&W Channel Mixer filters
      • Red
      • Blue
      • Blue-Green


Image Processing Comparison ~

As always, click on the image and enlarge to 100percent to see whatever there is to be seen.


Pentax 85mm f4 ~ Red Channel Mix + Local Contrast

Pentax 85mm f/2.2 Soft at f/4
B&W Channel Mixed Red Filter
Local Contrast enhanced

For me, this is my B&W "Beauty Filter."  It removes imperfections, and raises the skin tones nicely.  The stripes on the shirt are medium blue, and with the red filter these tones are deepened.


Pentax 85mm f4 ~ Blue Channel Mix + Local Contras

Pentax 85mm f/2.2 Soft at f/4
B&W Channel Mixed Blue Filter
Local Contrast enhanced

Here is a blue filter applied to the +1EV base image.  I did not adjust the skin tones to something that looks more like the red filter because I wanted to clearly illustrate the blue filter effect.  Skin imperfections are clearly visible and the blue stipes on the shirt are much lighter than in the previous example.

Of course, if I were to try and fully emulate wet-plate collodion or tin-type images I could raise the skin tones.  I would need to be sensitive to the colors in the other parts of the scene, too.  So it's worth studying carefully the tonal ranges of early Pictorialist images and to take these tones into account.


Pentax 85mm f4 ~ Blue-Green Channel Mix + Local Contras

Pentax 85mm f/2.2 Soft at f/4
B&W Channel Mixed Blue-Green Filter
Local Contrast enhanced

I chose to try a blue-green filter since it nearly perfectly emulates "Ortho Chromatic" film.  This film-type "sees" more green than earlier emulsions.  On this particular subject, setting, and day, this image isn't half bad at emulating old Pictorialist expressions.

Here is one last comment on the image processing choices that I made for these images.  I applied a 0.10 strength Local Contrast enhancer.  The reason I did this was to subtly reduce the overlying veil of softness and to reveal a bit more of the "sharpness" of the underlying image.  I did this so as to try and more closely emulate large format film lenses and I think it does the trick.  
 
These kinds of controls were never available to early practitioners, and certainly weren't yet available when the Pentax 85mm f/2.2 Soft first came to market.  With this kind of image processing flexibility I am seeing the potential for how I can finally bring this seemingly impossible to control lens to heel.


Friday, April 21, 2023

Soft Focus Pictorialist Effects ~ part Four

Continuing the Mad Quest to look more deeply at this Dastardly Difficult to Wrangle Under Control Pentax 85mm f/2.2 Soft, I'd like to now consider image processing and its influence on soft focus Pictorialist effects.

As I previously wrote, there was an underlying "sharpness" to the 85mm Soft that lay just below the under-corrected spherical aberration "glow."  I see this from wide open.

One thing we have today that we didn't back in the Old Film Days are a vast array of tools that can be used to modify various aspects of an image.  Certainly, there were processes we could use in those Old Dinosaur Days of Film, such as contrast controls and masking.

Contrast controls should be self-evident.

Masking in the Old Film Days could be used for at least two ends.  One was to control global contrast when using contrasty print media.  I'm thinking of Christopher Burkett's fabulous works printed to Cibachrome.  I've been fortunate to see his work in person.  He is clearly a Master Print Maker and his images absolutely "sing."  He masks everything he prints.

Another use for masking was to reveal the mid-tones of a scene.  We used to do this in a photo-print lab that I worked at.  It was a time consuming, exacting, difficult process.  It was rather expensive, too.  I'm not sure how many clients we actually had, if any, for the service.

A few Dinosaur Age Film Photographers created softened images that had a certain "spark" to them.  Considering the works of David Hamilton and his hairspray filters, it's interesting to note that he used Ektachrome 200 film that was pushed to 400ASA or 800ASA (and perhaps more?).  

This did two things.  First it increased the grain size, as would be expected.  I'm convinced the grain added a "artful" distance between the viewer and the subject.  I feel this is the case from looking at David Hamilton's last work.  It's too "clean" looking, even though the work had his signature soft rendering.

Second, the push development process increased contrast.  I'll bet dollars to doughnuts that normally processed 200ASA Ektachrome images would've been seen as too soft, in part due to the lower contrast. 

I'm imagining that David Hamilton stumbled upon a process that "worked" for him.  The way he lit, filtered (light hairspray on UV filter), composed and printed his images very likely depended on his choice of film and processing.  He might not have known "how" to get from here there, yet I'm continuing to imagine that he uncovered a useful process, perhaps by accident and/or by experimentation, liked the results, and made a career out of the whole thing.

That's one of the great things about photography.  There's so much room for experimentation and exploration.  If something doesn't "work", we can build on what we've learned and try something else.  Even if, back in the Good 'Ol Film Days expérimentation could be a lengthy, hit/miss process.

Sometime I might share a black and white film developing process that broke many of the "rules" of film development, yet was the foundation for a successful Lord and Taylor ad compagne that ran for years.  The photographer I learned the process from was rather successful and his works looked on some level more like "art" than photography.  How Robert Randall came upon the process I'll never know.  All I know is it "worked."

Coming to current time, digital image processing includes a number of functions that we would've given our eye teeth for back in the Old Film Days.  Luminosity masks being one example.  Clarity and Texture functions in Pay-dobe' parlance, or Local Contrast and Micro Contrast in RawTheraee terms being another example.  These and many many other tools are well integrated into digital image processing software.  One can view the impact/results of these functions instantaneously.  No need to wait a few days for results to come back from a laboratory.

In this spirit I experimented using RawTherapee hoping to find a way to unlock the veiled resolution hidden in the Pentax 85mm f/2.2 Soft lens.   This post is described what I found.

Setup ~ 

  • Camera - 
    • Sony A7, 100ISO, 2sec timer, "A" mode
  • Lens - 
    • Pentax 85mm f/2.2 Soft at f/2.2, f/2.8, and f/4
  • Bogen tripod
  • RawTherapee - 
    • Global contrast increased by image to taste
    • Local Contrast increased by image to taste


Image Processing Comparison ~

As always, click on the image and enlarge to 100percent to see whatever there is to be seen.


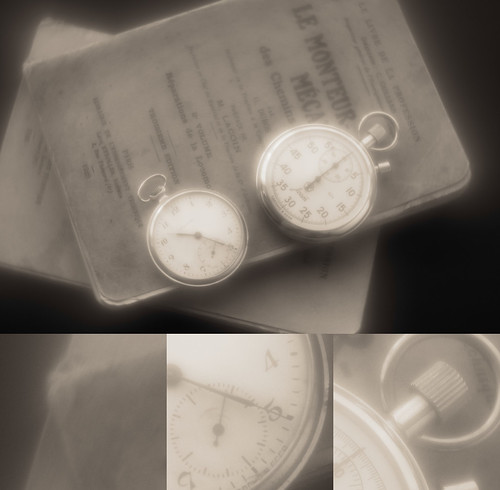
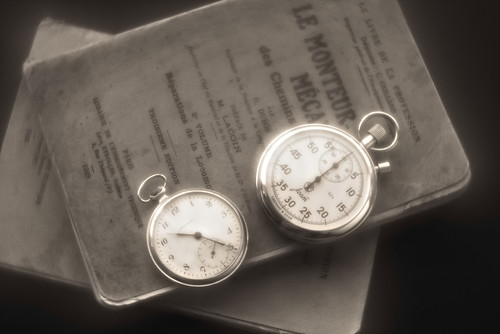
Pentax 85mm f/2.2 Soft at f/2.2

Pentax 85mm f/2.2 Soft at f/2.2
Base Image

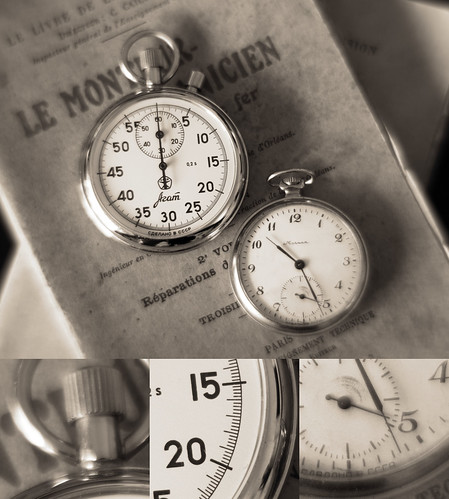
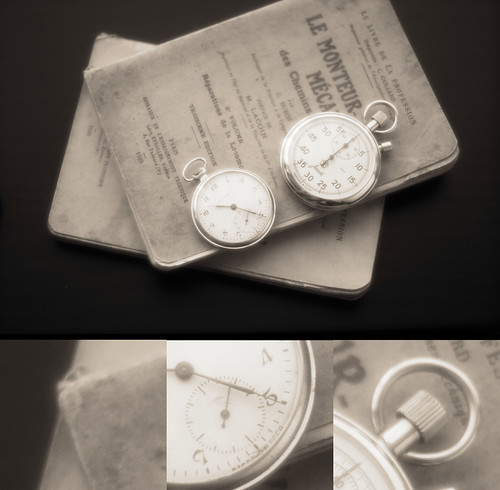
This is the starting point for the image processing comparison. I see a strong veiling softness at f/2.2.  Just under that, the image looks sharp, particularly  around the numerals on the faces of the watches.  That is where I focused the lens, so this makes sense, right?


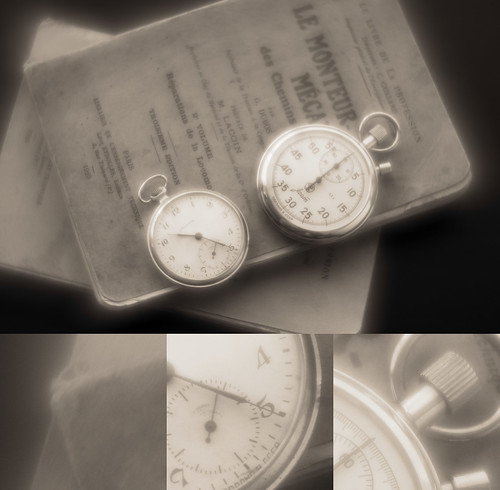
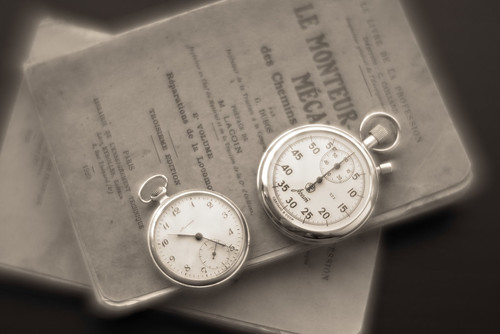
Processing Comparison ~ Pentax 85mm f/2.2 Soft at f/2.2 ~ Local/Global/Curves Contrast Comparison Base

Pentax 85mm f/2.2 Soft at f/2.2
+ image processing

By choosing a strong global contrast setting, and a strong Local Contrast setting I was able to "bring up" the details of the watch faces.  The veiling "glow" remains quite strong.  
 
To my admittedly aging eyes this doesn't look 1/2 bad.  I feel this begins to prove a point about the power of software image processing tools.  With a little work it appears I can offset the soft effects of the Pentax 85mm lens.


Pentax 85mm f/2.2 Soft at f/2.8

Pentax 85mm f/2.2 Soft at f/2.8
Base Image

Processing Comparison ~ Pentax 85mm f/2.2 Soft at f/2.8 ~ Local/Global/Curves Contrast

Pentax 85mm f/2.2 Soft at f/2.8
+ image processing

Stopping down one click changed dramatically the softness of the overall image.  For this reason I didn't need to push neither the global contrast nor Local Contrast controls as hard as I did in the f/2.2 version.
 
This is looking rather nice, actually.  The highlights glow, but not too much.  The mid-tones are revealed quite well.  Clearly the image was made using a soft focus lens.  There are the optical effects I expected to see, but they are now coming under control in relationship to the "glow" and the overall image.
 
I could stop here, but why?


Pentax 85mm f/2.2 Soft at f/4

Pentax 85mm f/2.2 Soft at f/4
Base Image

Procsssing Comparison ~ Pentax 85mm f/2.2 at f/4 ~ Local/Global/Curves Contrast

Pentax 85mm f/2.2 Soft at f/4
+ image processing

Stopping down two clicks changes even further the softness of the overall image.  I didn't need to push either the global contrast nor Local Contrast controls as hard as I did in the f/2.8 version.
 
I see the "resolution hole" beginning to open in the center of the frame.  The image is sharper in the center of the frame than it is around the edges.  The sense of "glow" and optical effects are still in effect.  And I see that I didn't make the darks as deep in the re-processed sample than I did in the original.  Hopefully the mid-tone differences are apparent.

Where is the balance with this subject and this lens using strong side-lighting?  It comes down to how sharp I want the center of the image and how much edge softness I could tolerate.  I think there might be a very nice balance at f/3.5.

Considering Local Contrast in RawTherapee, I believe there might be another way of revealing the underlying sharpness.  That tool is Micro-Contrast.  I'll have a look at it in a future post.

Sunday, April 16, 2023

Soft Focus Pictorialist Effects ~ part Three

It's been such a long process of thinking, considering and trying to use soft focus lenses that I've developed a sense that my story includes looking into the morning mirror to see Don Quixote reflected back.  There's just enough self recognition in this Madness for me to question why I even bother, but bother I persist.  I know the windmills aren't what I've taken them to be, if only I could work out how.

In deepening my understanding of how to use meniscus soft focus lenses I am beginning to build a matrix of relevant information that I feel/hope/believe I can use to determine when a soft focus optic is "right" for me to use.

As a starting point, in the first two posts in this series I looked at how a Dastardly Difficult to Master 85mm lens behaves with close-up subjects.  In this post I would like to move the lens back a little from the subject and explore how the Pentax 85mm f/2.2 Soft renders at mid-distance

Before I get to the comparison images I'd like to share the nuggets of years of conversations with those who really know and to (*shock*, *horror* men don't usually do this king of thing) carefully read the lens' instruction manual.

While I knew this intuitively, I don't think I fully appreciated it until very recently.  A soft focus lens' aperture controls the level of softness the lens returns.

Duh.  Obviously.

Yet, if I look carefully at the effect of aperture on image softness, at some point the center of the image becomes clear to reveal an already existing at wider aperture underlying sharpness.  The transition areas from sharp to soft can be tricky.  In the case of this Pentax, the lens "resolution hole" that appears in closeup images around f/4 has a transition zone that swirls the edges of the scene.  

I don't find this pleasing.  It reminds me too much of the swirly out of focus rendition that Helios 40, Petzval, and many other early and now Hipster-Have-to-Have lenses deliver.  With one exception, I've never viewed a swirly background image that I could fully appreciate.  The swirly effect for me gets in the way.  Alex Timmerman's work being the exception.  OK.  Maybe two photographers.  Sally Mann makes incredible images from time to time in this style, too.

What this means to me is that while being strictly true that aperture controls the level of lens softness in meniscus photographic optics, the fuller answer is a bit more subtle.

As an aside, large format film soft focus lenses don't normally show much problem in the transition areas from sharp to veiling under-corrected aberration softness.  

Yes, if I look carefully at the edges of Chetworth delGato's work that I'm using as a reference, I can see a similar effect to what I've encountered with the smaller format Pentax, but the 9inch Pinkham & Smith Semi-Achromatic transition effect seems to be a bit more subtle.  I'll bet dollars to doughnuts that part of the reason is the way the transition zone is hidden by the way the subject is lit.  I'll keep this point in mind as I go along.

I am now of the thought that large format film lenses have been designed with a larger field of view than the small format Pentax, and that the gaping "resolution hole" that can form as a lens is stopped down is often _outside_ the field of view when using big sheets of film and longer soft focus lenses.  How do I feel this is true?  Look at instances where a lens' field of view is smaller than the film format.  I'll explore this, too, in the near future.

While mulling all of these things over in my wee-little brain, Bonzo Din suggested that the instruction manual for the Pentax 85mm f/2.2 Soft might provide important clues on how to use the lens.  Translating from Japanese, he found the lens was made for close-up and portrait work.  It is strongly hinted that landscape work with this Soft lens is best used in conjunction with a tele-converter.

There it is.  Truth.  Which underscores that fact that, if it's available (and in this case it often isn't), it pays to read the bl**dy manual.

The Pentax 85mm f/2.2 Soft is a close-up lens or a portrait optic.  Period.  It is not, repeat not, a general purpose lens in the sense that it might behave consistently across a wide range of subject to lens distances.  It doesn't.  Rendition consistency is lost on this lens.  It wasn't designed for that.  It's a two trick pony. If landscape photography is a goal, then a tele-extender is recommended.

In this post I will consider how the Pentax 85mm f/2.2 Soft behaves as a portrait lens.   I will use myself as the subject.  Viewer discretion is advised.

Setup ~ 

  • Composition -
    • Considering the "resolution hole" that opens in the middle of the frame starting around f/4, the subject's head (mine) was placed dead center in the field, right in the middle of the "resolution hole," so as to try and achieve the best possible sense of sharpness
    • If the head was placed nearer to the edge of the frame I know it would be distorted and covered with too much veiling under-corrected spherical aberration softness coming from what I'm calling the "resolution hole"
       
  • Camera - 
    • Sony A7, 100ISO, 2sec timer, "A" mode
    • Sony Remote Trigger so the subject could remain seated
  • Lens - 
    • Pentax 85mm f/2.2 Soft at f/4, f/4.8, f/5.6
  • Bogen tripod 
  • RawTherapee - 
    • Similar image processing settings applied to all images so as to observe optical differences
    • Vanity Alert - I used a red filter in BW conversion to suppress the skin imperfections and to raise the skin tones to something I found pleasing


Comparison ~

As always, click on the image and enlarge to 100percent to see whatever there is to be seen.

To facilitate the following comparisons, open Chetworth's image in a window, and then open my images in an adjacent window.


Autoportrait ~ Pentax 85mm f/2.2 Soft at f/4

Pentax 85mm f/2.2 at f/4

The underlying sharpness of the face and shirt collar regions are visible, but to my eyes, the overall image appearance is just slightly too soft, particularly when compared with the 9 inch Pinkham & Smith.


Autoportrait ~ Pentax 85mm Soft f/2.2 at f/4.8

Pentax 85mm f/2.2 at f/4.8

Of the three comparison images here, I feel this is the best balance between center sharpness and edge softness drop-off.  The face and collar regions are reasonably sharp.  The sleeve at the bottom of the image is not offensive to me.  The "resolution hole" isn't quite as obvious as in the following example.

Comparing this image to Chetworth's, it's not half bad at these viewing sizes to my admittedly aging eyes.  My image isn't as sharply lit as Chetworth's.  His model is far more interesting than mine.  And  I would expect the 5x7inch film image to be sharper in reality around the face and shoulders than in the above photo.  

But I have to say I'm pleased with the above result.


Autoportrait ~ Pentax 85mm Soft f/2.2 at f/5.6

Pentax 85mm f/2.2 at f/5.6

Compared with the prior two images, I feel the face and shirt collar areas in this f/5.6 image are the sharpest.  The transition "resolution hole" from sharp to soft is the most promenant, too.  If I'd lit this a little differently I might've had more success in hiding the effect.

What I've confirmed for myself is that aperture controls can be a little tricky on a lens like this.  It takes a delicate touch to extract the most out of the optic.  I can't just put the lens at a certain aperture by looking through the viewfinder and seeing something that looks good in-camera.  No.  It's more subtle than that.

Saturday, April 15, 2023

Soft Focus Pictorialist Effects ~ part Two

Chetworth Del Gato posted a soft focus image to Flickr.  I saw it, appreciated it for a moment, and was about to move on to look at something else when I stopped and had a good long look.  Gawds! I think it's gorgeous.  Call me Old Fashioned.  Call me a Sentimentalist.  Call me a Fool.  I don't care.  It's a great image.

The subjects eyes are sharp.  The entire image glows beautifully.  The edges are gently softer overall than the center, but not by much.  The lighting is nearly perfect.  The composition is classic.  To me it's a good example of what current day Pictorialist practitioners can achieve.

Chetworth used a 9inch Pinkham & Smith Semi-Achromatic to 5x7 film. That lens is filled with optical imperfections that modify the scene in "just the right way."  It's such an "artistic" optic.

I asked the photographer if he felt one could replicate the effect in smaller format cameras. He said he didn't think it was possible.

If you know me, you know I love a good challenge.  That's really what this series on Soft Focus Pictorialist Effects is all about.  I'm still trying after many years to see how close I can come to duplicating the "look" and "feel" of large format film photography what uses early soft focus lens.

In the first post on the topic I talked about how a "resolution hole" opened up when using the Pentax 85mm f/2.2 Soft as the lens was stopped down.  This is where the center of the image is sharp and without much of an overlaying softness, and where the edges retain an obvious amount of under-corrected spherical aberration.

The "resolution hole" appeared at f/4 and became very apparent at f/5.6.  It is so strong that it was somewhat disorienting to me in the f/5.6 comparison image.  This got me to thinking and wondering.

How sharp is this Pentax 85mm f/2.2 Soft at f/5.6?

The following may help answer that.

To begin with, it's important to note the image I use here was shot at the lens' minimum focus point.  The subject was about a foot or so away from the camera.

While the image talked about in this blog entry is not trying to duplicate the effects Chetworth achieved in his 5x7inch film photograph, it is a potentially important stepping-stone to a greater understanding of how I should use this dastardly Pentax 85mm f/2.2 Soft.


Setup ~ 

  • Camera - 
    • Sony A7, 100ISO, 2sec timer, "A" mode
  • Lens - 
    • Pentax 85mm f/2.2 Soft at f/5.6
  • Bogen tripod
  • RawTherapee - similar image processing settings applied to all images


How sharp is it?

As always, click on the image and enlarge to 100percent to see whatever there is to be seen.


Close up study ~ Pentax f/2.2 Soft 85mm at f/5.6


Looking at the on-axis dial face of the stopwatch where I focused the lens, I'd say the lens is pretty darned sharp.  If I were after something sharp, I'd have no problem with the center of the frame.  Looking at the near-off-axis portions of the image I see the abrupt transition from sharp to an under-corrected spherical aberration overlay of softness.
 
By now it should be pretty obvious that in close-up work, the Pentax f/2.2 Soft is not, repeat not, a general purpose lens.  I type this thinking of comments I've read around the internet over the years where people talk about soft focus lenses and say things like such-and-such lens is soft from wide open, but it cleans up nicely by f/this-and-that.   This is not one of those lenses.

On the other hand, if I wanted to photograph flowers, I might not care, and in fact might appreciate the rapid increase in surrounding softness outside the "resolution hole."  On the proper subject, composition, and background, the lens might help create something rather interesting.  Right there is another hint at how to use this lens.

As I said in the previous entry, so far the images made in these comparisons use the Pentax Soft near its minimum focus point.
 
Without getting too far ahead of myself, I have the strange feeling that there might be a specific matrix of possibilities/applications where meniscus soft focus lenses operate at their best.  I'll explore this idea a bit further in the near future.

Friday, April 14, 2023

Soft Focus Pictorialist Effects ~ part One

I have a copy of Taschen's "Camera Work - The Complete Photographs."  It's a weighty, densely filled book given it's rather small size.  I often refer to it seeking inspiration and understanding of how Pictorialist/Secessionist photographers worked their art and craft.

There is a copy of "Clarence H. White and his world" on the bookshelf, too. This is bigger and heavier than "Camera Work." It's more of a show catalogue from a curated exhibition.  The book comes with long essays that explain White's background, history, life, and times.  It's fascinating, actually.  It recalls how early practitioners would gather to share ideas, processes, and how they would many times work in groups when making images.  It sounds as if it was a very sociable exercise.

One of the many tools Pictorialists might use were soft focus lenses.  Some of the works that still impress me the most are by Clarence White, Edward Steichen, Robert Demachy, Karl Struss, and George H. Seeley.  One image in particular stands out for me.  It was made by George Bernard Shaw of Alvin Langdon Coburn.

For years I've tried to find a process, a technique, an approach to creating soft focus-effect images in the Pictorialist style.  Forty years ago I started buying and trying various soft focus lenses such as Wollensak Verito, Portland Portrait, Rodenstock Imagon, Fuji large format SF, and medium format RB 150mm SF lenses

As I started downsizing image capture formats I entered a two decade long "phase" of collecting and shooting with old manual focus Nikon Nikkor lenses.  I was looking to take advantage of their more subtle under-corrected spherical aberration behind the point of focus.

Other than a series of images I made using a Mamiya RZ and the RB 150mm SF, the whole exploration of the soft focus Pictorialist inspired effect was nothing but a  long series of failures.  Out of frustration nearly every soft focus lens I ever owned was sold.  Recently I've off-loaded almost all of my Nikon Nikkor lenses, too.  Nothing seemed to be "working."

There is only one Soft Focus lens left in the Toy, er, sorry, Tool Box.  It is the supremely irritatingly difficult to understand Pentax 85mm f/2.2 lens.  I'd picked it up from someone in Japan off That Auction Site.  It's uniqueness is that it has a cleanly and correctly installed Nikon F mount in place of the original Pentax K. I didn't need to buy Yet Another adapter for my Sony mirrorless cameras as I was knee deep in Nikkors at the time.

For several years I've been having a conversation with someone about how to correctly use Soft Focus lenses.  His first hand knowledge and historic research are second to none.  He shares valuable information that I doubt I could've gotten any other way.  

Then, two weeks ago, a different photographer provided a partial translation of a Japanese instruction manual on the Pentax 85mm f/2.2 Soft lens.  It was clear that I've never used meniscus style soft focus lenses in the way they were designed for.

Like a scab that just can't be ignored, I decided to pick at the subject one more time.  Armed with better knowledge, I wanted this time to compare a sharp image to filtered softeners and, of course, to the Pentax 85mm Soft.

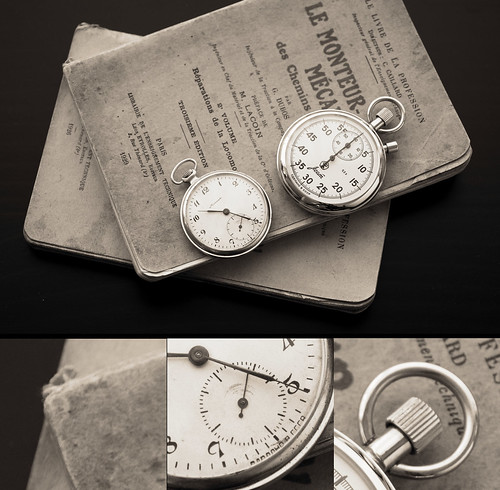
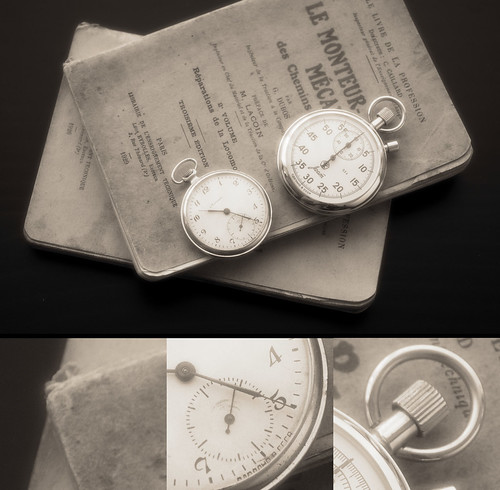
One important thing to note before I start.  The following comparison uses a subject photographed at very close range.  The watches and books were 1 to 2 feet away from the camera.  I will cover why this is important in the near future.  

Suffice it to say for the moment, these comparison results apply best to close focused subjects.

Setup ~ 

  • Camera - 
    • Sony A7, 100ISO, 2sec timer, "A" mode
  • Lenses - 
    • Nikon Micro-Nikkor 55mm f/3.5 pre-Ai
      • Straight sharp image
      • Nikkor #1 soft filter
    • Nikon Nikkor-S 50mm f/1.4 pre-Ai
      • Straight shot wide open
      • Nikkor#1 soft filter
      • UV filter very lightly smeared with nose grease
    • Pentax 85mm f/2.2 Soft at f/2.2, f/2.8, f/4, and f/5.6
  • Bogen tripod
  • RawTherapee - similar image processing settings applied to all images


Comparison ~

As always, click on the image and enlarge to 100percent to see whatever there is to be seen.

Nikon Micro-Nikkor 55mm f/3.5 at f/3.5

Nikon Micro-Nikkor 55mm f/3.5

The old Micro-Nikkor 55mm f/3.5 is one of those great lenses that I've had the pleasure of owning for many years.  It's sharp from wide open.

I will use this image as the baseline from which I'll judge the softening effects of filters and optics.

Nikon Micro-Nikkor 55mm f/3.5 at f/3.5 with Nikkor Soft #1 filter

Nikon Micro-Nikkor 55mm f/3.5 + Nikkor Soft Filter #1

I can see the effect of the Nikkor Soft #1 filter quite easily.  The effect is pronounced.  Overall there is a lessening of contrast.  Highlights can be made to glow.  Underlying image sharpness is retained, which can seen under the veiling glow.

I find this effect a little too strong for my liking.  Perhaps a surprisingly costly Cinebloom filter would give a more pleasing effect?  Optionally I could take a UV filter and make a DIY Cinebloom filter from hairspray mist or a clear coat aerosol of some kind.  It would be easy and might provide an effect similar to Cinebloom, and weaker effect to the Nikkor Soft #1.  There are YouTube videos that illustrate the making and use of these filters.


Nikon Nikkor-S 50mm f/1.4 pre-Ai at f/1.4

Nikon Nikkor-S 50mm f/1.4

The Nikkor-S 50mm f/1.4 lens is the early and now classic Nikon SLR high speed standard lens.  Stopped down, this old lens is modern optics level sharp.  So wide open is where I went looking for Pictorialist effects.

At f/1.4 it delivers a certain level of under-corrected spherical aberration behind the point of focus when shot wide-open.  I can see some of this in the above image. 

However I'm not sure the effect is not strong enough to approach the Pictorialist effect I am looking for.  I'm thinking that something more "extreme" is what's really called for.


Nikon Nikkor-S 50mm f/1.4 pre-Ai at f/1.4 with Nikkor Soft #1 filter

Nikon Nikkor-S 50mm f/1.4 + Nikkor Soft Filter #1

As with the Micro-Nikkor I can see the underlying sharpness of the bare lens.  It's hidden just under the veiling glow that the filter creates.

Again, I find the effect a little too strong.  Additionally, because the basic lens returns a geometrically correct image, the creative "spark" provided in soft focus Pictorialist images is still missing.


Nikon Nikkor-S 50mm f/1.4 pre-Ai at f/1.4 with nose-greased UV filter

Nikon Nikkor-S 50mm f/1.4 + very light nose grease on UV filter

In my attempt to emulate Cinebloom and DIY hairspray filters, I took an old UV filter, and using a finger rubbed the side of my nose, spread it very lightly over the filter.  I used minimal nose grease to make sure the effect was less than the Nikkor Soft #1.  

I can see the effect of the nose grease on the image.  It lessens the contrast, but keeps the underlying sense of sharpness.

Nose greased (or hairsprayed) filters combined with the 50mm Nikkor-S shot wide open as an imaging softening combination might actualy be a decent jump-off point for exploring Pictorialist effects.  It's a fairly close approximation to the way David Hamilton created his hairspray filter softened images back in the day.  

The effect can be gorgeous. I'll set this aside for a moment and will come back to it in a future post.

Pentax 85mm f/2.2 Soft at f/2.2

Pentax 85mm f/2.2 Soft at f/2.2

Holy Soft Glowy Smokes! this lens is filled with under-corrected spherical aberration wide open.  Using the image processing recipe that was used in prior images gives an image that glows so brightly that I need sunglasses.

Under the veil of Holy Soft Glowy Smoke I can see the lens is actually surprisingly sharp.  Soft Focus might not mean a complete lack of sharpness.  There's a hint of something in this that I'll explore later.  

If this was all I had, I'd say this image was simply too soft as to be usable on anything but strong abstracts.  It doesn't feel suitable at this aperture for recreating soft focus Pictorialist effects.


Pentax 85mm f/2.2 Soft at f/2.8

Pentax 85mm f/2.2 Soft at f/2.8

I can see the image starting to clear just a bit over the image that was shot wide open.  The highlights glow.  The mid-tones glow, too.  Underlying sharpness of the lens is more clearly seen.

Still using the image processing recipe from the earlier images on this f/2.8 photograph yields a fairly pleasing work.  I'm not sure I'd finish the image this way if I were trying to do something "serious," but for the purposes of this comparison the results are beginning to look promising.


Pentax 85mm f/2.2 Soft at f/4

Pentax 85mm f/2.2 Soft at f/4

At f/4 I begin to see some kind of "resolution hole" opening from the center of the image.  The sharp region of the photograph has more contrast than the edges and the transition is rather obvious.  This is where the highlights appear to "pull" away from the center of the image.

With the subject I choose I'm not sure the center being sharp and the edges being soft suit it very well.  There may be, however, subjects and compositions where this effect would "work" better than it does here.


Pentax 85mm f/2.2 Soft at f/5.6

Pentax 85mm f/2.2 Soft at f/5.6

The "resolution hole" effect I started to see at f/4 comes into full play here at f/5.6.  

I don't think the transition from sharp to soft effect suits this subject well at all.  It's hard on my eyes and just doesn't "look" right.


This comparison lays the foundation for the next three blog entries.  Onward.


Monday, April 10, 2023

Nikon 75-150, Nikkor 105mm, and Sony Zeiss 55mm ~ comparison

It seems that I'm still in transition from manual focus to auto focus lenses.  I have a pretty 75-150mm f/3.5 Nikon Series-E AiS up for sale.  It's been very slow to move.  As in for months, now.  It's only 75Euros but you'd think it cost the moon, or something.

Since it's still with me, I thought I'd have one last look at it compared, again, with the famous Nikkor-P (Xenotar) 105mm f/2.5 pre-Ai and add to the comparison the fabulous Sony Zeiss 55mm f/1.8 FE.

The Nikon 75-150mm f/3.5 was an inexpensive lens built using inexpensive glass types.  The designers nevertheless created a wonderful little optic.  Fashion photographers back in the day used this as their Super Secret Sauce lens.  It renders beautifully.  Wide open it's not so clinically sharp as some lenses.  It's kind of a Goldilocks kind of thing.  Or so I've been told.


Nikon 75-150mm f/3.5 E ~ Lens Stories


Setup ~ 

  • Camera - 
    • Sony A7, 100ISO, 2sec timer, "A" mode
  • Lenses - 
    • Sony 55mm f/1.8 ZA
    • Nikon Nikkor-P 105mm f/2.5 pre-Ai
    • Nikon 75-150mm f/3.5 Series-E AiS
  • Bogen tripod
  • RawTherapee -
    • Snug up the curves


Comparison ~

As always, click on the image and enlarge to 100percent to see whatever there is to be seen.


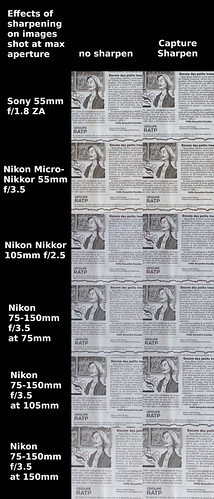
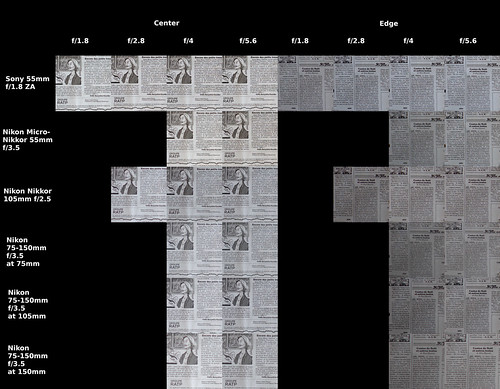
Sony and Micro-Nikkor 55mm, Nikkor 105mm, and Nikon 75 to 150 Comparison


Comments ~

It's obvious.  The Sony 55mm f/1.8 ZA is brilliant from wide open and straight across the field.  As this lens is autofocus, it fits the desired goal of helping this Old Man get decent focus without struggling with the in-camera magnifier and all that.

Perhaps surprisingly, given the decades difference in design dates, the Nikon Nikkor-P 105mm f/2.5 pre-Ai is a Cats Thin Whisker behind the Sony at f/5.6 and straight across the field.  Wide open this little optic is clearly not as sharp as the Sony Zeiss.  It's not bad, mind you.  But in this comparison I can see a difference.

The Nikon 75-150mm f/3.5 Series-E AiS is obviously a touch soft wide open.  And it seems a little behind the other lenses at f/5.6.  If you stare at this long enough, perhaps you might feel as I do that the differences aren't all that great.  To test this, I ran another comparison using Rawtherapee's Capture Sharpen function.  Here are those results -


Wide Open w/wo Capture Sharpen ~ Sony and Micro-Nikkor 55mm, Nikkor 105mm, and Nikon 75 to 150 Comparison


It's pretty clear that Capture Sharpen offsets the AA filter effects of the 24mpixel Sony A7.  What's impressive to me is that the softest 75-150mm focal length wide open is 150mm.  With Capture Sharpen it looks better than the un-Capture Sharpened Sony Zeiss at f/1.8.  The Sony Zeiss Capture Sharpened is nothing short of glorious.

Image processing for absolute best quality must (as has been the case for years) include software.  There's really not much more to say. 


Thursday, March 30, 2023

Ai poses an enormous problem ~ it's much more than image scanning and Copyright issues

[updated 30 March, 2023 - see the end of the post]

The question of Copyright and AI scanners can thundering home recently when I learned that my Flickr images have been included in at least two major AI datasets. So, I submitted the following Help Request to Flick.com - 

Dear Sirs, 

Using tools available to see if my images have been consumed by "AI" scanners I see that, yes, indeed, my Flickr images have been scanned. 

I am very aware of Copyright and it's limitations. I used to advise legal council at the companies I worked for in technology. I did NOT give anyone the right to scan and then use my works. 

I hold copyrights to all but one of my images, and I believe there may be a serious issue by allowing "AI" scanners to do what they are doing. 

What is Flickr's position on this? 

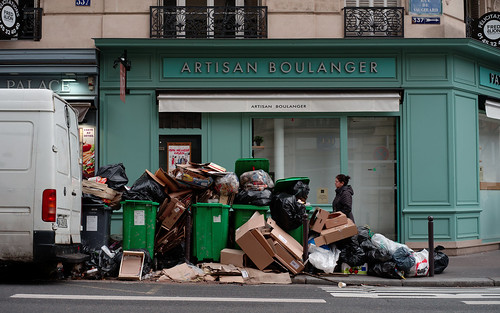
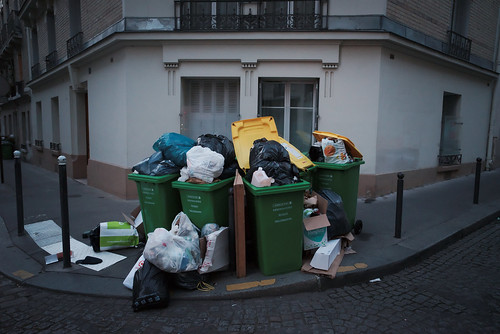
La grève des éboueurs ~ Paris 21 March 2023


Indeed, among may other tasks, I helped advise the lawyers at the last company I worked for.  I'm fairly familiar with what is and is not allowed, and where the gray areas are in copyright law and its application.  Perhaps Flickr had developed a position on the topic?

Their reply, from what I can tell, is likely a lawyer reviewed/sanitized/canned message that gets sent to everyone who asks about AI -

"Hi there,

Thank you for your input on this matter.

As this is a new and emerging space, we have not yet fully reviewed how Flickr will fit with AI images and photography. 

At this time, there have not been any changes to the Copyright Act to address AI generated images.

It is something we are reviewing closely and should there be any changes that would affect the whole platform, we will certainly notify our members.

As always, if there are instances where a creator identifies their copyright or license has taken place, they can submit a claim through our DMCA process for review and actions here.

Best,
Doug

We're updating the terms of Flickr's free accounts to strengthen our community and the long-term stability of Flickr. Read more here.
"

La grève des éboueurs ~ Paris 21 March 2023


First, I fail to see where there is something unique about AI that could require legal redefinition/reapplication.  Secondly, Flickr recently announced a new area of AI generated images where people can post the output of AI software.

It feels as if Flickr is giving this a rather big "pass."

Class Action lawsuits have been filed and I wondered how to join. One site I visited indicated that _normally_ 

"...you don't need to do anything to "join" a class action. If your legal rights are affected by a class action, you usually will only need to get involved once the case settles. In most cases, you will need to submit a claim, either online or through the mail, to receive your portion of the settlement or judgment...

Digging into Flickr's past I found that four years ago it was known that Flickr had been scrapped by an AI in a project that involved IBM. 

"...“This is the dirty little secret of AI training sets. Researchers often just grab whatever images are available in the wild,” said NYU School of Law professor Jason Schultz..." 

One more thing. There was an article published back in 2018 on scrapping Flickr for "deep learning experiments", complete with code to implement a scrapper where it was noted that - 

"...1. It is not legal and ethical to scrape some websites 

2. Even if you were not concerned about the law or ethics, scrapping at scale can be challenging particularly if there are safeguards in place to discourage scrapping...

La grève des éboueurs ~ Paris 15 March 2023


Which begs the question: Did Flickr allow scrappers/scanners, or did they just not care and let it happen?  Afterall, they'd published an API that people could with as they pleased.

Any way I look at it I'm wondering if the benefit stills photographers in the "Pro" program _pay_ for out weighs the huge issue of creative copyrighted works  AI poses and has posed for several years. Flickr may on some level be culpable.

I follow a number of tech websites to try and keep current with the State of Things in science and technology.  Something very concerning turned up just the other day (March 24, 2023 to be exact).

After listening to the podcast I came to the understanding and realization that the problems posed by AI far out-strip the scanning of our images.  

AI is out of control and, if not contained, might pose serious risks to us. As this fire is building to disturbingly large proportions, Microsoft has laid off key personnel from their AI Ethics team.  Isn't _now_ the time to staff-up ethics teams on AI?  What the h*ll is going on?

Ack!  Something very important is happening right this moment and I've not been following the ethical and moral implications of AI as closely as I could have.

If you're at all interested in this topic, have a listen. 

[Update 30 March, 2023] - Some people are calling for an outright ban on AI.

La grève des éboueurs ~ Paris 21 March 2023
 

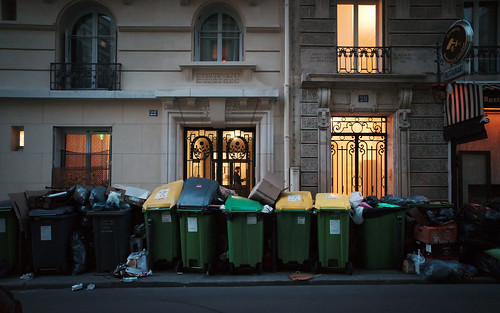
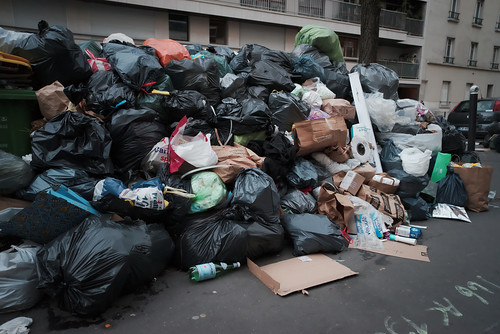
Yes,the images used to illustrate this blog entry
were carefully chosen to set the mood


Sunday, March 12, 2023

One last Wabbit Hole ~ and it's a whopping BIG one, too!

Accidental Renaissance ~ Retromobile 2023
A little "accidental Renaissance"
to keep things interesting in prep for
reading through somewhat dense material.


[References section updated twice ~ 4 March, and 3 March, 2023]

After whinging and whining about the lack of verifiable, accurate knowledge, I find myself at the bottom of an Enormously Vasty Wabbit Hole.  At the top and just as I fell in I saw it was labeled  "Knowledge You Are Looking For."

The areas I wanted to learn more about but was having a Devil of A Time finding anything useful/correct/truthful included dynamic range, sensor noise, and color depth. I was still poking at the things that might go into defining what a "Fat Pixel" camera might be made up of.

Apologies first: For this blog entry I'm going to move very fast and rather deep.

There are nuances and details that can and should be applied to each of the following statements.  Each step can be an entire study unto itself.  As always, don't trust me, but if you must, make sure you verify.

Here is my present state of understanding.  

Sensor Basics ~

~ There is an analog input side of every sensor ending at analog to digital converters (ADC) with the following components -

  • Light sensitive photo site
  • Analog amplifier
  • ADC

~ There is a digital output side of every sensor starting at the ADC with the following components -

  • Digital image processing chips for stills and video
  • Digital image processing software for stills and video

~ ISO controls the gain on the _analog_ amplifier that feeds the ADC

~ RAW files are made up of the digitized data spit out of the ADC

~ jpg files are the result of the ADC output _plus_ whatever massaging the manufacturer applies on the digital circuitry in-camera

~ In-camera jpg processing _may_ further increase gain digitally (as a second gain function)


Dynamic Range ~

This is the EV difference between highlight areas with detail and shadow areas with detail.  Sensor noise reduces dynamic range.  Said another way, the quieter the sensor the greater the dynamic range.

In general...

~ The broadest dynamic range is seen at the Base ISO

~ The higher the gain on the analog amplifier (increasing ISO) the lower the dynamic range


Sources of noise ~

~ The analog amplifier (where signal gain is first applied) that feeds the ADC and ADC itself are the primary sources of noise in RAW files (see Canon DSLRs)

~ In-camera jpg processing digital circuit may further increase gain and thereby add noise downstream from the analog circuit.  In general, if there is noise on the output of the ADC, unless there is noise reduction on the digital side, we will see noise out of the digital circuits, too (see Canon DSLRs).

Sensors ~ ISO Variant

These are the traditional CMOS sensors that we've all come to know and love.  Until very recently, these were the only ones commercially available to us.

~ The electron gathering well at each sensor site has these properties -

  • Traditional big and somewhat shallow electron gathering well design
  • When used at low ISO settings (ie: low analog amplifier voltages) we get -
    • Broad dynamic range
    • Slight pixel to pixel variations (subtle noise, if you will)
    • Lowest noise/broadest dynamic range tells us what the Base ISO is
  • As ISO increases -
    • Dynamic range decreases
    • Noise increases... maybe... (see astro-photography reference video below about cases where this is _not_ entirely true)

 Recent Sony Design Enhancements ~ ISO invariance

Sensors starting with A6300, A7RIII, A7III, and very obviously the A7SIII, as well as the Sony manufactured MF sensors used in Fuji GFX cameras have _two_ electron gathering wells per photo-sensor site.

~ First electron gathering well at each sensor site has these properties -

  • Traditional big and somewhat shallow well design
  • Used at low ISO settings
  • Broad dynamic range
  • Slight image to image variations (subtle noise, if you will)
  • Lowest noise again tells us what the Base ISO is

~ Second electron gathering well at each sensor site has the following properties -

  • Narrow but deep well design
  • Used for higher ISO settings
  • Shows reduced dynamic range
  • BUT it shows _less_ noise than the big, shallow electron well
  • Highest dynamic range when using this higher ISO than base ISO 1 well-type sets a Second Base ISO
     

Interesting property: ISO invariant sensors tend to show no change in noise as ISO is increased after the Second Base ISO has been switched on.

Note: There are examples of sensors that are ISO invariant from low ISO, such as the Nikon D750 where noise levels do not change from ISO200 on up. See the astro-photography reference video below for the Nikon example.


Comments ~

 Taken as a whole I feel I can begin to understand a few seemingly unrelated things.  Such as -

  • Early Kodak CCD MF sensors showed the best image quality at the time.  This, even if they _expanded_/_amplified_ the ADC output from 14bits to 16bits.  At least they started out at 14bits when everyone else was down around 10bits of RAW and/or stuck at 8bits jpg.  I can see where the "Fat Pixel" ideas could stem from in terms of perceived image quality.  What I've learned is that modern sensors can easily outperform the original Kodak MF sensors in every measurable way, _and_ we get ISO flexibility with current sensors where Kodak worked best at Base ISO, period.
  • I now see (on Photons to Photos - see reference link below) the differences between the old 14bit ADC Canon 5D MkII and 7D sensors and the _12bit_ ADC Sony A6000.  In one release of products we went from "ya, that's not bad but if we're not careful there's loads of noise in the shadows" to "wow! now there's a clean image".  The A6000 has more dynamic range at 12bits ADC and, as hoped for, less noise than the older 14bit ADC Canon sensors.  There is likely something about Canon's analog circuit that was rather prone to the introduction of error.  It's interesting to me that it's only with the release of Canon's new mirrorless cameras that their sensors seem to meet or slightly exceed the early Sony FF sensors.  This tells us something about how much work Canon has done on the analog side photo-site to ADC path.
  • Looking (again on Photons to Photos - see reference link below) at first generation Sony A7, A7S, and A7R, there's not really all that much difference between these models in terms of dynamic range and noise.  Yes, the A7S has slightly better dynamic range than the A7, but I'm not sure I'll ever actually see or appreciate the extra 1/3stop EV the A7S has.  I've read where we can begin to see differences of 1EV dynamic range, but I haven't verified that for myself.  Coming back to the Photons to Photos information, the A7R looks nearly as good as the A7S.  In the end, if I can't make a great "Fat Pixel" image with any of these three cameras, I'm doing something drastically and dramatically wrong.
  • ETTR (Expose To The Right) "works", but not for the reasons we're commonly told.  It "works" because we are able to bring the dark areas up out of the base level noise.  Of course we have to guard against saturating the highlights beyond recovery, but once the data has been collected, it's more flexible in processing than images where the dark areas are down in the noise base of the sensor.
  • ETTL (Expose The The Left) "works" as expected.  We use ETTL in black and white photography as a "lazy man's way" of guaranteeing as much detail in the highlights as possible.  This can closely emulate film images when processed appropriately.  The highlights are raised in processing and the shadows raise with the highlights. As an aside, I've started to use Zebras to know when the highlights are saturated.  Coming back to ETTL, with quiet sensors we might be able to avoid distracting noise to the shadow areas.  Which leads me directly to the next item.
  • One of the problems I had trouble understanding why there is so much noise in the shadow areas of severely under-exposed images even at 100ISO where I thought we should see the lowest noise everywhere across a broad dynamic range image.  It turns out the noise is easily explained.  The electron gathering wells aren't able to gather enough information consistently across the wells to make the dark areas appear as smooth as the light areas.  The light simply is not available at those low levels to distribute evenly. Hence noise, even at 100ISO.  To avoid this problem in a single shot, use ETTR or better yet Zebras.  If the dynamic range of the scene is broader than a sensor can handle, there's HDR and image stacking during processing.
  • Potential recent "Fat Pixel" candidates could be the Sony sensor manufactured Fuji MF GFX cameras.  Their dynamic range exceeds by 1EV the best Sony FF.  The MF Fujis are well above my current Pay Grade and I doubt we'll ever see them go for less than 1500USD used.  Yes, I know.  The 50R is trading hands on the used market for around 2250USD.  It's still too rich for me.  But there is something to be said about well-engineered sensor development and ISO invariant circuitry.  Kodak sensors were never ever close to being this good.
  • I now understand why backside illumination of a sensor "works."  By raising the black base to a known level, sensor noise levels are suppressed by starting at zero (pure black) well above the potentially noise inducing analog circuits.  It's a neat trick, actually.  I feel there are some creative solutions being applied to sensor design these days.  This is Fun Stuff.
  • Pursuing the absolute best color depth, longest dynamic range, and lowest noise images possible requires a static subject, a tripod, setting the camera at its Base ISO 1, and shooting three or four identical images.  Three image stacked low ISO photos "work" because the process averages out the subtle fat/shallow electron well variations.  The final output image quality should easily exceed that of, well, just about anything.  And speaking of which...
  • Sony has come up  with something interesting in their dual Base ISO sensors.  While destined for video work, I can see where there will be benefits for us stills shooters, too.  Even if we're stuck at 8EV dynamic range at Base ISO 2, I'm still struck by the possibilities of lower than Base ISO 1 noise.  
It's a Crazy Topsy Turvy Counter-Intuitive World out there and I can't wait to see what the Sensor Development Wizards come up with next.

Until further notice I have stopped reading the thoughts, evaluations, and conclusions of the vast majority of popular still-photography related websites.  In general they are at a distinct lack for meaningful data on sensor performance, dynamic range, color depth, and noise characteristics.  I know they're "trying" the best they can, but I've found that I have a difficult (Gear Grinding) time with the Marginal at Best "test" methods and bad data they attempt to analyze and justify their conclusions with.  It's become just "noise" to me.
 
Sometimes a person has to dig deeper to get at truth.
 

References ~ [updated/modified on 4 March (correcting a link to the most important video, the first, and updated slightly on 3 March, 2023]

Here is a video with very clear, concise explanations of Sony sensor behaviors.  

I had to pause the video every other sentence, or so it seemed, so I could stop and think about and think through what was just said.  There is so much _good_ information here.  In fact, _this_ should be the reference for discussion of sensor performance.  I wish more of YouTube was this accurate and informative.  I've found there is too much "squishy thinking" go'n on out there!!!  So this is an absolute breath of fresh air.  

It's easy to see how much this video influenced the organization of my thoughts.  While I knew various pieces and parts of the process, the video helped me organize what I knew into a cohesive whole.  In fact, I've borrowed from the video outline in the writing of this piece because I found it that useful.

Photons to Photos has a great site on measured dynamic range, noise, and sensor performance. Complete with methods and rationale explaining what they do and why. For some reason I've not run into this site until now.  There were many spent hours looking around, reading, and comparing various sensor data.  It's amazing how much a person can learn if they're patient and aware and take a few notes along the way.

Here is a video on ISO invariance and why it's interesting and useful.  There are also comparison images showing how ISO variant and invariant sensors behave differently. 

I often wondered what changed with the introduction of Sony's cameras around 2012.  Reading Jon Rista's explanation from 19 January 2015 - 01:30 PM gives a clue.  While I might not agree that 500nm waffer technology was a problem (except as an example of Canon not keeping up with the latest waffer fabrication trends), the rest of his argument rings true.  Further, Jon Rista gives us a few potential clues about "Fat Pixel" photo-sites from Posted 29 January 2015 - 12:09 AM (pay attention to his comments on photo-site area and electron well capacities). For a Geek who really wants to Geek Out it's very interesting and potentially practical stuff

Lastly, here is a link to a Wiki page where we can see a Sony camera and function matrix.  In addition, Sony has a matrix of ADC bit depth information.  This too is organized by camera and function.  Using this information we can begin to guess how much circuitry is implemented in the various cameras that influence things like read speed and camera capabilities.

To me the most important outcome of all the Geeky Nerdiness is the acquisition of knowledge that can be applied and balanced in the real world when pursuing highest possible image quality.

Update of a common 'net expression from when dinosaurs roamed the earth: Base ISO 1, f/8 and be there.  
If it's dark out, Base ISO 2, wide open and be there.